Setup L2TP VPN on Ubiquiti USG
How To Setup an L2TP VPN on Ubiquiti USG
This post will cover the basics of configuring an L2TP VPN on any type of USG. Here is a tutorial on how to connect.
Here is another post I made on configuring a site to site VPN between 2 USGs if you are interested.
Parts Used For Project
| Part | Comment | Link |
|---|---|---|
| USG | Any USG will do. I personally use the USG-PRO-4. It’s a great router for your home if you dont already have one. I assume you already do if you are here. | Unifi Security Gateway |
Creating A RADIUS User
Lets start by creating a new RADIUS user so that we can authenticate with the USG.
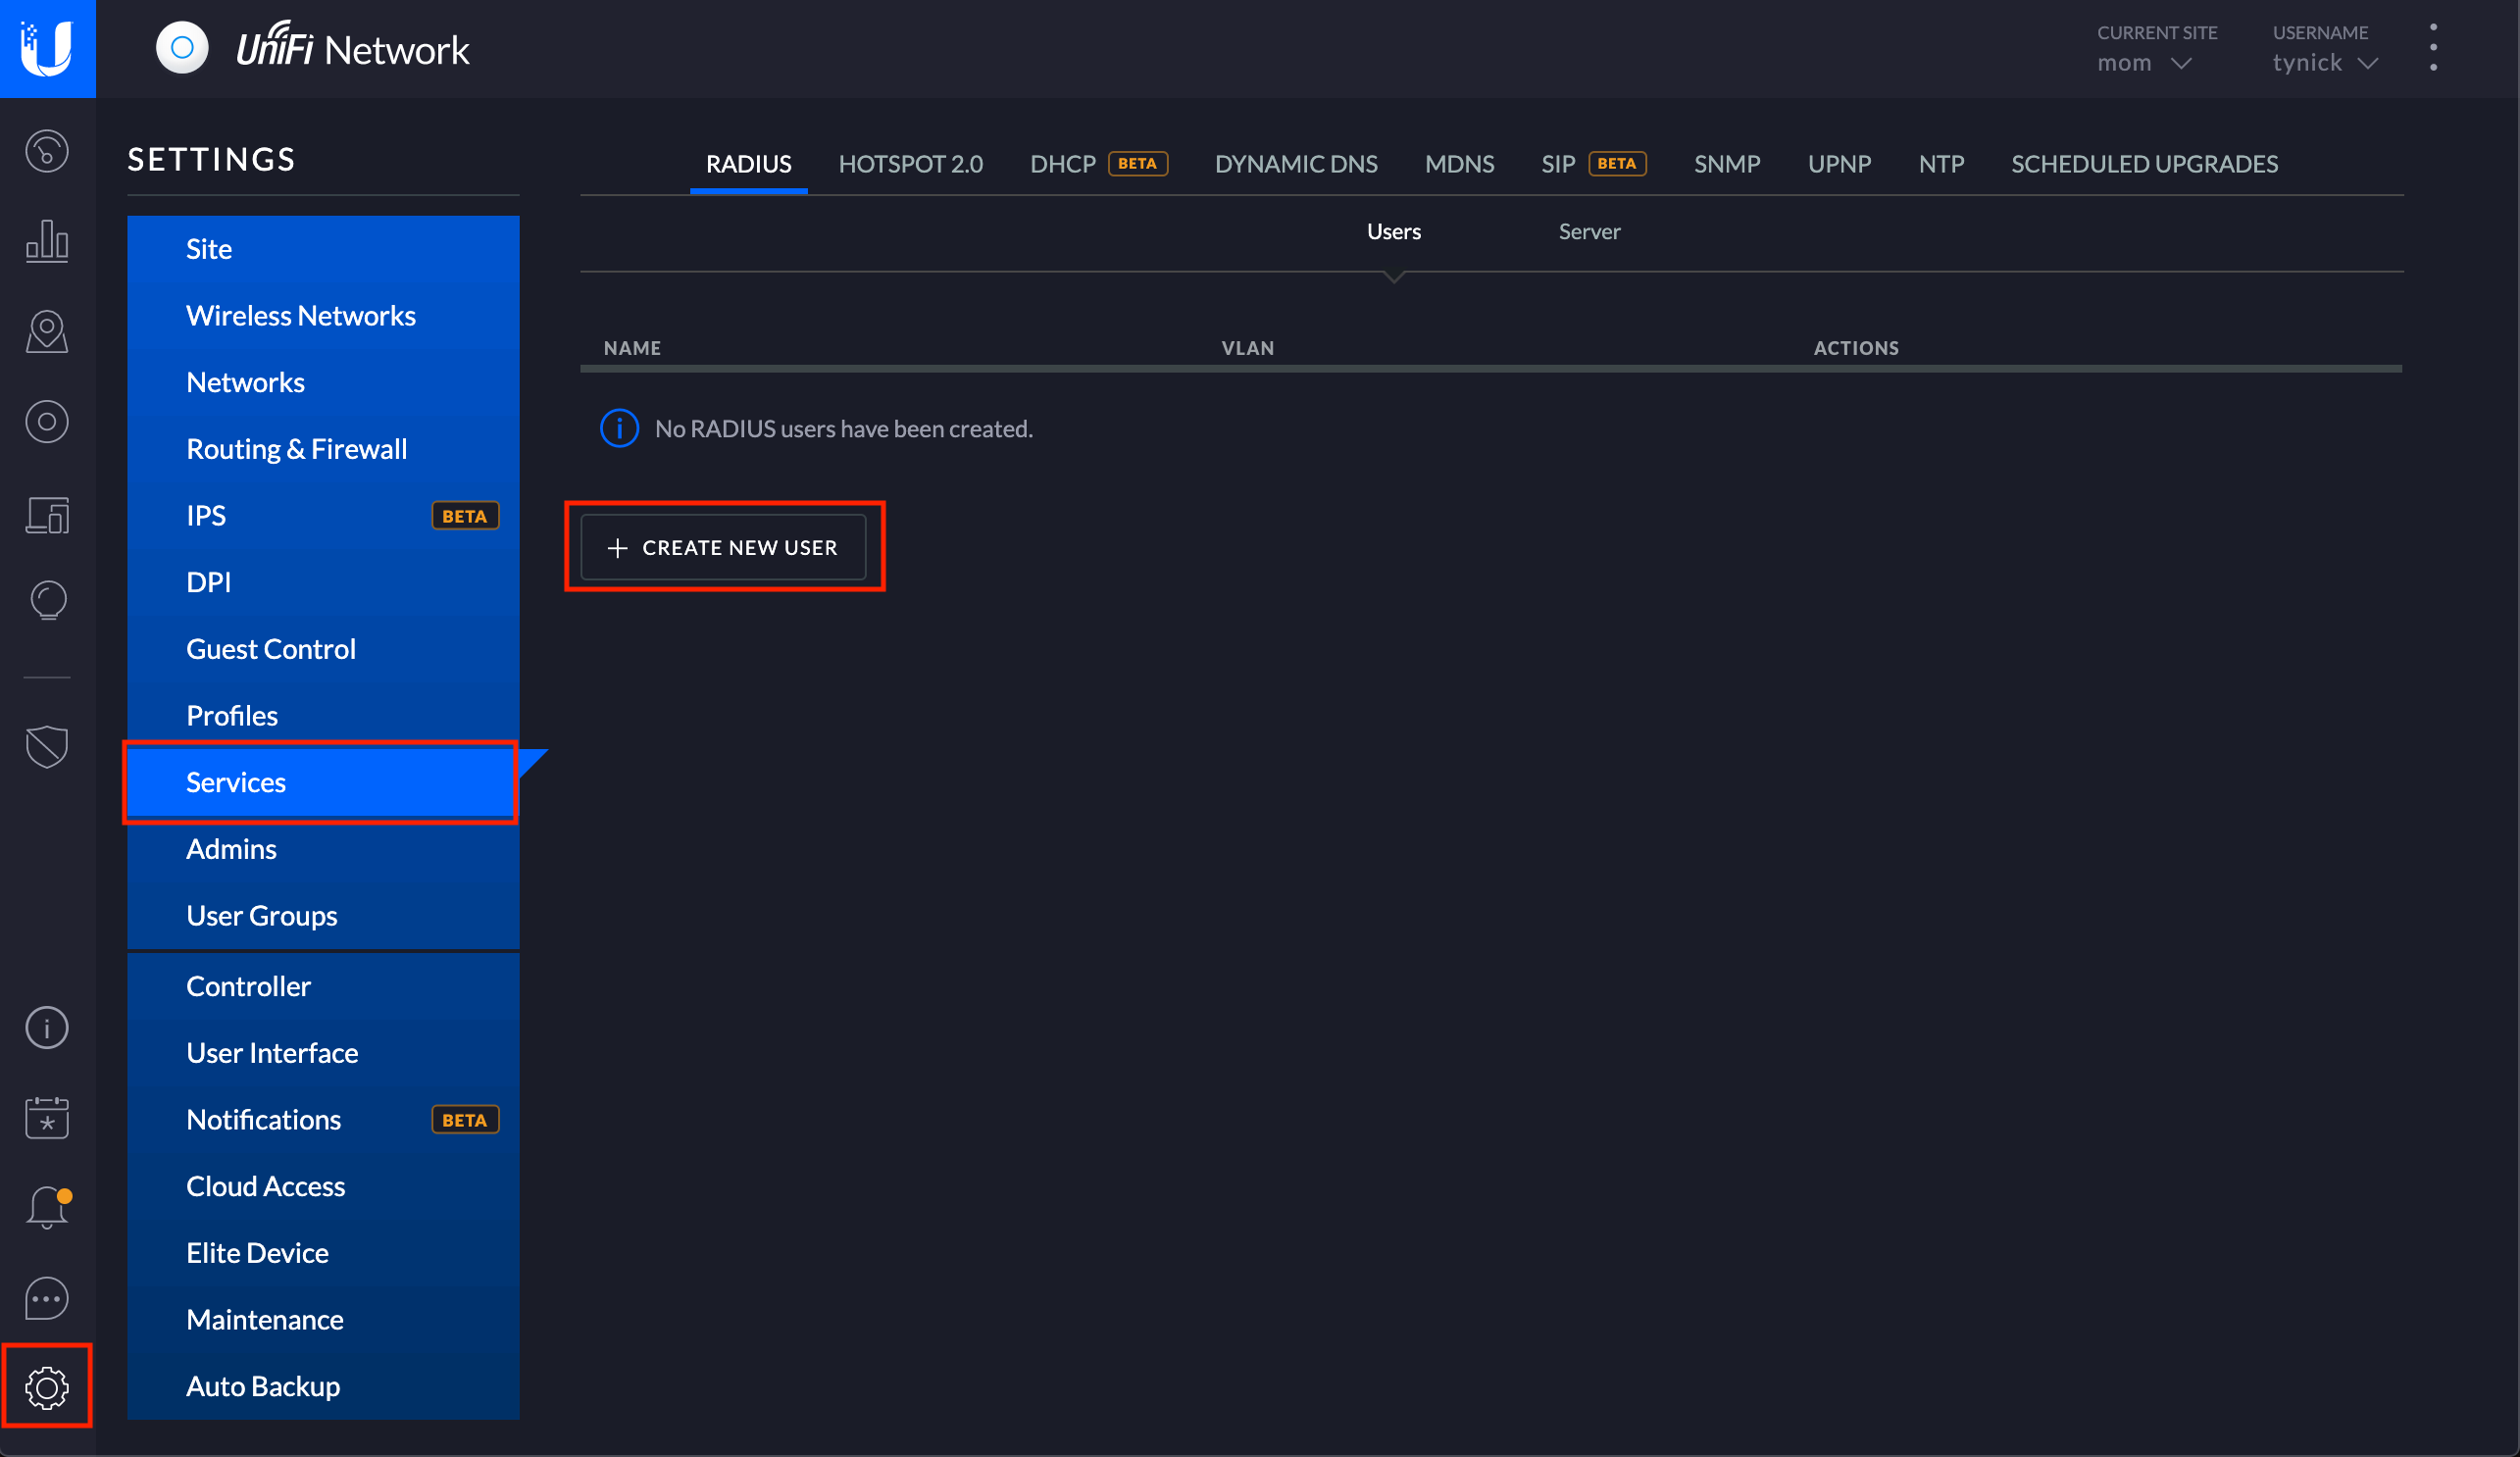
Start by going to Settings > Services > CREATE NEW USER.
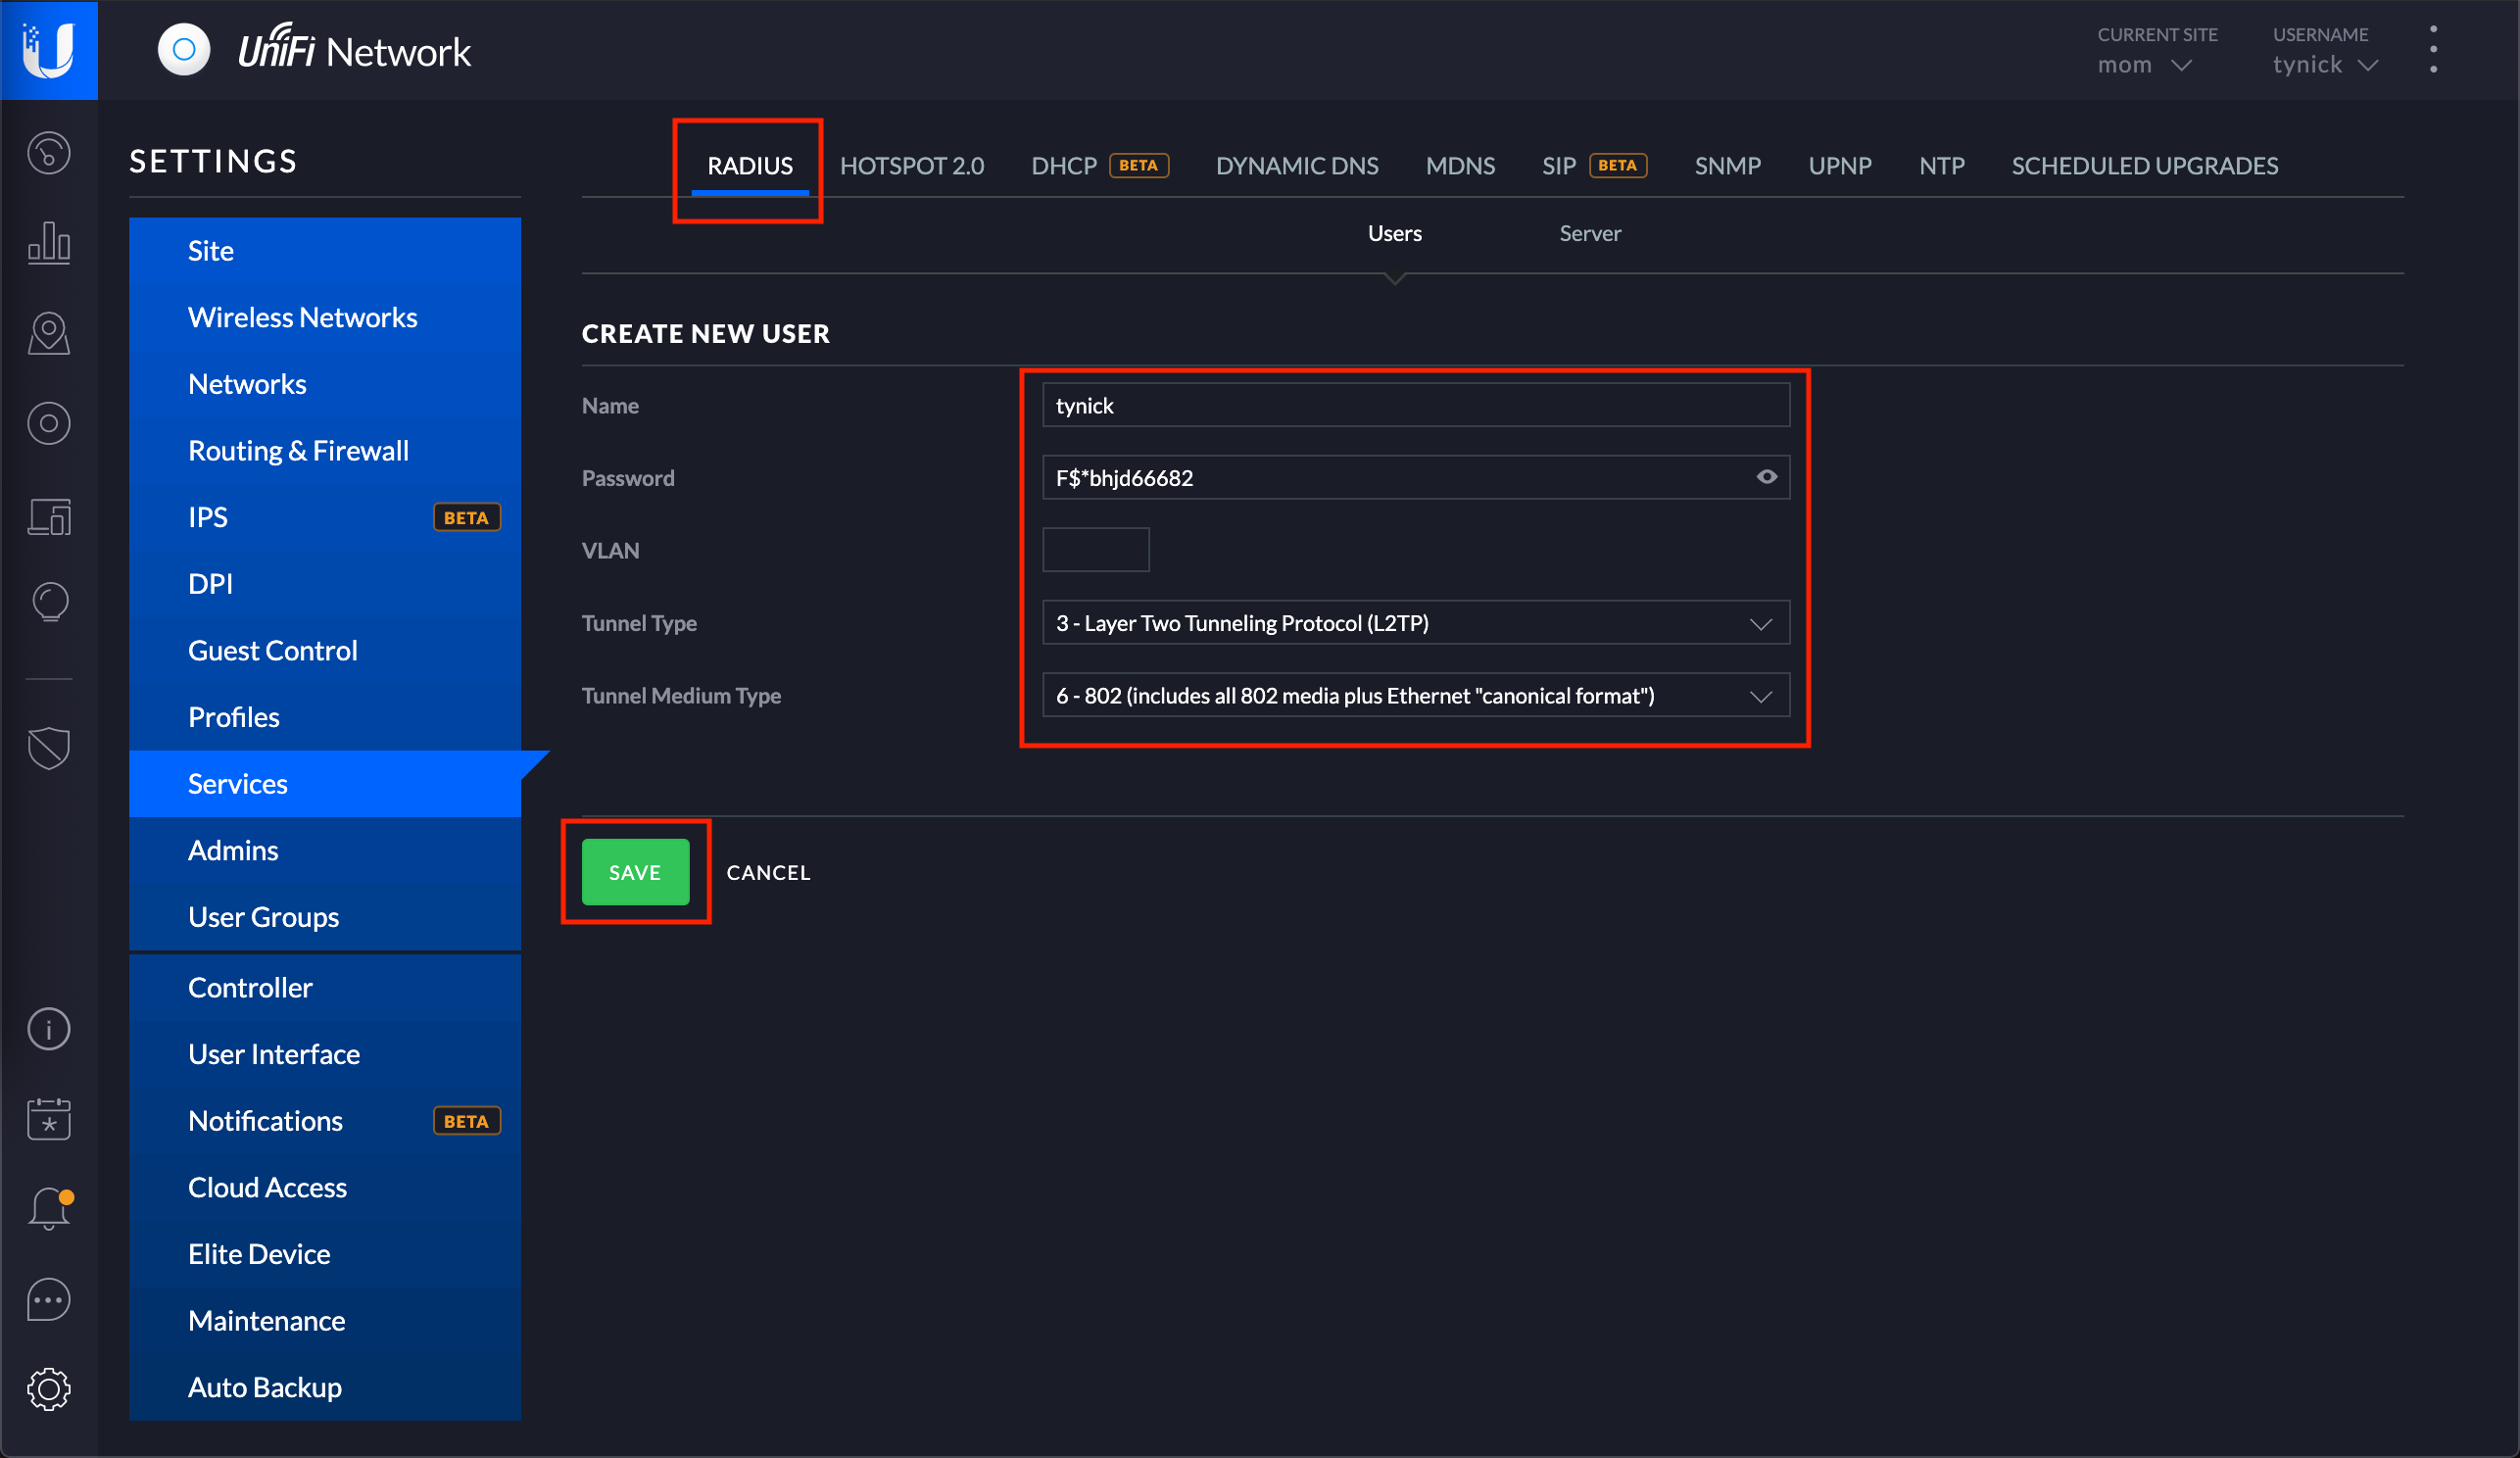
Below is a table with the information I entered on this screen. Obviously choose your own Name and Password. I recommend using a strong password for this. It’s basically a key to your network.
I don’t care if you see this password. I deleted this user before I made this post live.
If you have a VLAN you’d like to use, go ahead and enter it here.
| Name | tynick |
| Password | F$*bhjd66682 |
| VLAN | |
| Tunnel Type | 3 - Layer Two Tunneling Protocol (L2TP) |
| Tunnel Medium Type | 6 - 802(includes all 802 media plus Ethernet "canonical format") |
Press SAVE when finished.
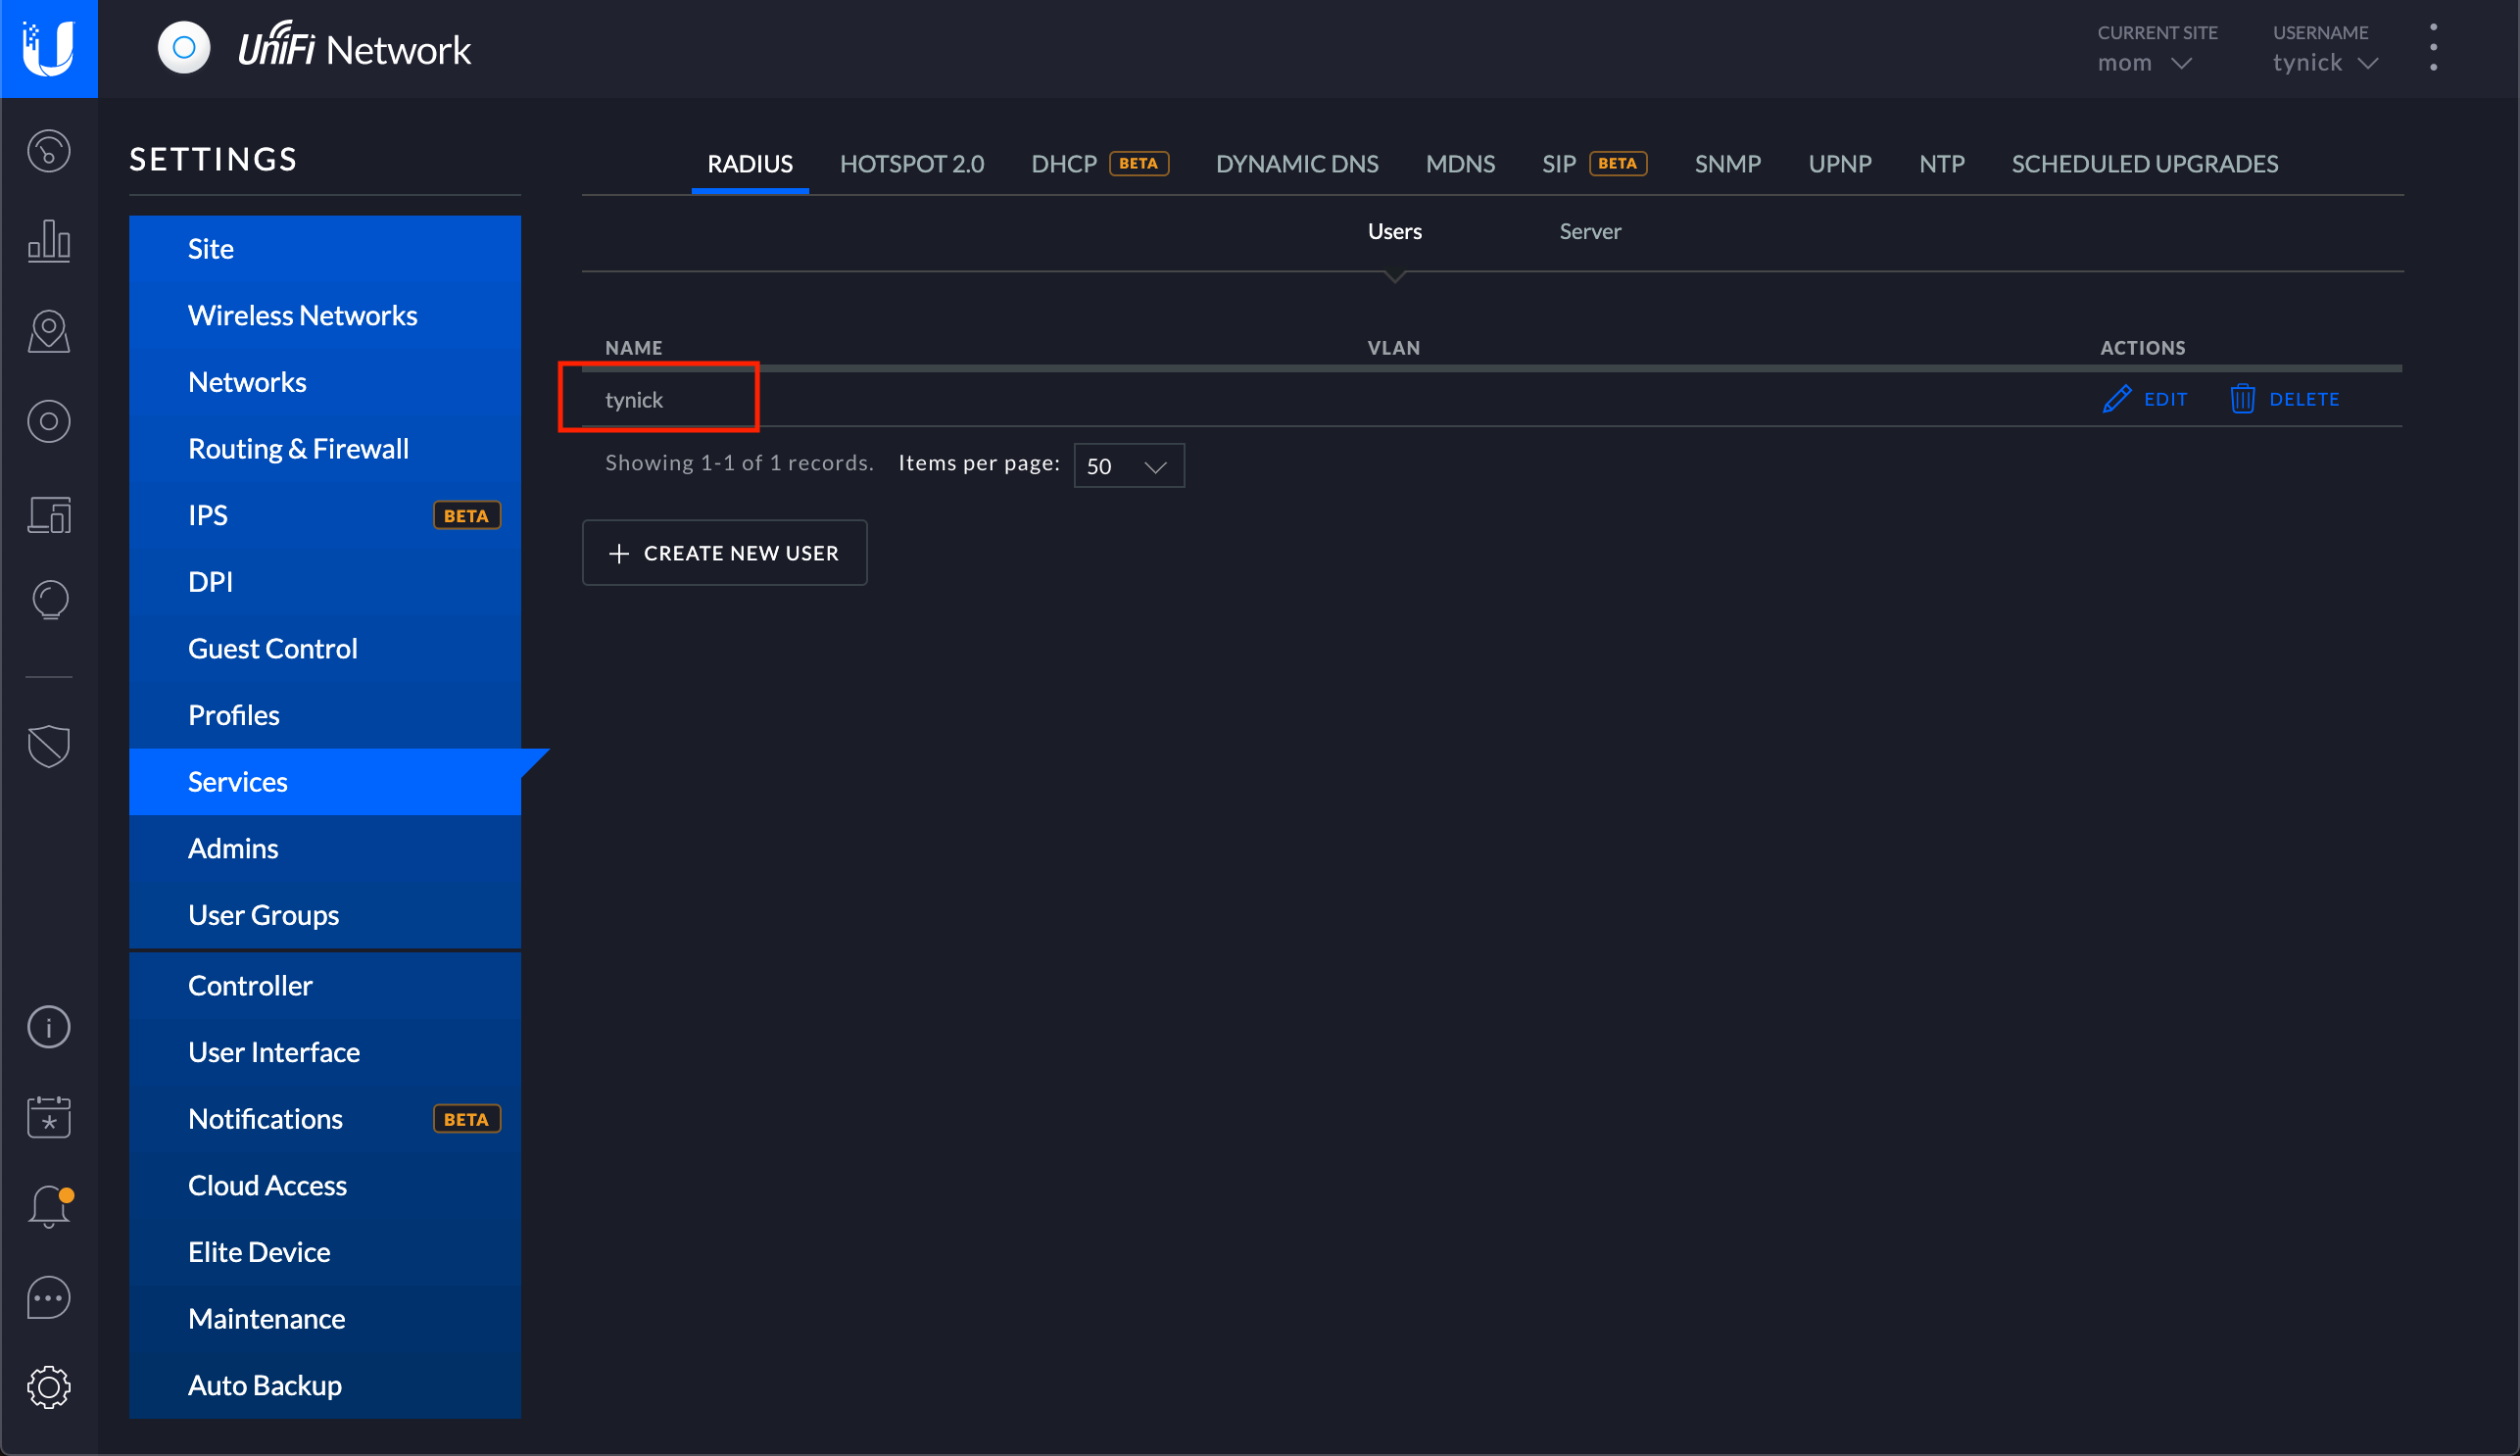
You should now see your newly created user.
Configuring And Enabling RADIUS server
Now we need to configure the RADIUS server.
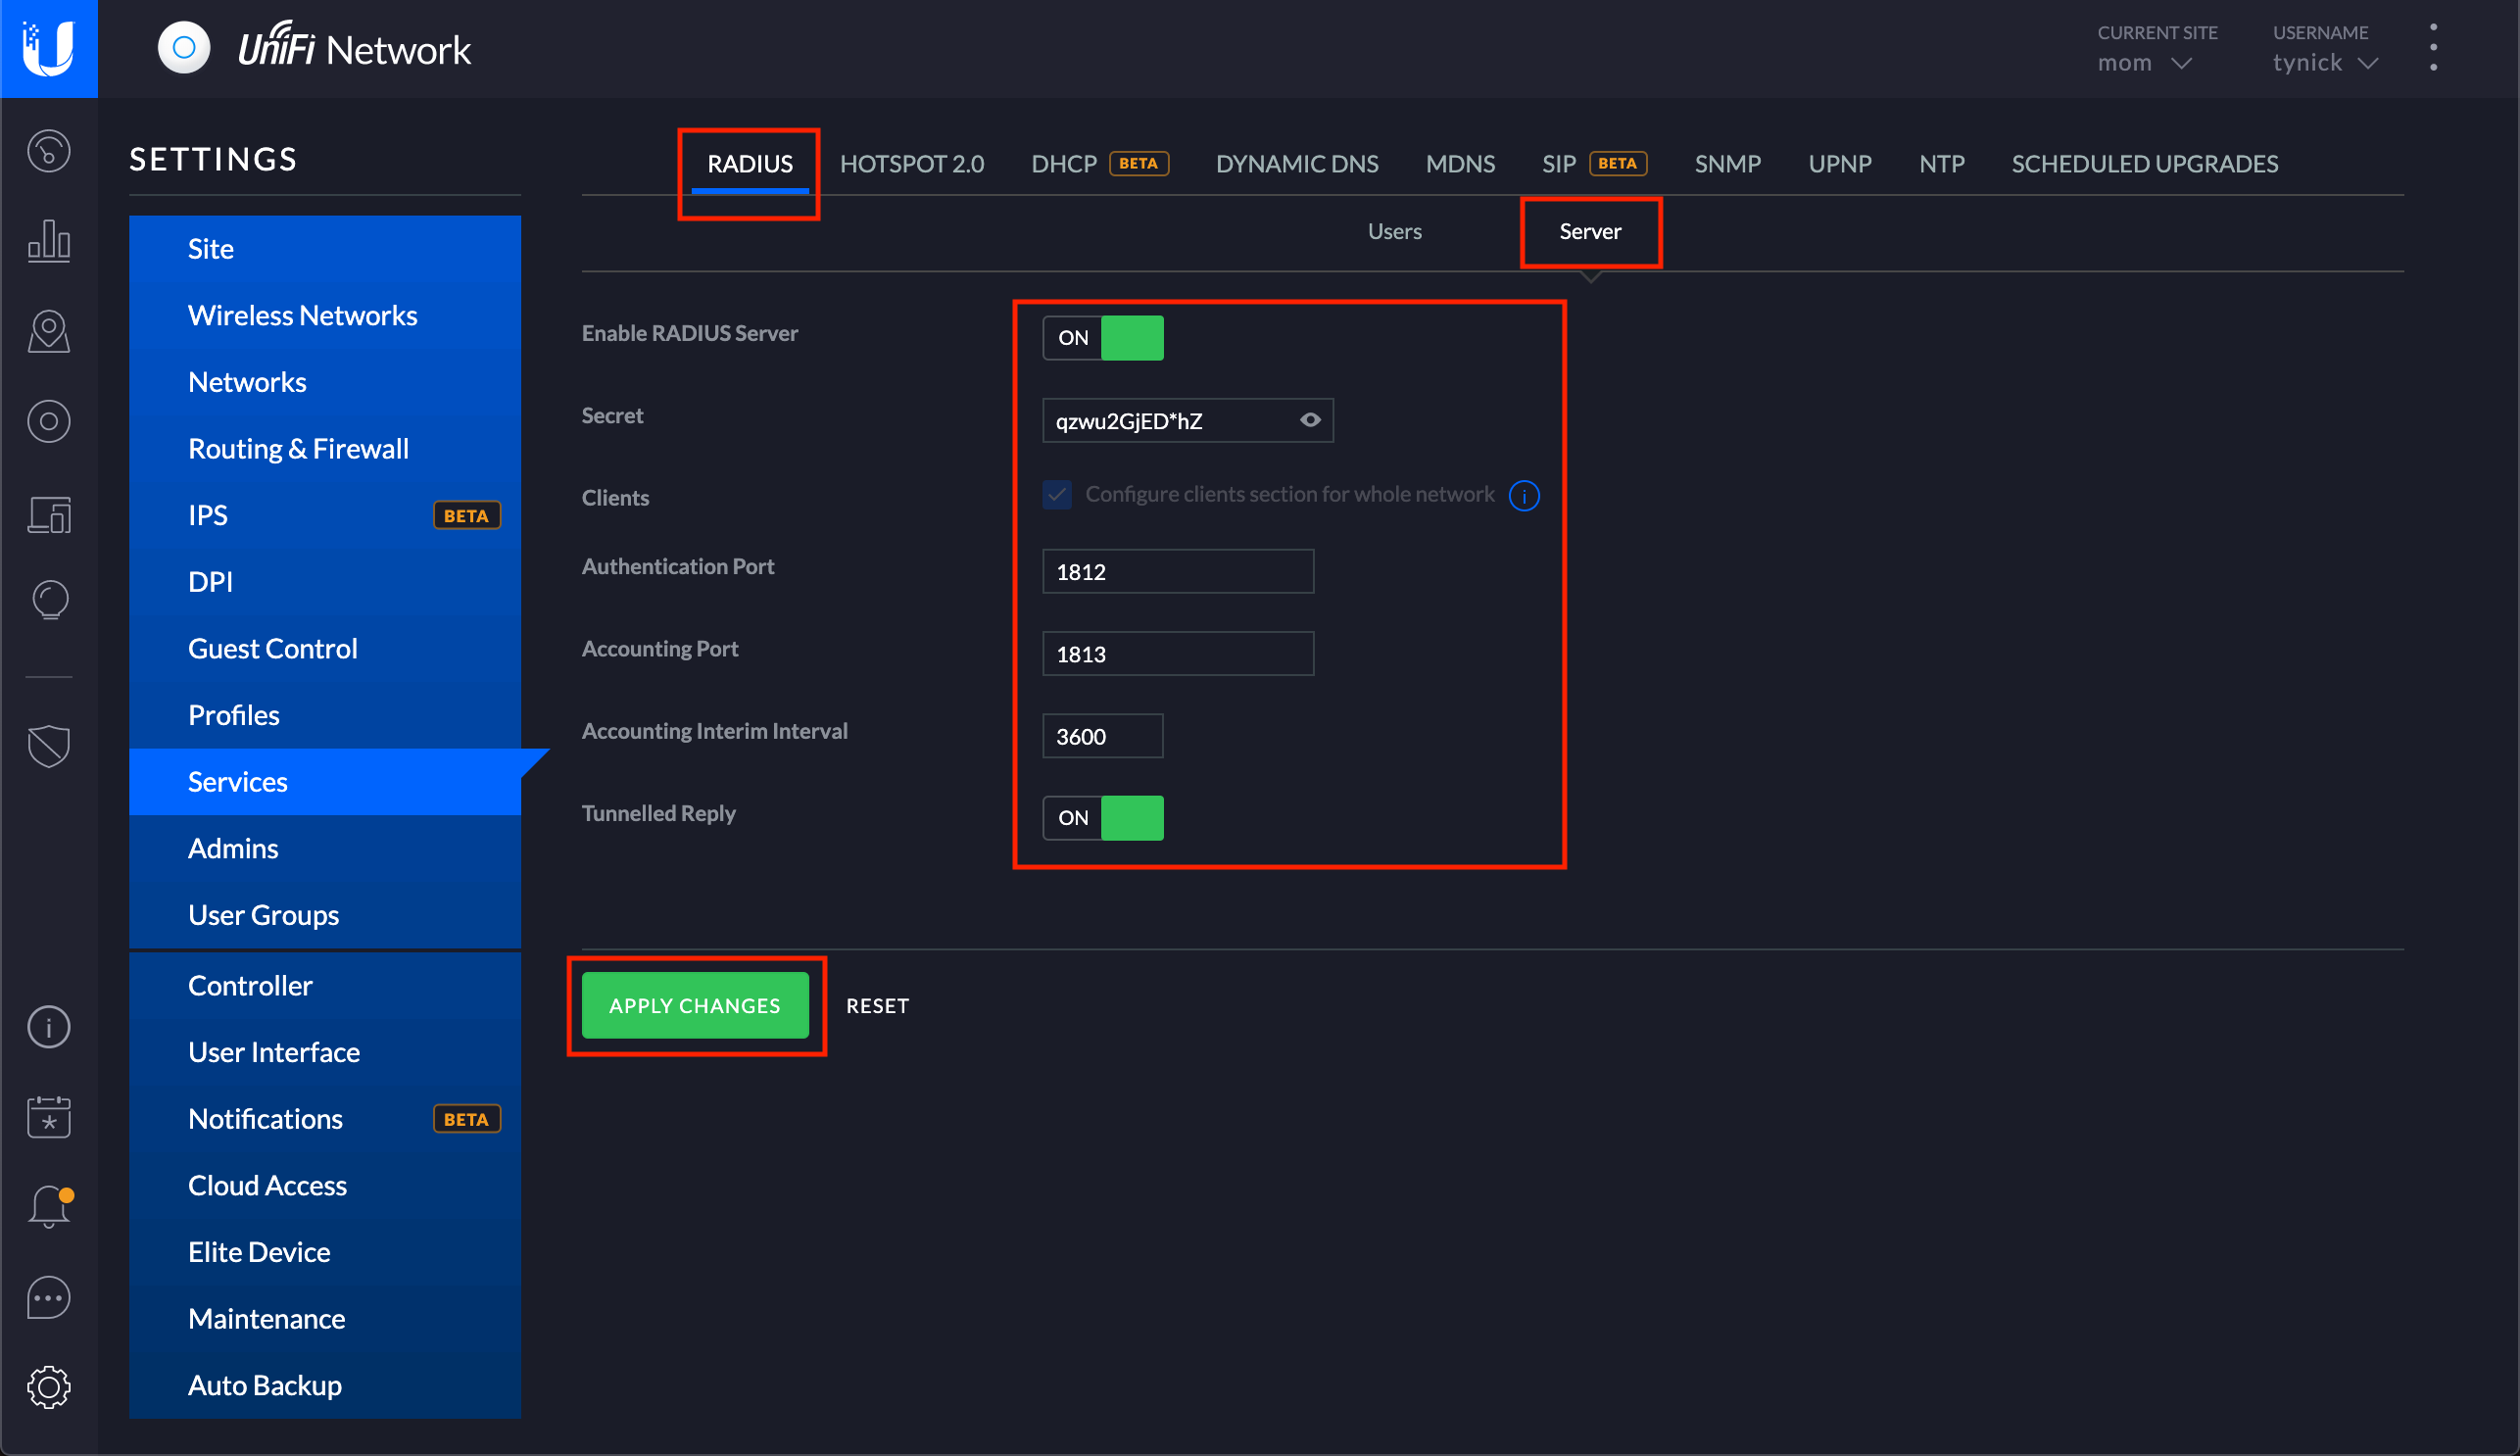
From the screen we ended on in the last section, select the Server sub-heading and then switch Enable RADIUS Server to ON.
You will need another password/secret here. It should be different than the one you used for the user. Don’t be lazy and make them the same. This Secret *will not be used when connecting to the VPN.
Enter the information as follows.
| Enable RADIUS Server | ON |
| Secret | qzwu2GjED*hZ |
| Clients | This is checked and grayed out for me. Just ignore this. |
| Authentication Port | 1812 |
| Accounting Port | 1813 |
| Accounting Interim Interval | 3600 |
| Tunnelled Reply | ON |
Click APPLY CHANGES when complete.
Creating A New Network
We will now create a new network for out VPN.
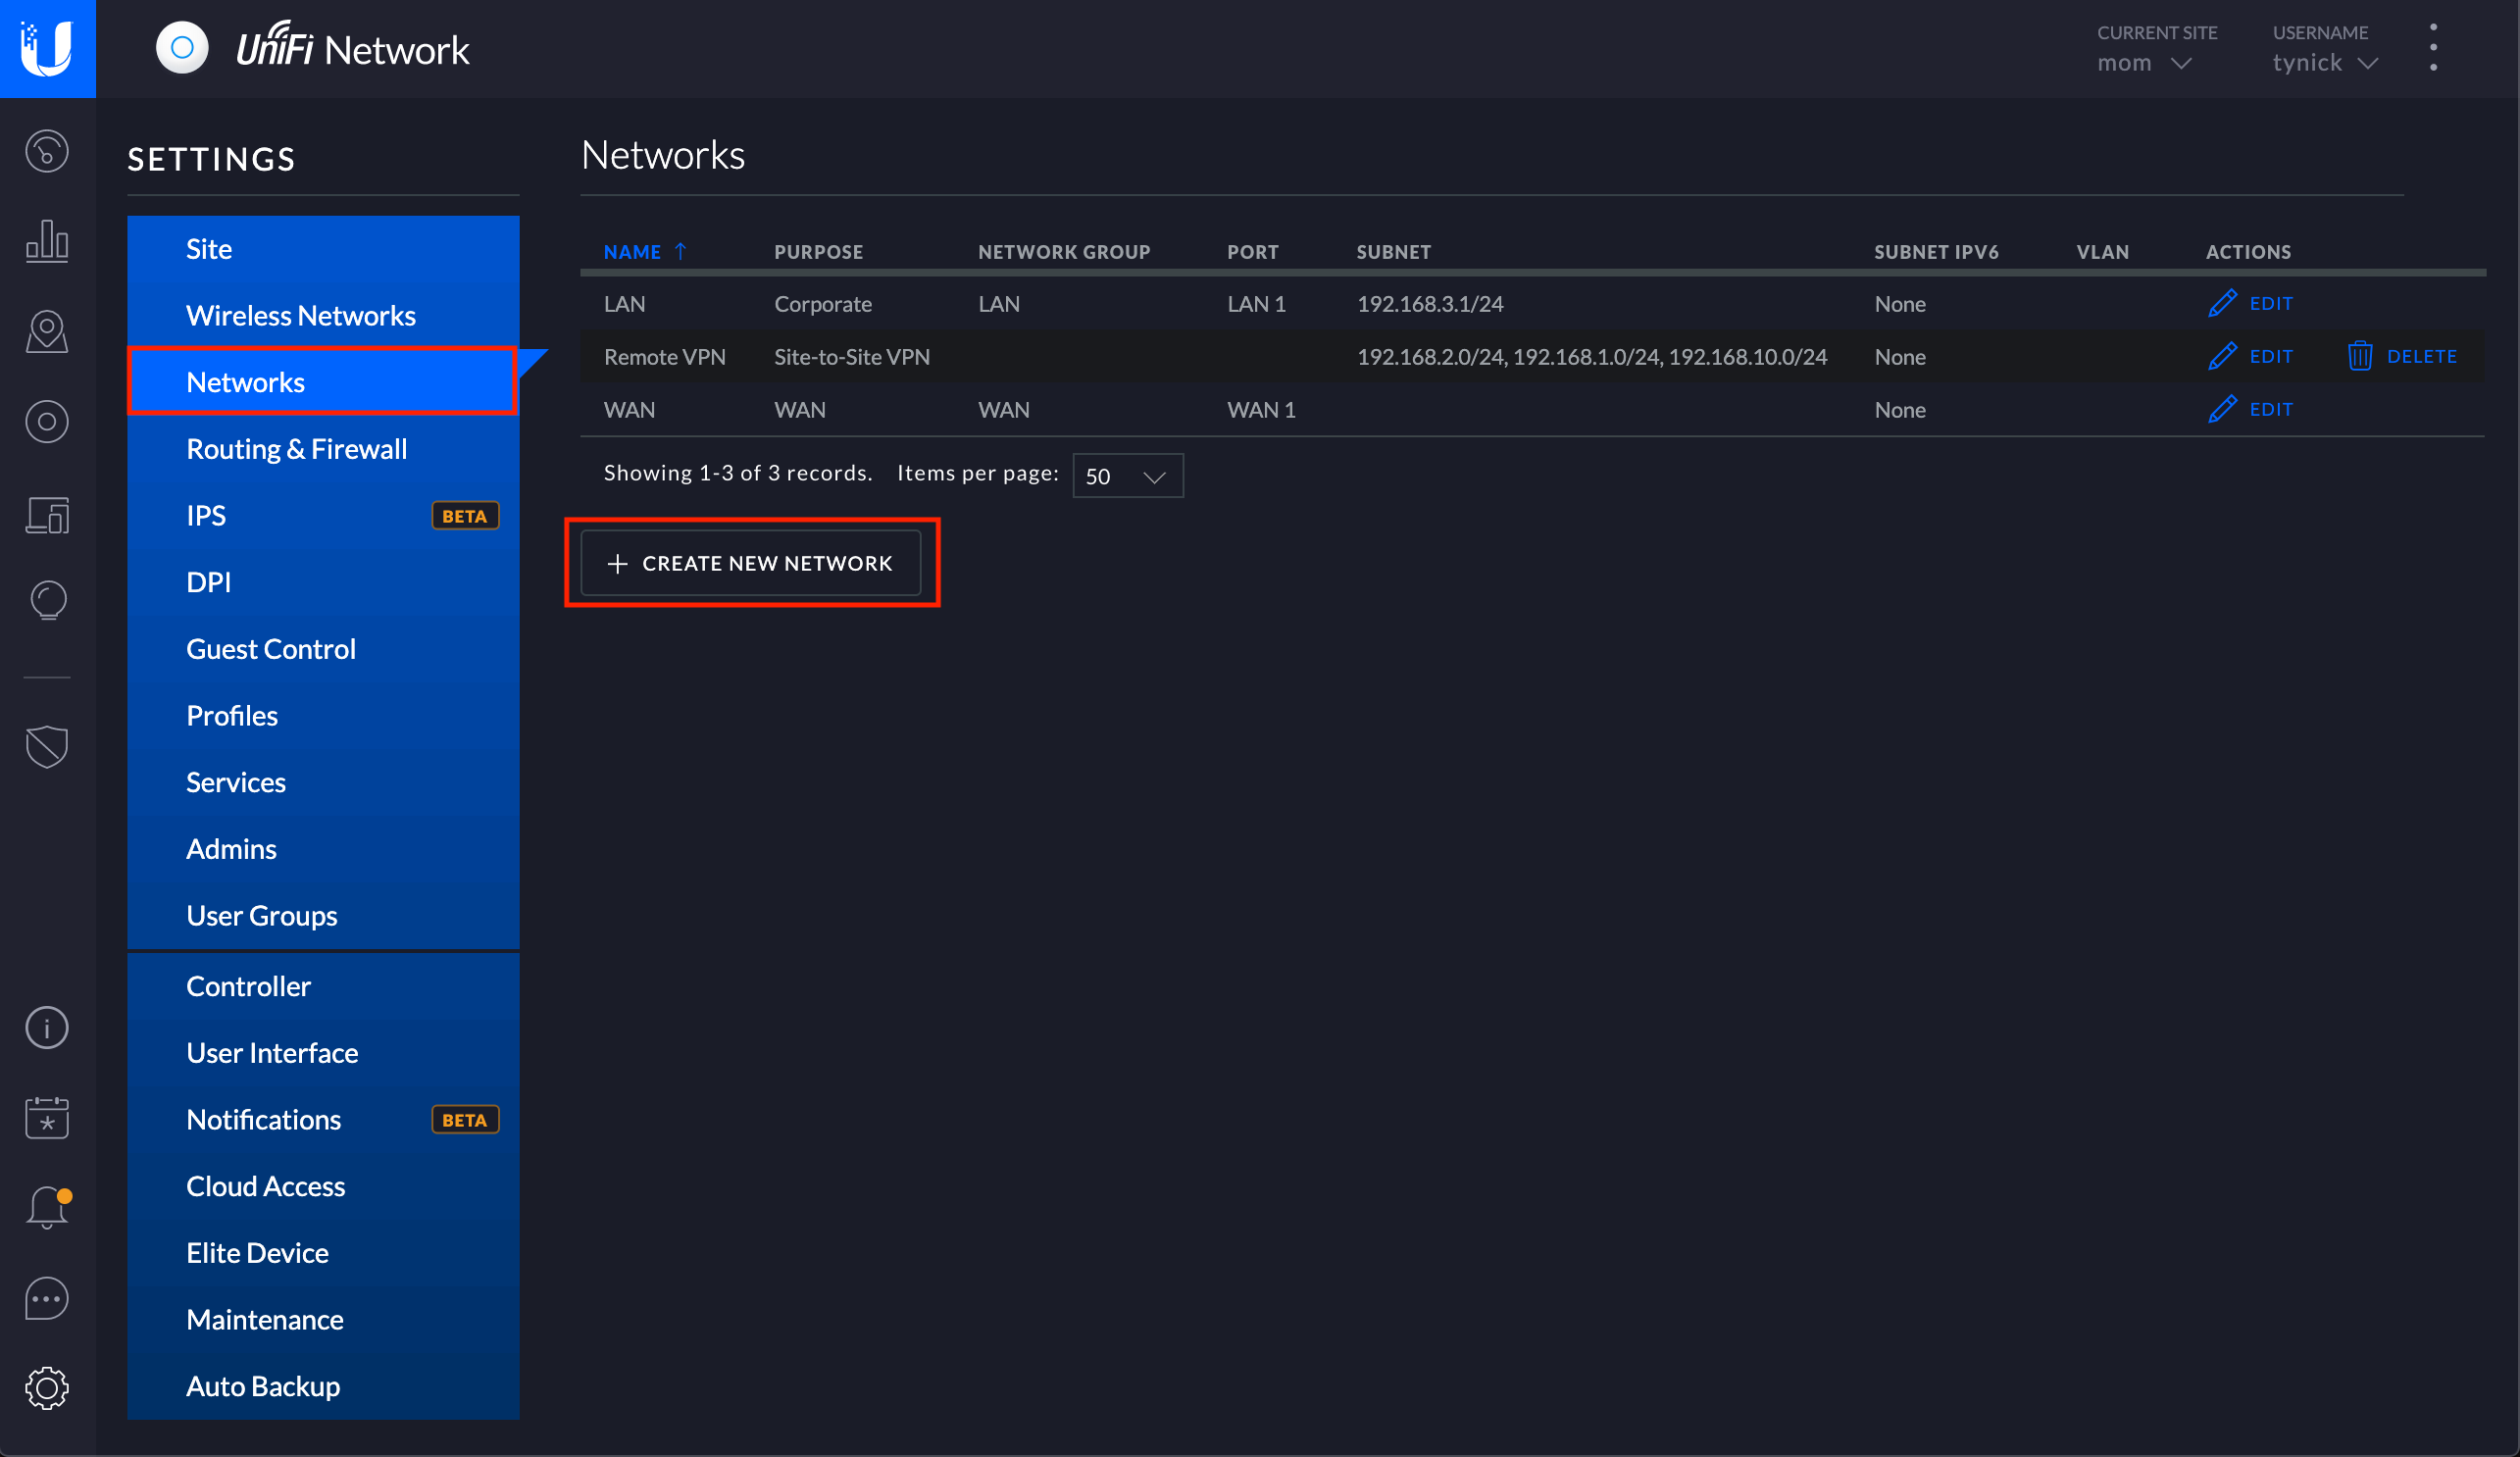
Select Networks from the sidebar menu and then press CREATE NEW NETWORK.
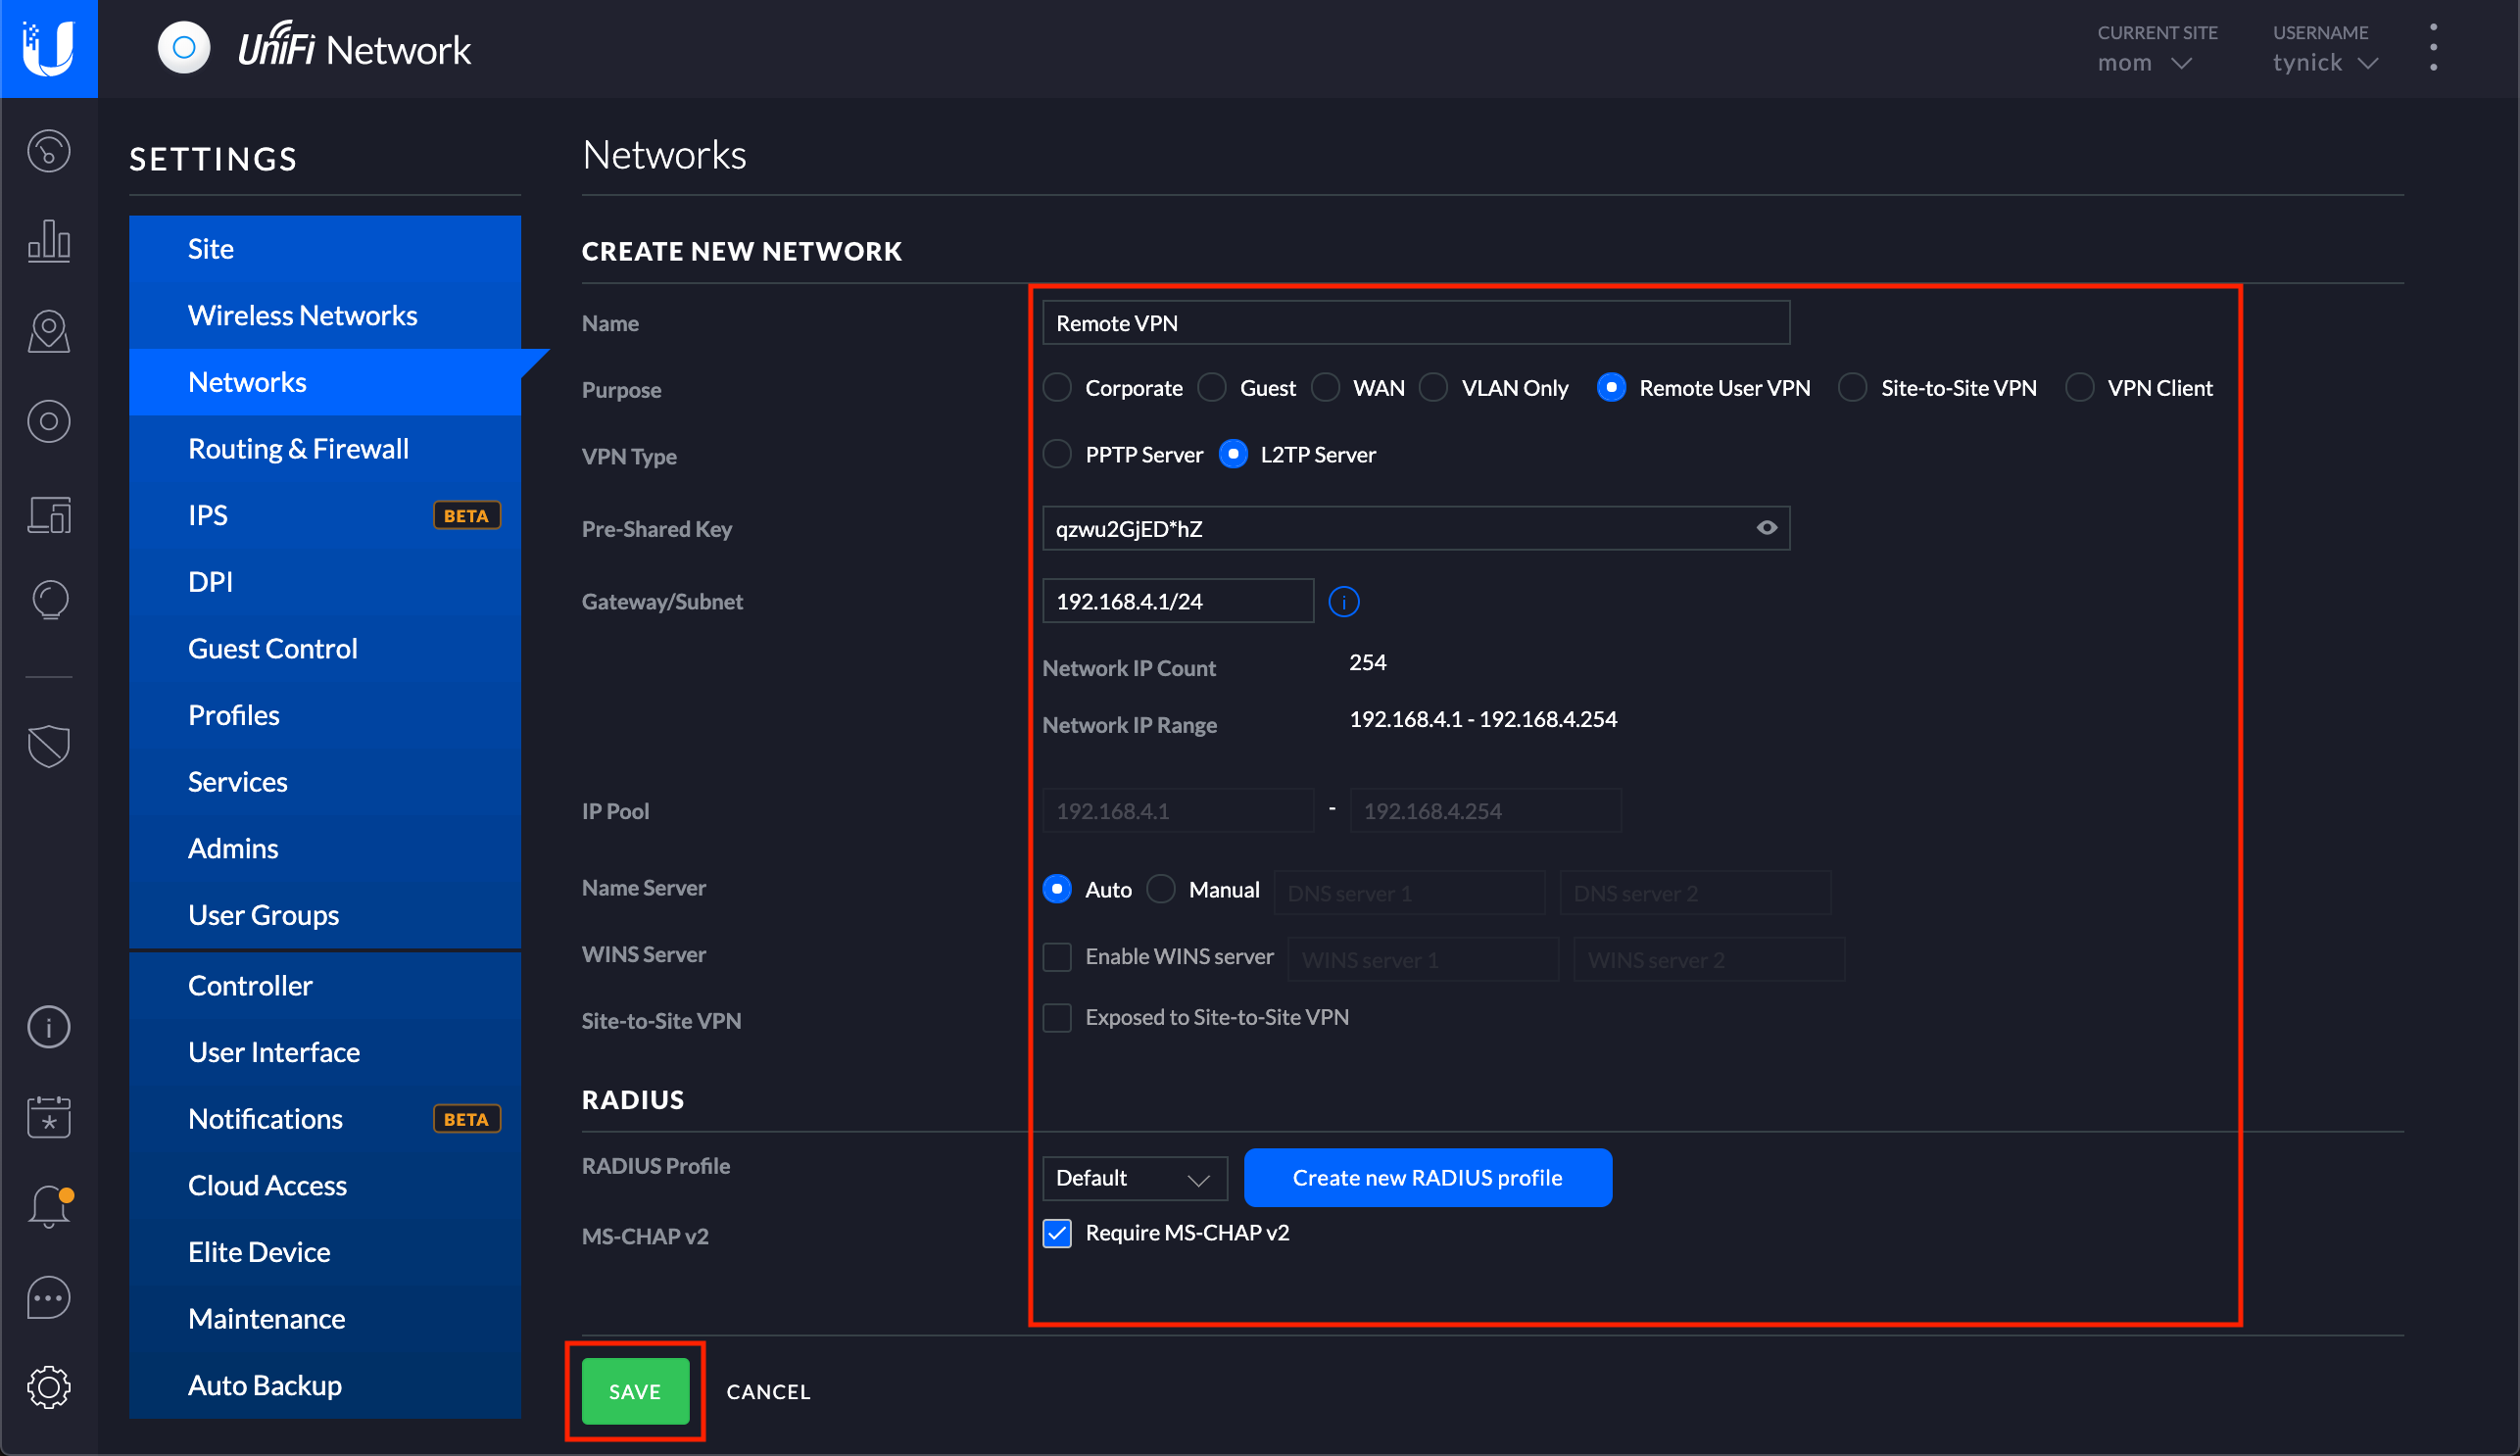
The Pre-Shared Key should also be unique.
The Gateway/Subnet you enter here cannot exist already!
| Name | Remote VPN |
| Purpose | Remote User VPN |
| VPN Type | L2TP Server |
| Pre-Shared Key | P7HV@e78B&eT |
| Gateway/Subnet | 192.168.4.1/24 |
| Name Server | Auto |
| WINS Server | Unchecked |
| Site-to-Site VPN | If you have a site to site VPN configured and want to expose that network to the remote VPN then go ahead and check this. If not, leave it unchecked. |
| RADIUS Profile | Default |
| MS-CHAP v2 | Require MS-CHAP v2 |
Click SAVE when finished.
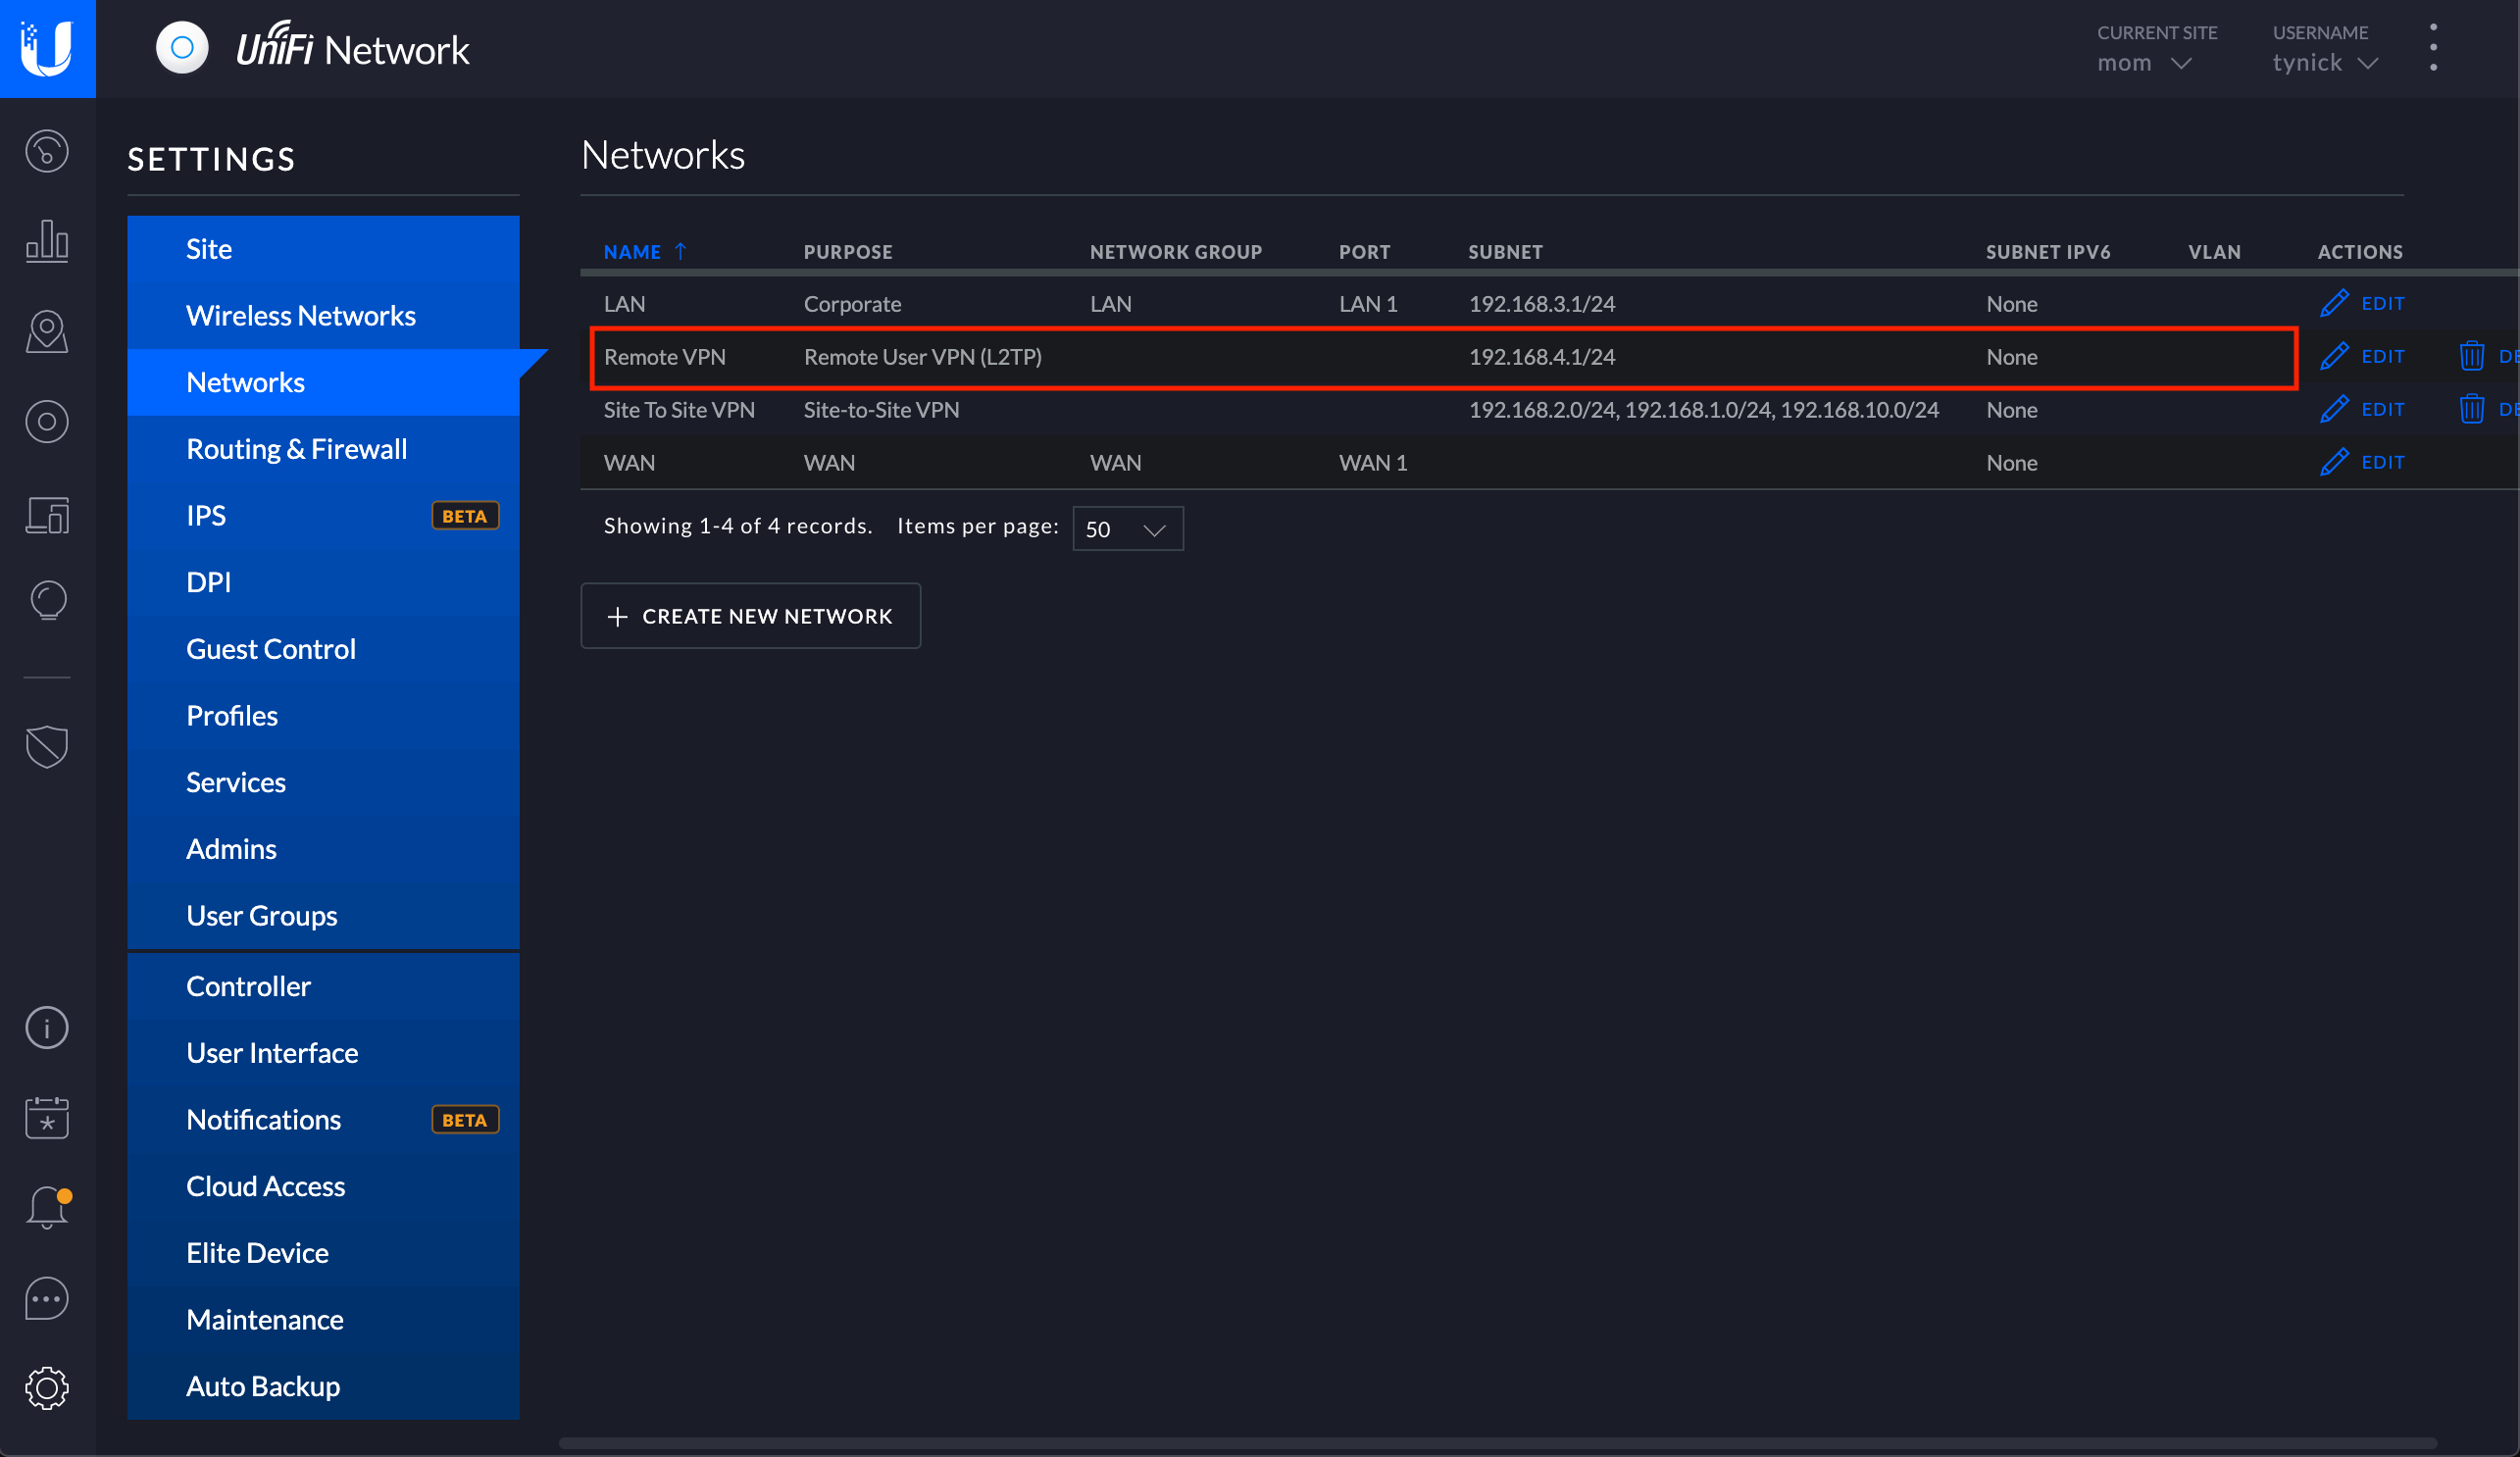
You should see our new Remote VPN network.
Your L2TP VPN is now up and running!
Pretty much every operating system has a built in way to connect to a L2TP VPN.
Here is a tutorial on how to connect using Mac and iOS.
You will need the following info to connect to your new L2TP VPN…
| IP where USG is located | Get your IP from this site |
| Username | tynick |
| Password | F$*bhjd66682 |
| Pre-Shared Key | P7HV@e78B&eT |
Let me know if you have any questions about this setup on Twitter.
Subscribe to my mailing list below to be notified when I make a new post or follow me on Twitter. I’d really appreciate it.