How To Shuck A Western Digital Easystore Or Elements External Drive
Removing The Drive From A Western Digital Easystore Or Elements Enclosure
Recently I realized that the NAS I use for Blue Iris didn’t have enough storage.
I finally replaced my Ring doorbell with this Blue Iris compatible Amcrest Doorbell Camera. After liking the Amcrest doorbell, I grabbed 2 of these Amcrest PTZ 12x Zoom Cameras and replaced some of my Hikvision cameras with these 4K Amcrest Cameras.
I loved the new cameras but my recordings were being overwritten too soon. I only had 4TB drives in my NAS. It was time to upgrade but I didn’t want to spend a fortune.
If you are familiar with the data hoarder community, you almost certainly already know about shucking Western Digital Easystore or Elements enclosures. For those that don’t, these enclosures contain what most people suspect are relabled WD Red drives. They are cheap compared to buying the bare WD Red drive which makes them a prime target for shucking.
Shucking a drive is the act of removing the drive from it’s enclosure. The problem is that these drives are not meant to be removed by consumers.
I documented the process I went through to get these drives out of the enclosures without breaking anything. This was necessary in case the drive failed. In my experience, if a drive fails it will do it fairly soon after it is put into use. After about 3 months I will probably throw the enclosures away.
What You Need
First, you will need either one of these external drives. They are cheap compared to their raw counterparts.
| Western Digital Easystore External Drive | 10TB |
| Western Digital Elements External Drive | 10TB |
| Star Key Wrench Set | You will NEED these if you do not have them. |
After you’ve acquired one or a few of those, you want to grab any unused/expired IDs, credit cards or library cards. You will need 4 of them. Please don’t use cards that you need.
You should also grab a flat head screw driver.
How To Remove Drive From Western Digital Easystore Or Elements Enclosure
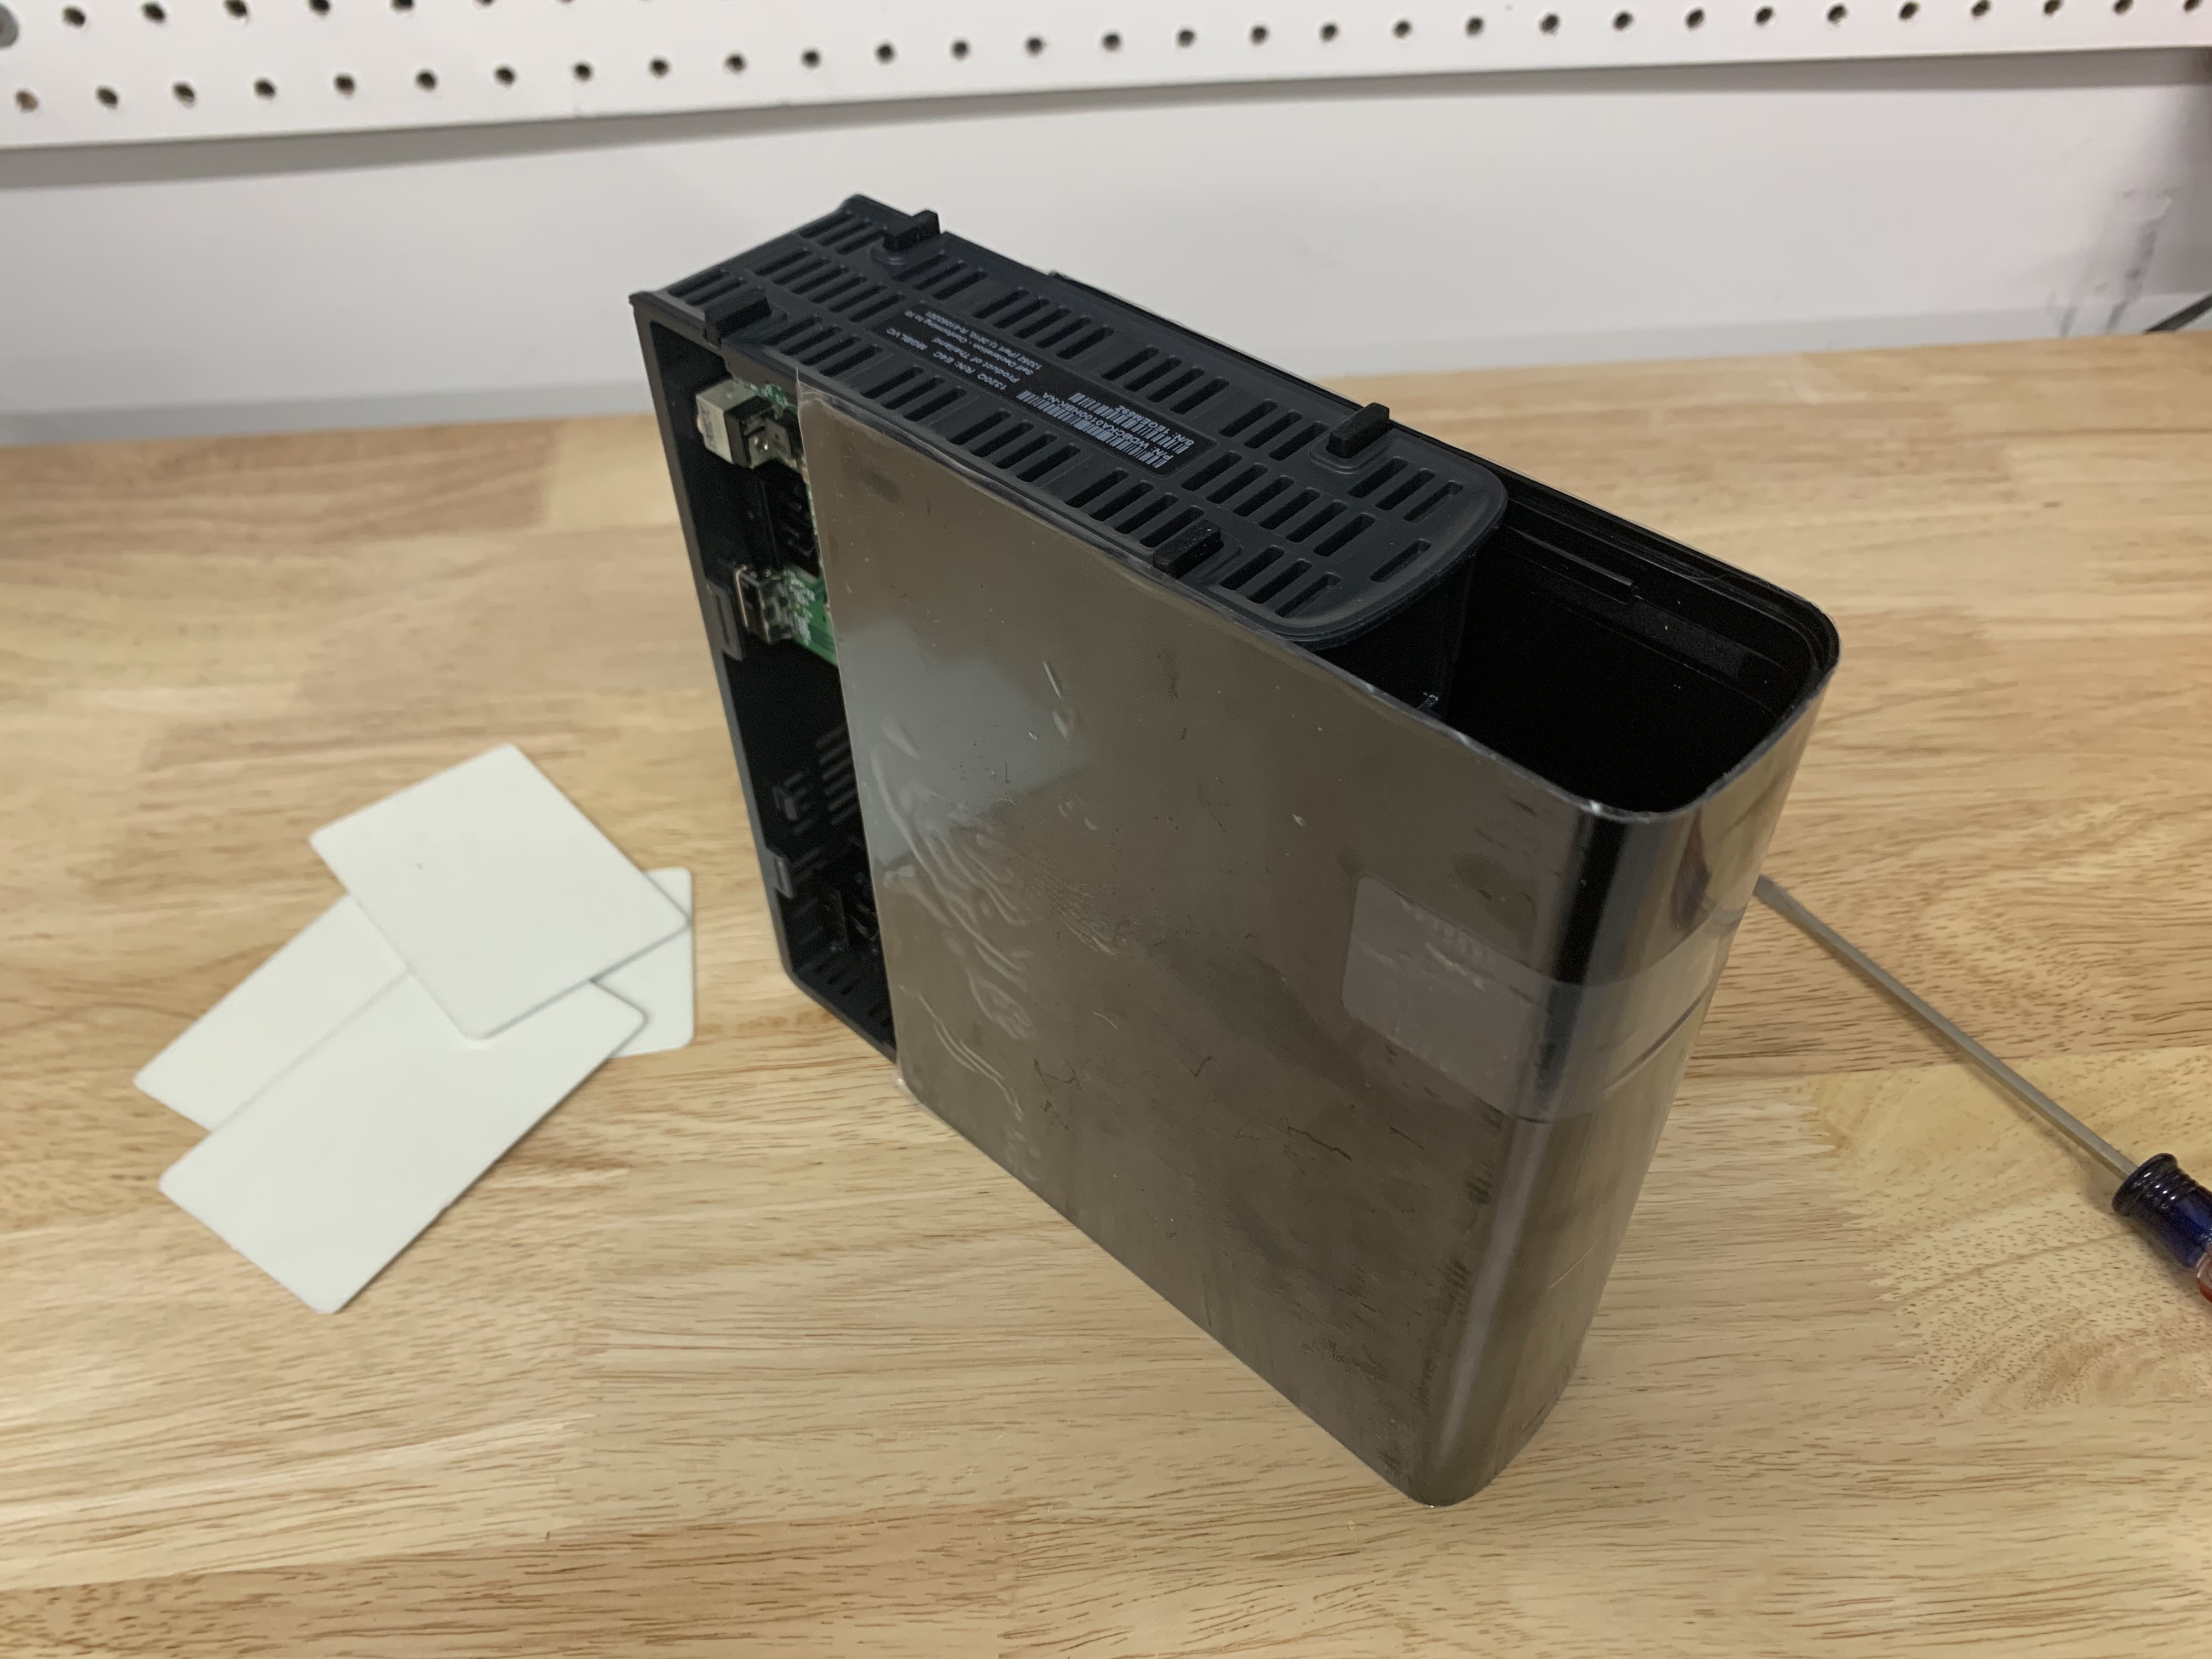
Before we get started, it’s best that you see one of these enclosures after it has been opened. This will help you understand what you are looking for.
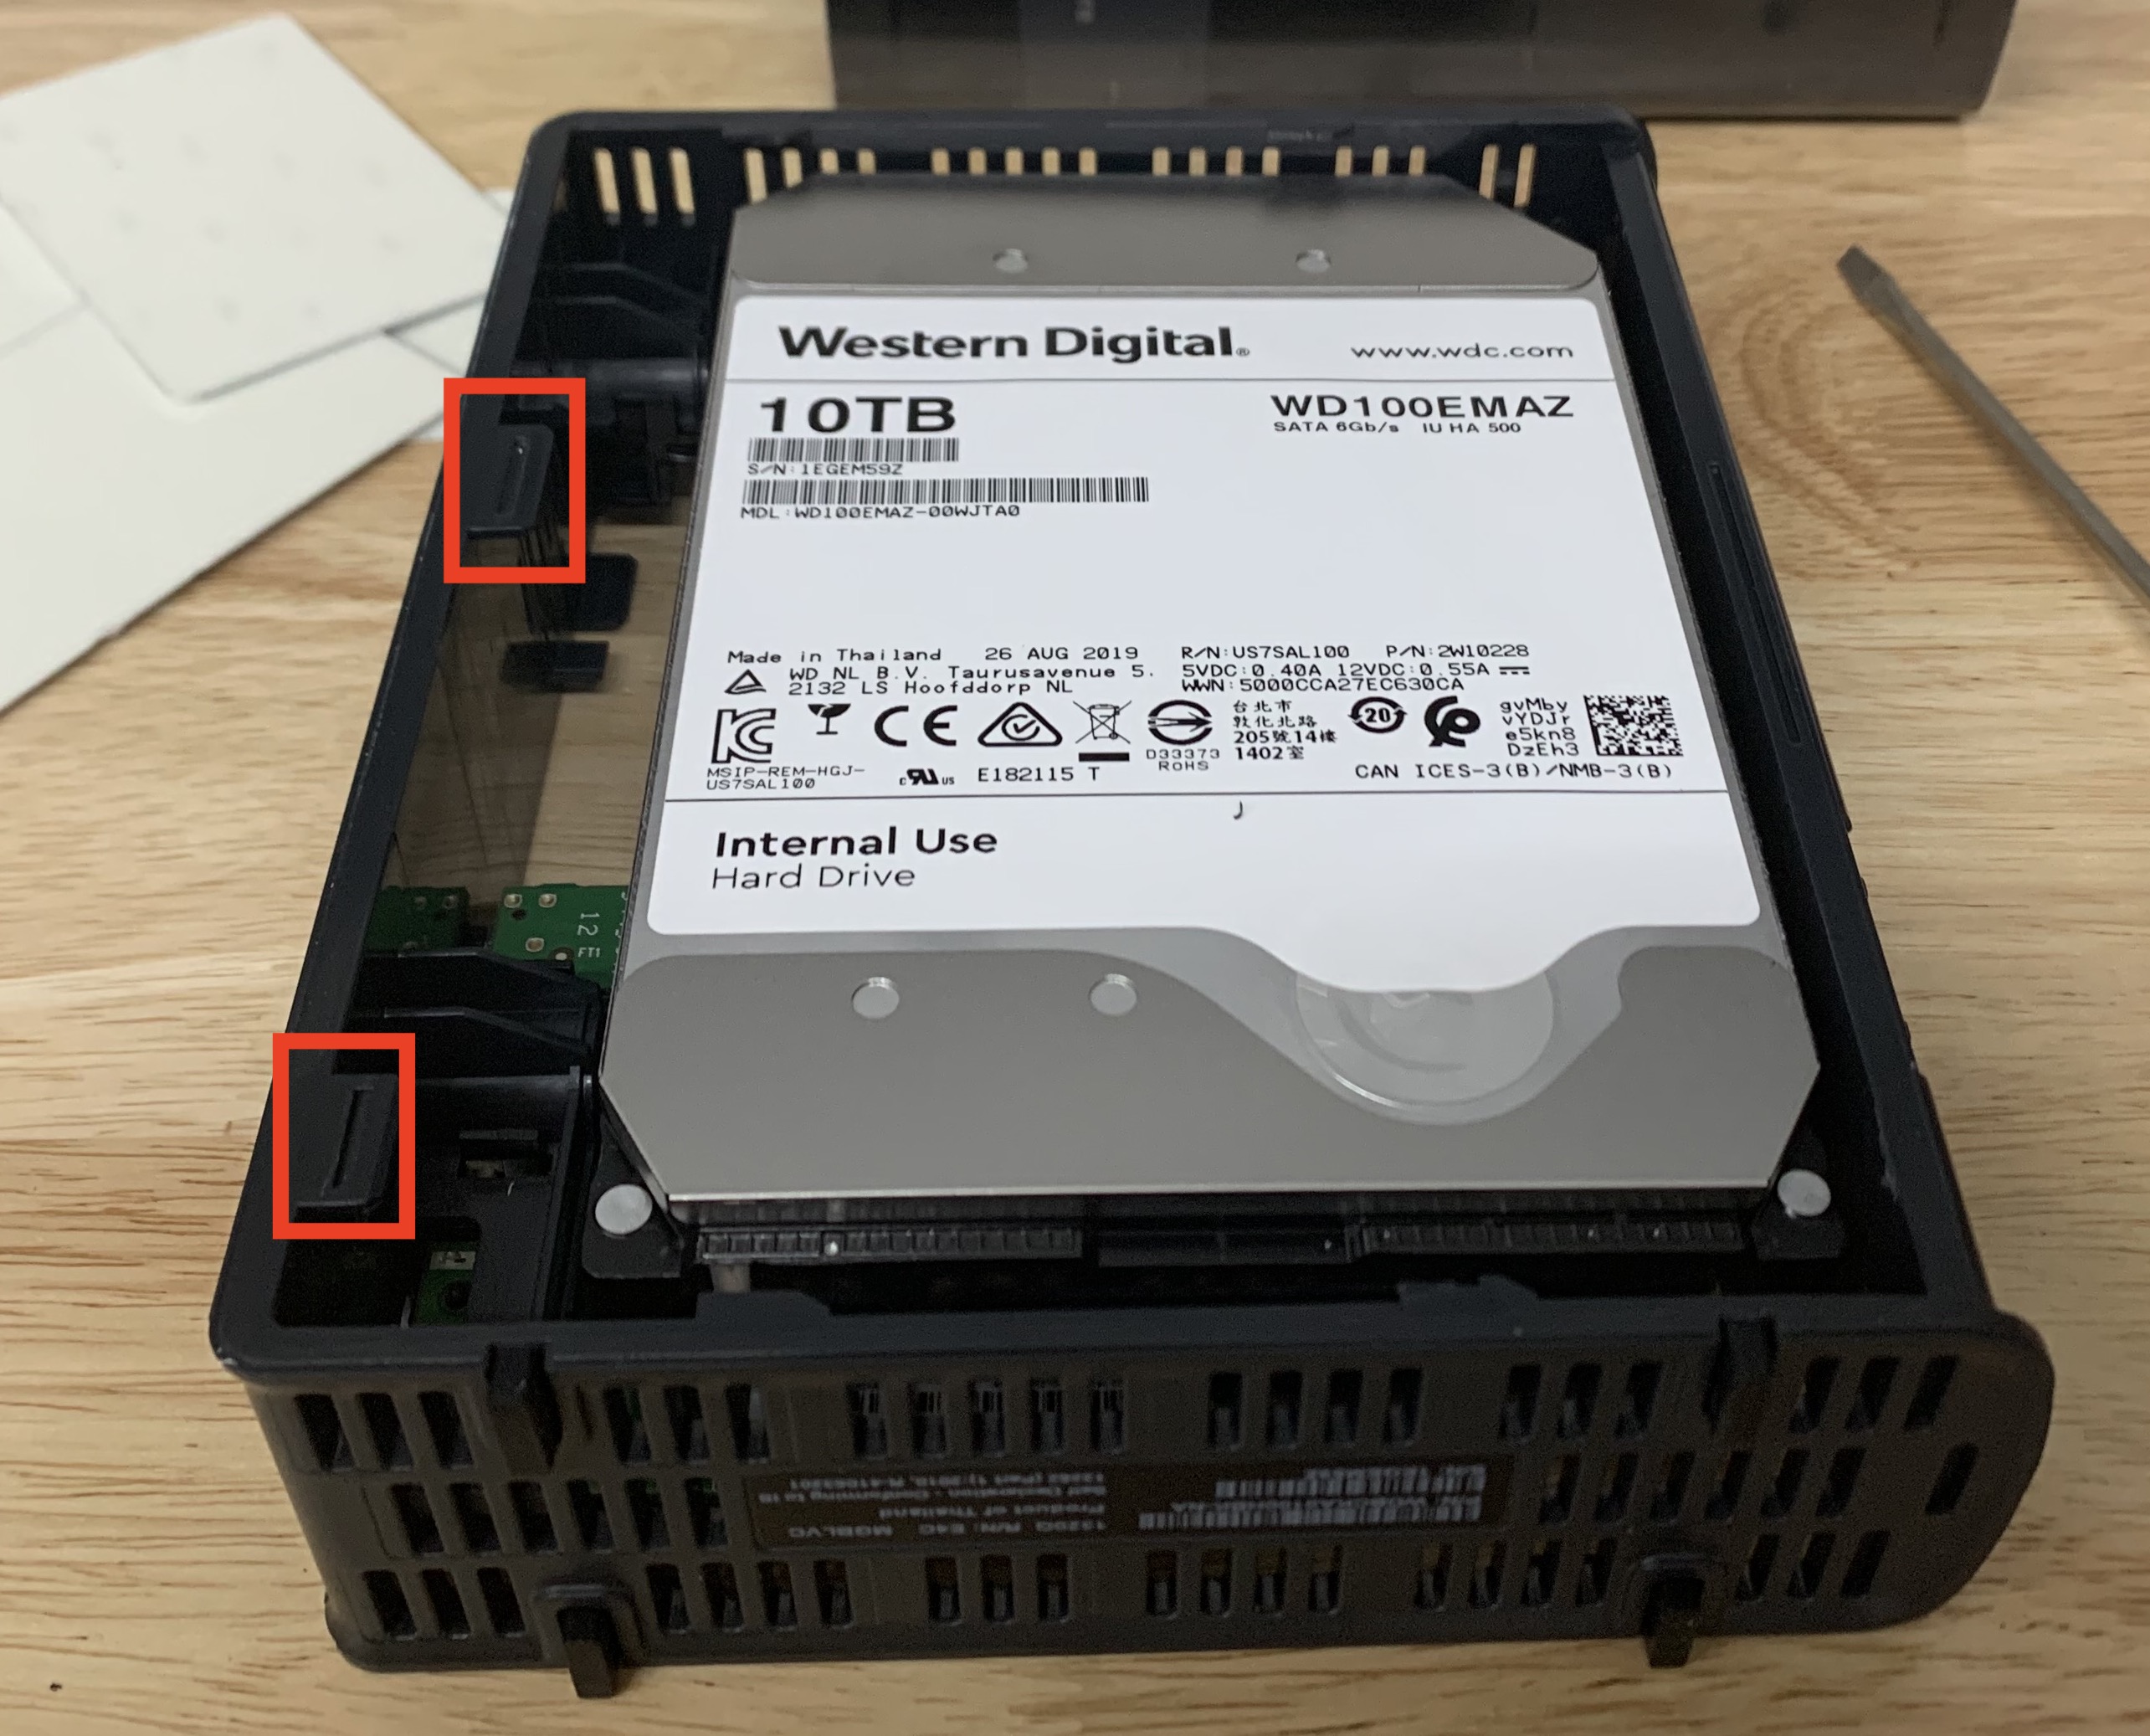 The case is held on by 4 tabs. There are 2 tabs on each side. It’s important to note that the tabs are not in the same spot on both sides. They are staggered a bit.
We need to push all of these tabs in at the same time to get the case to slide off.
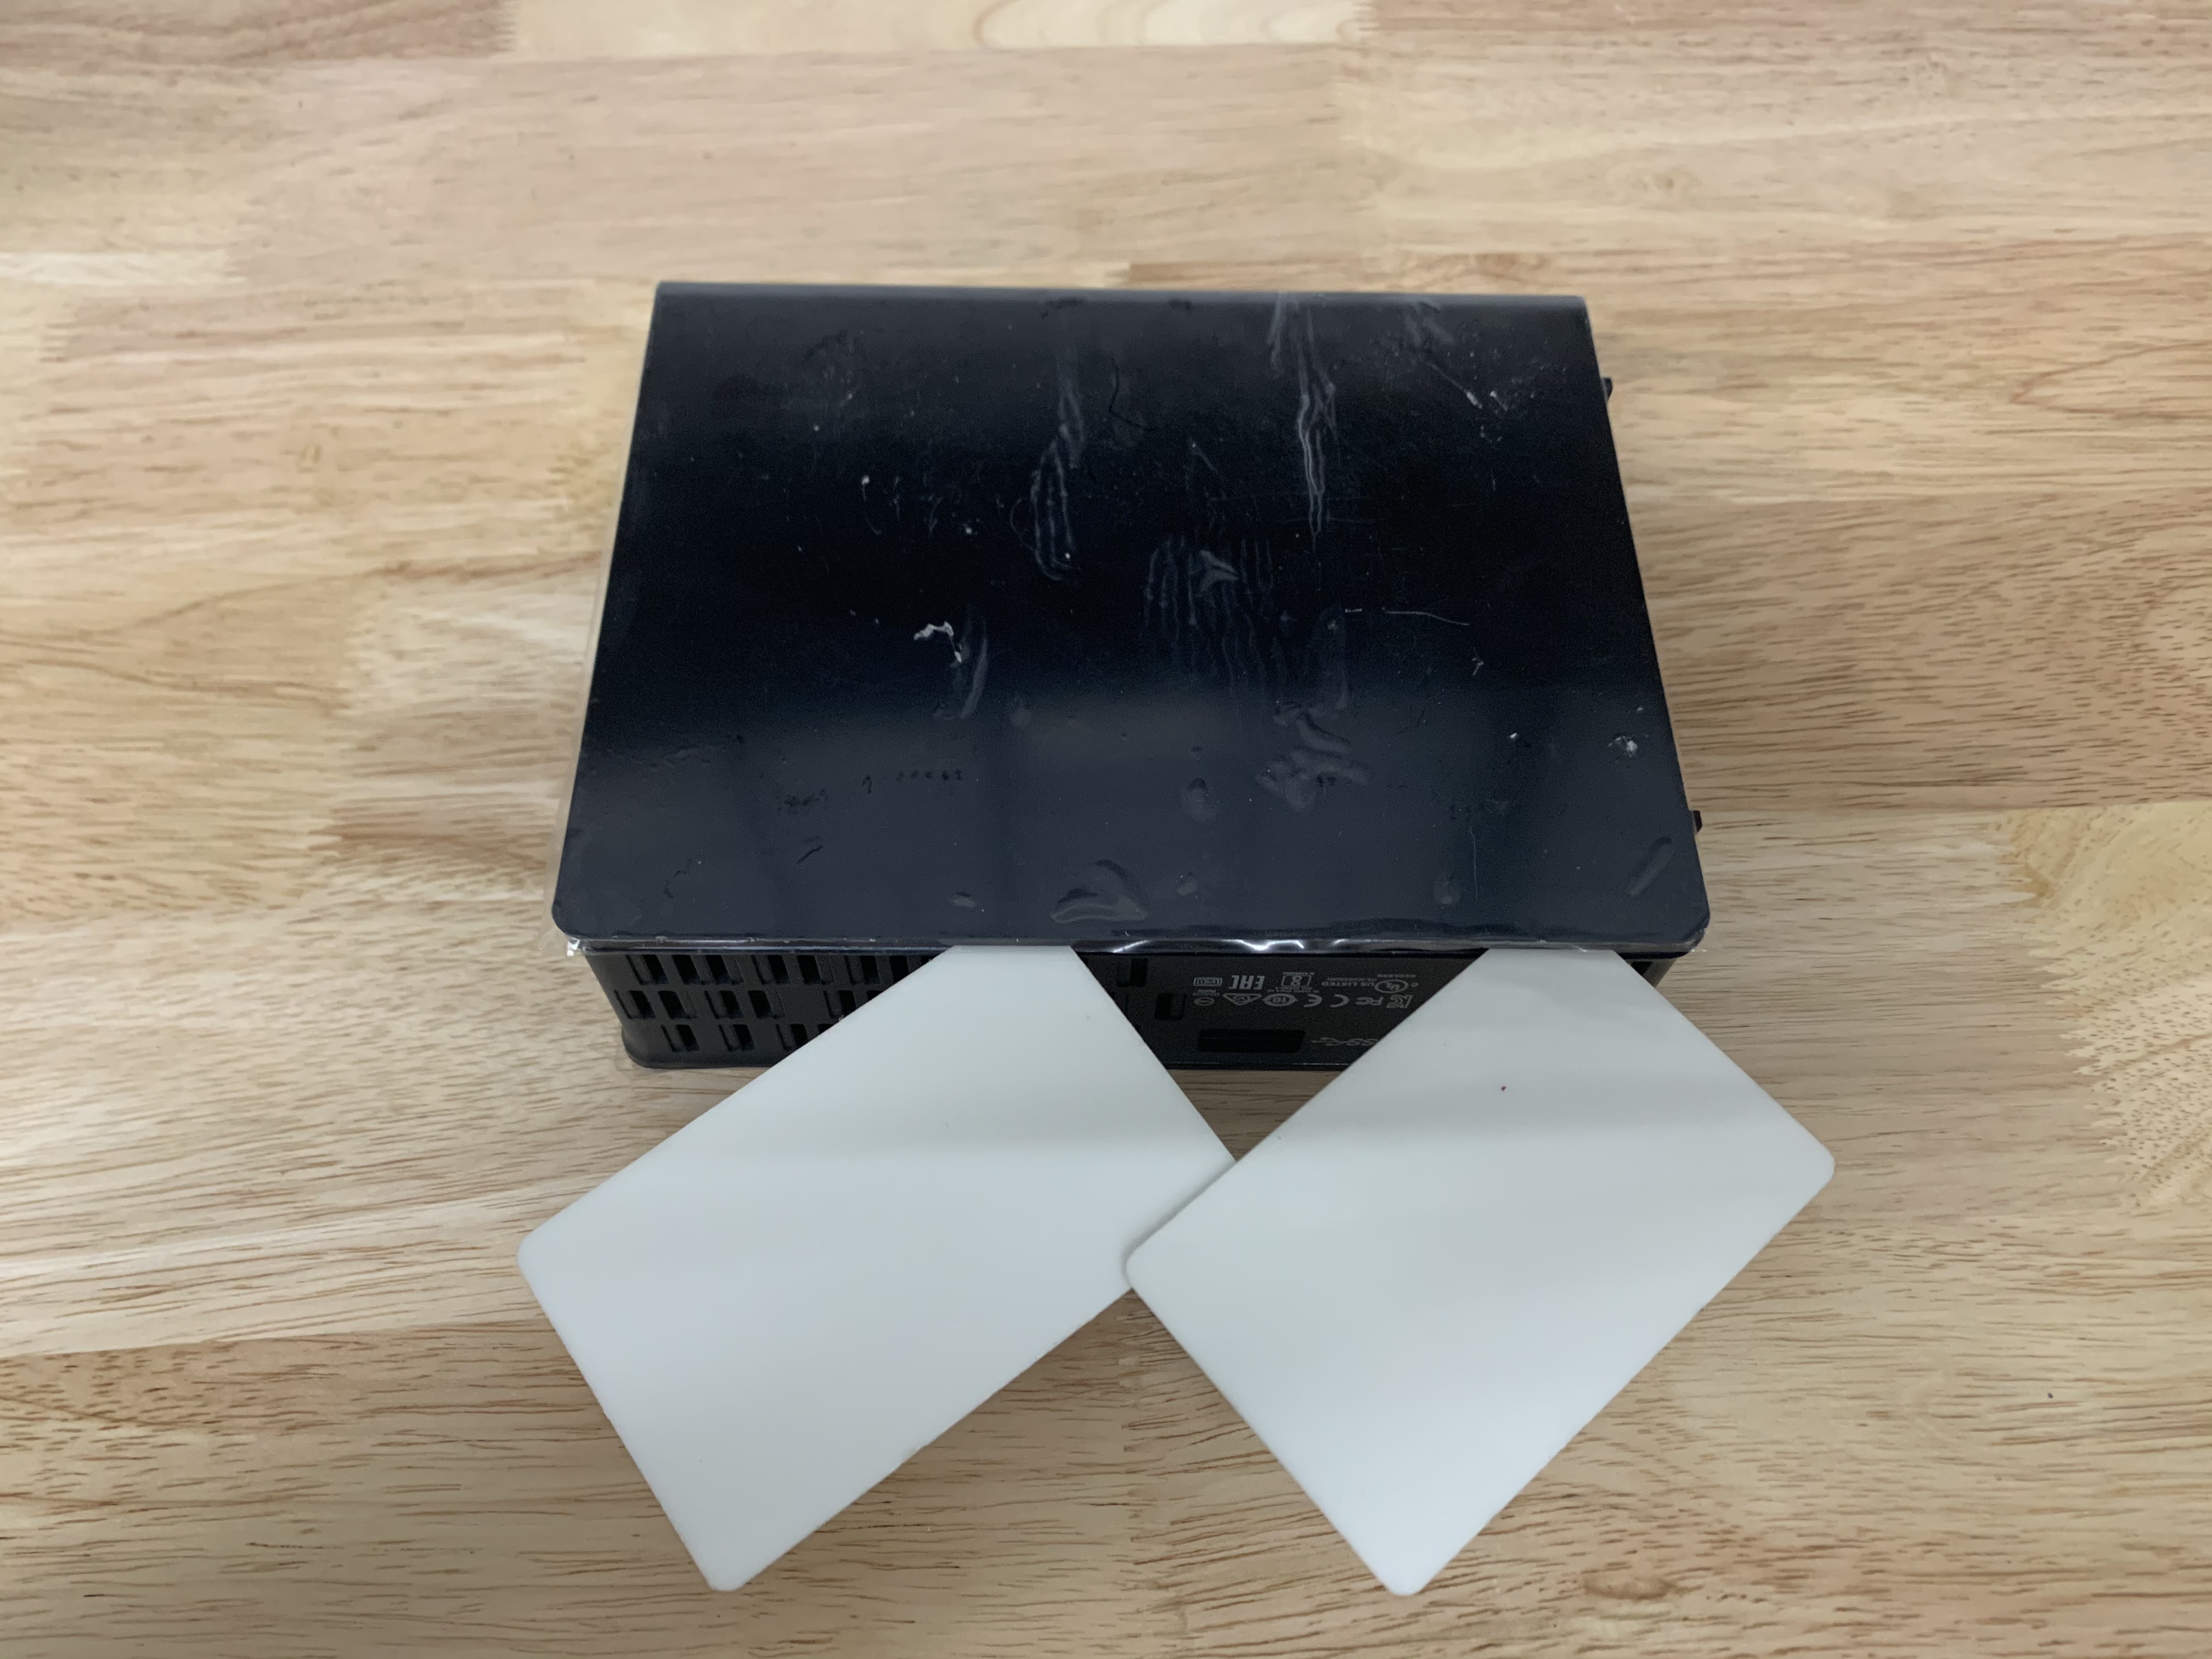
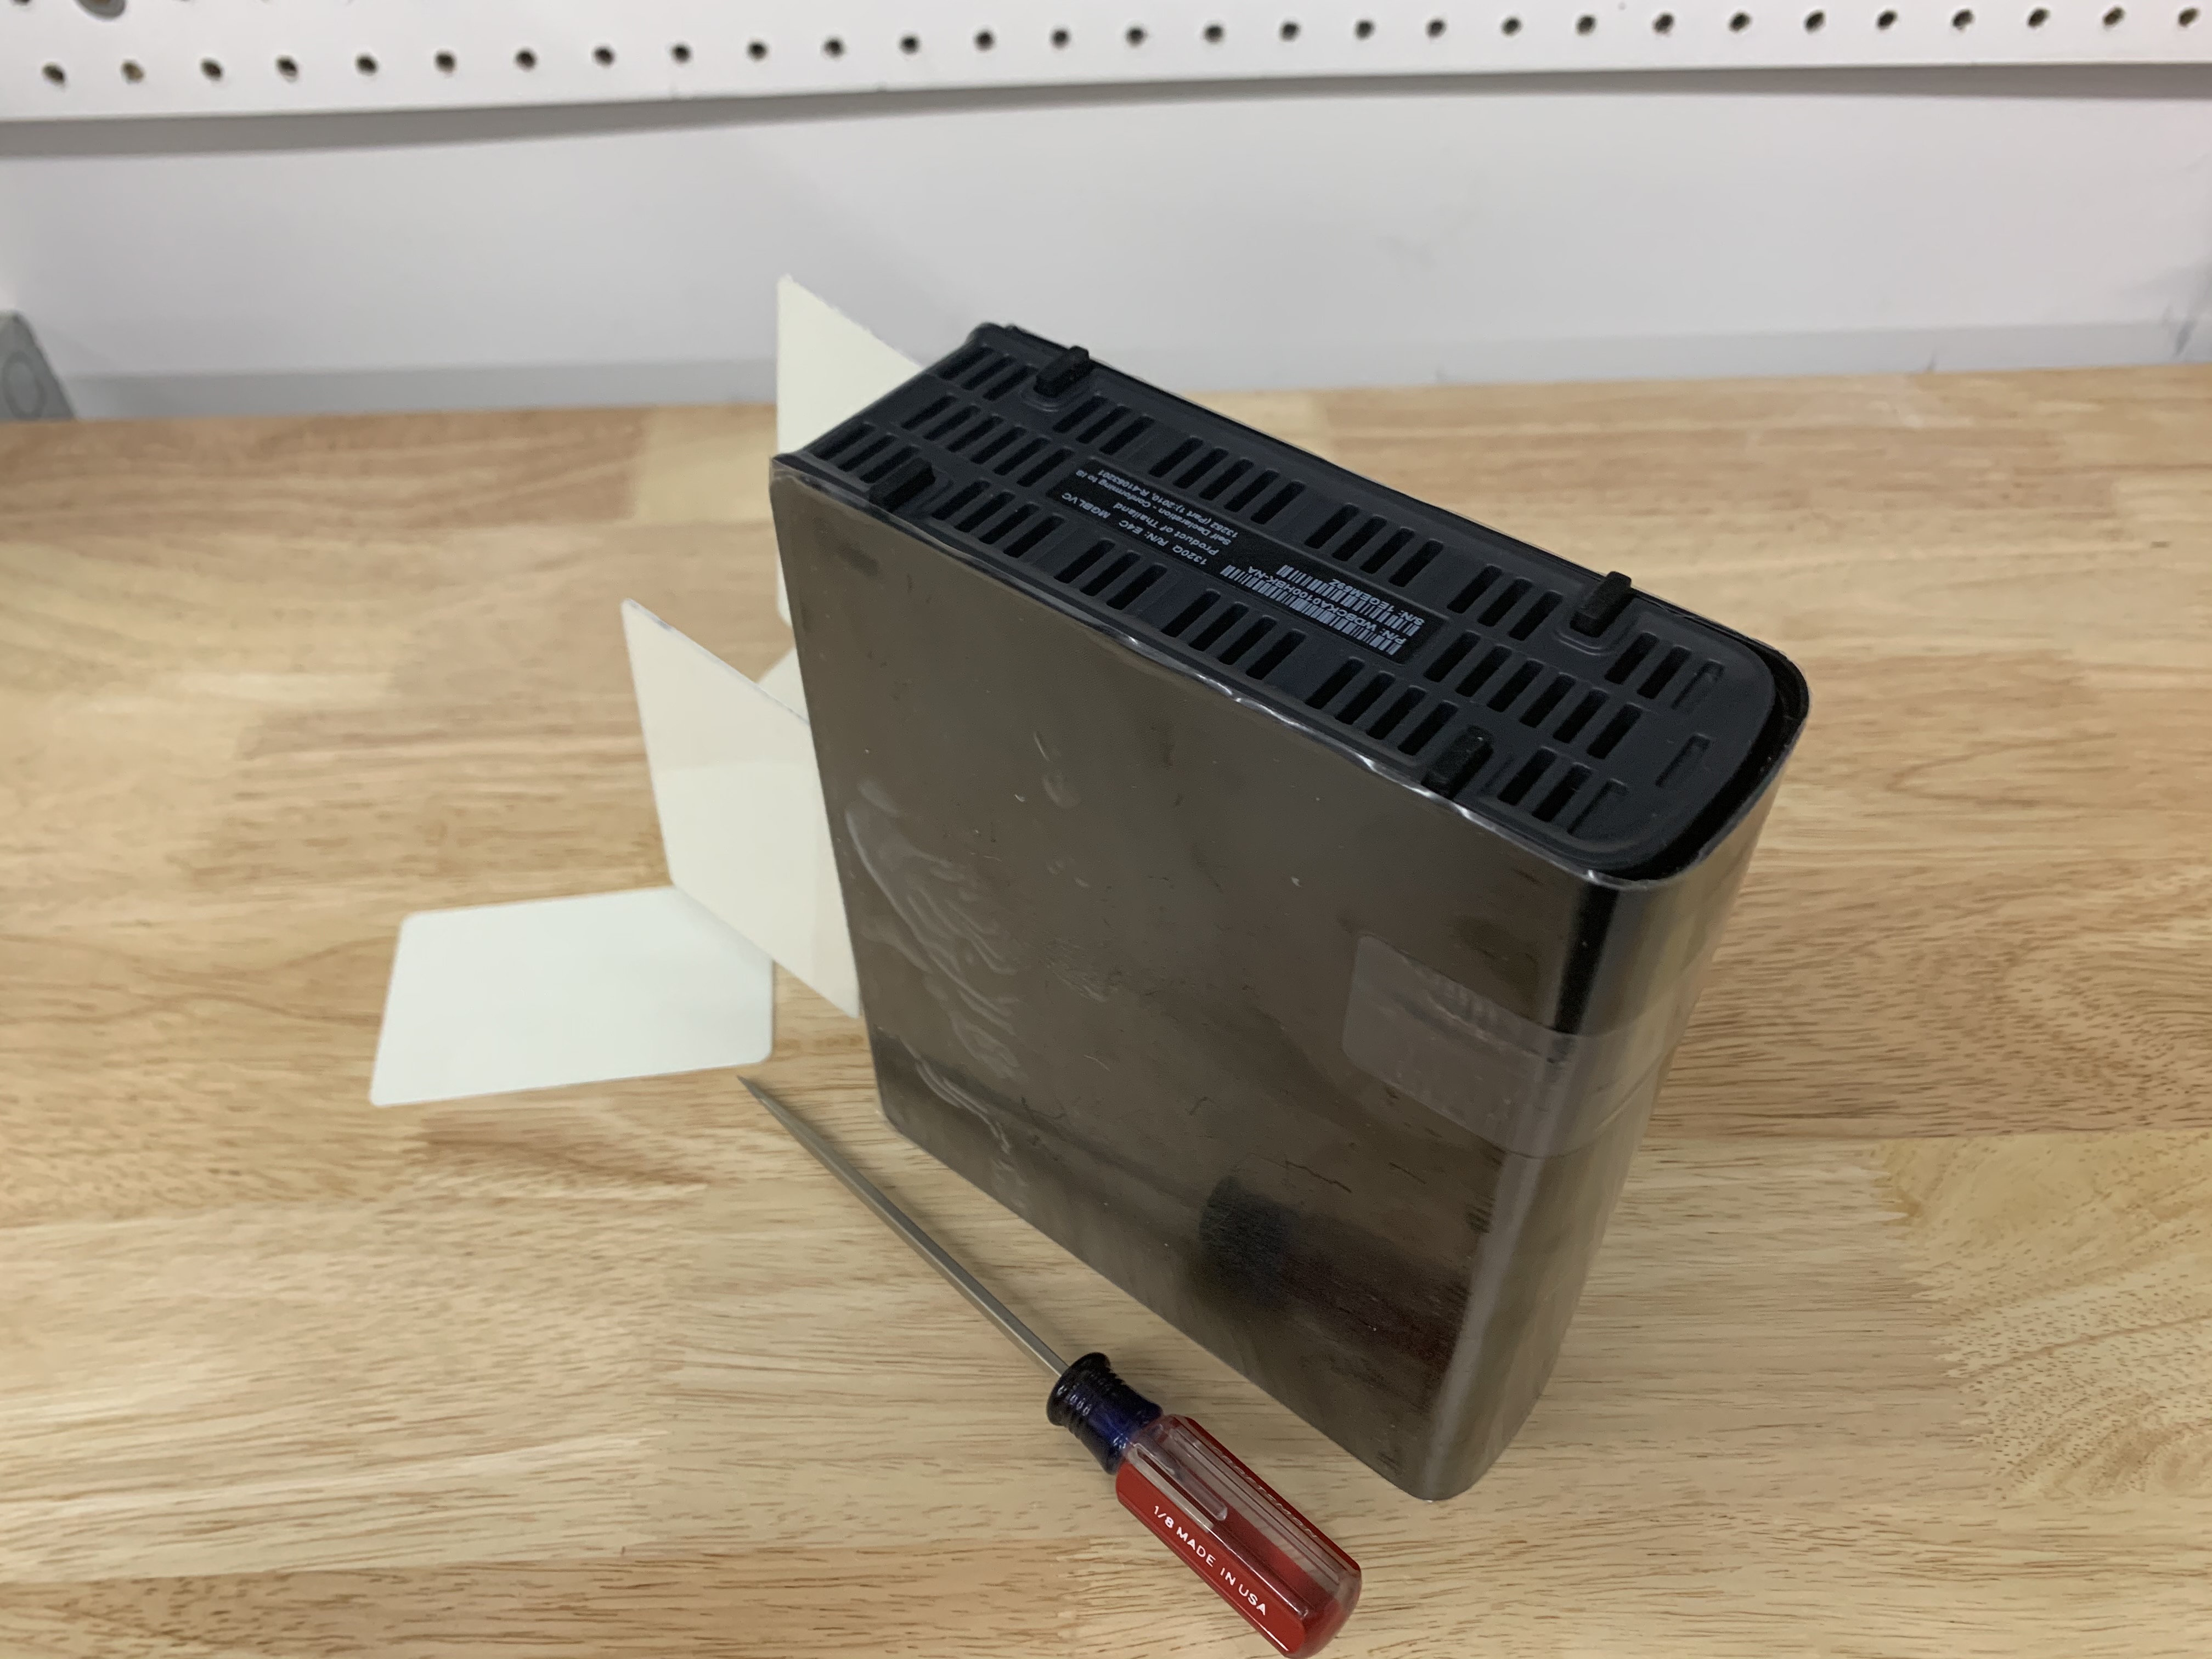
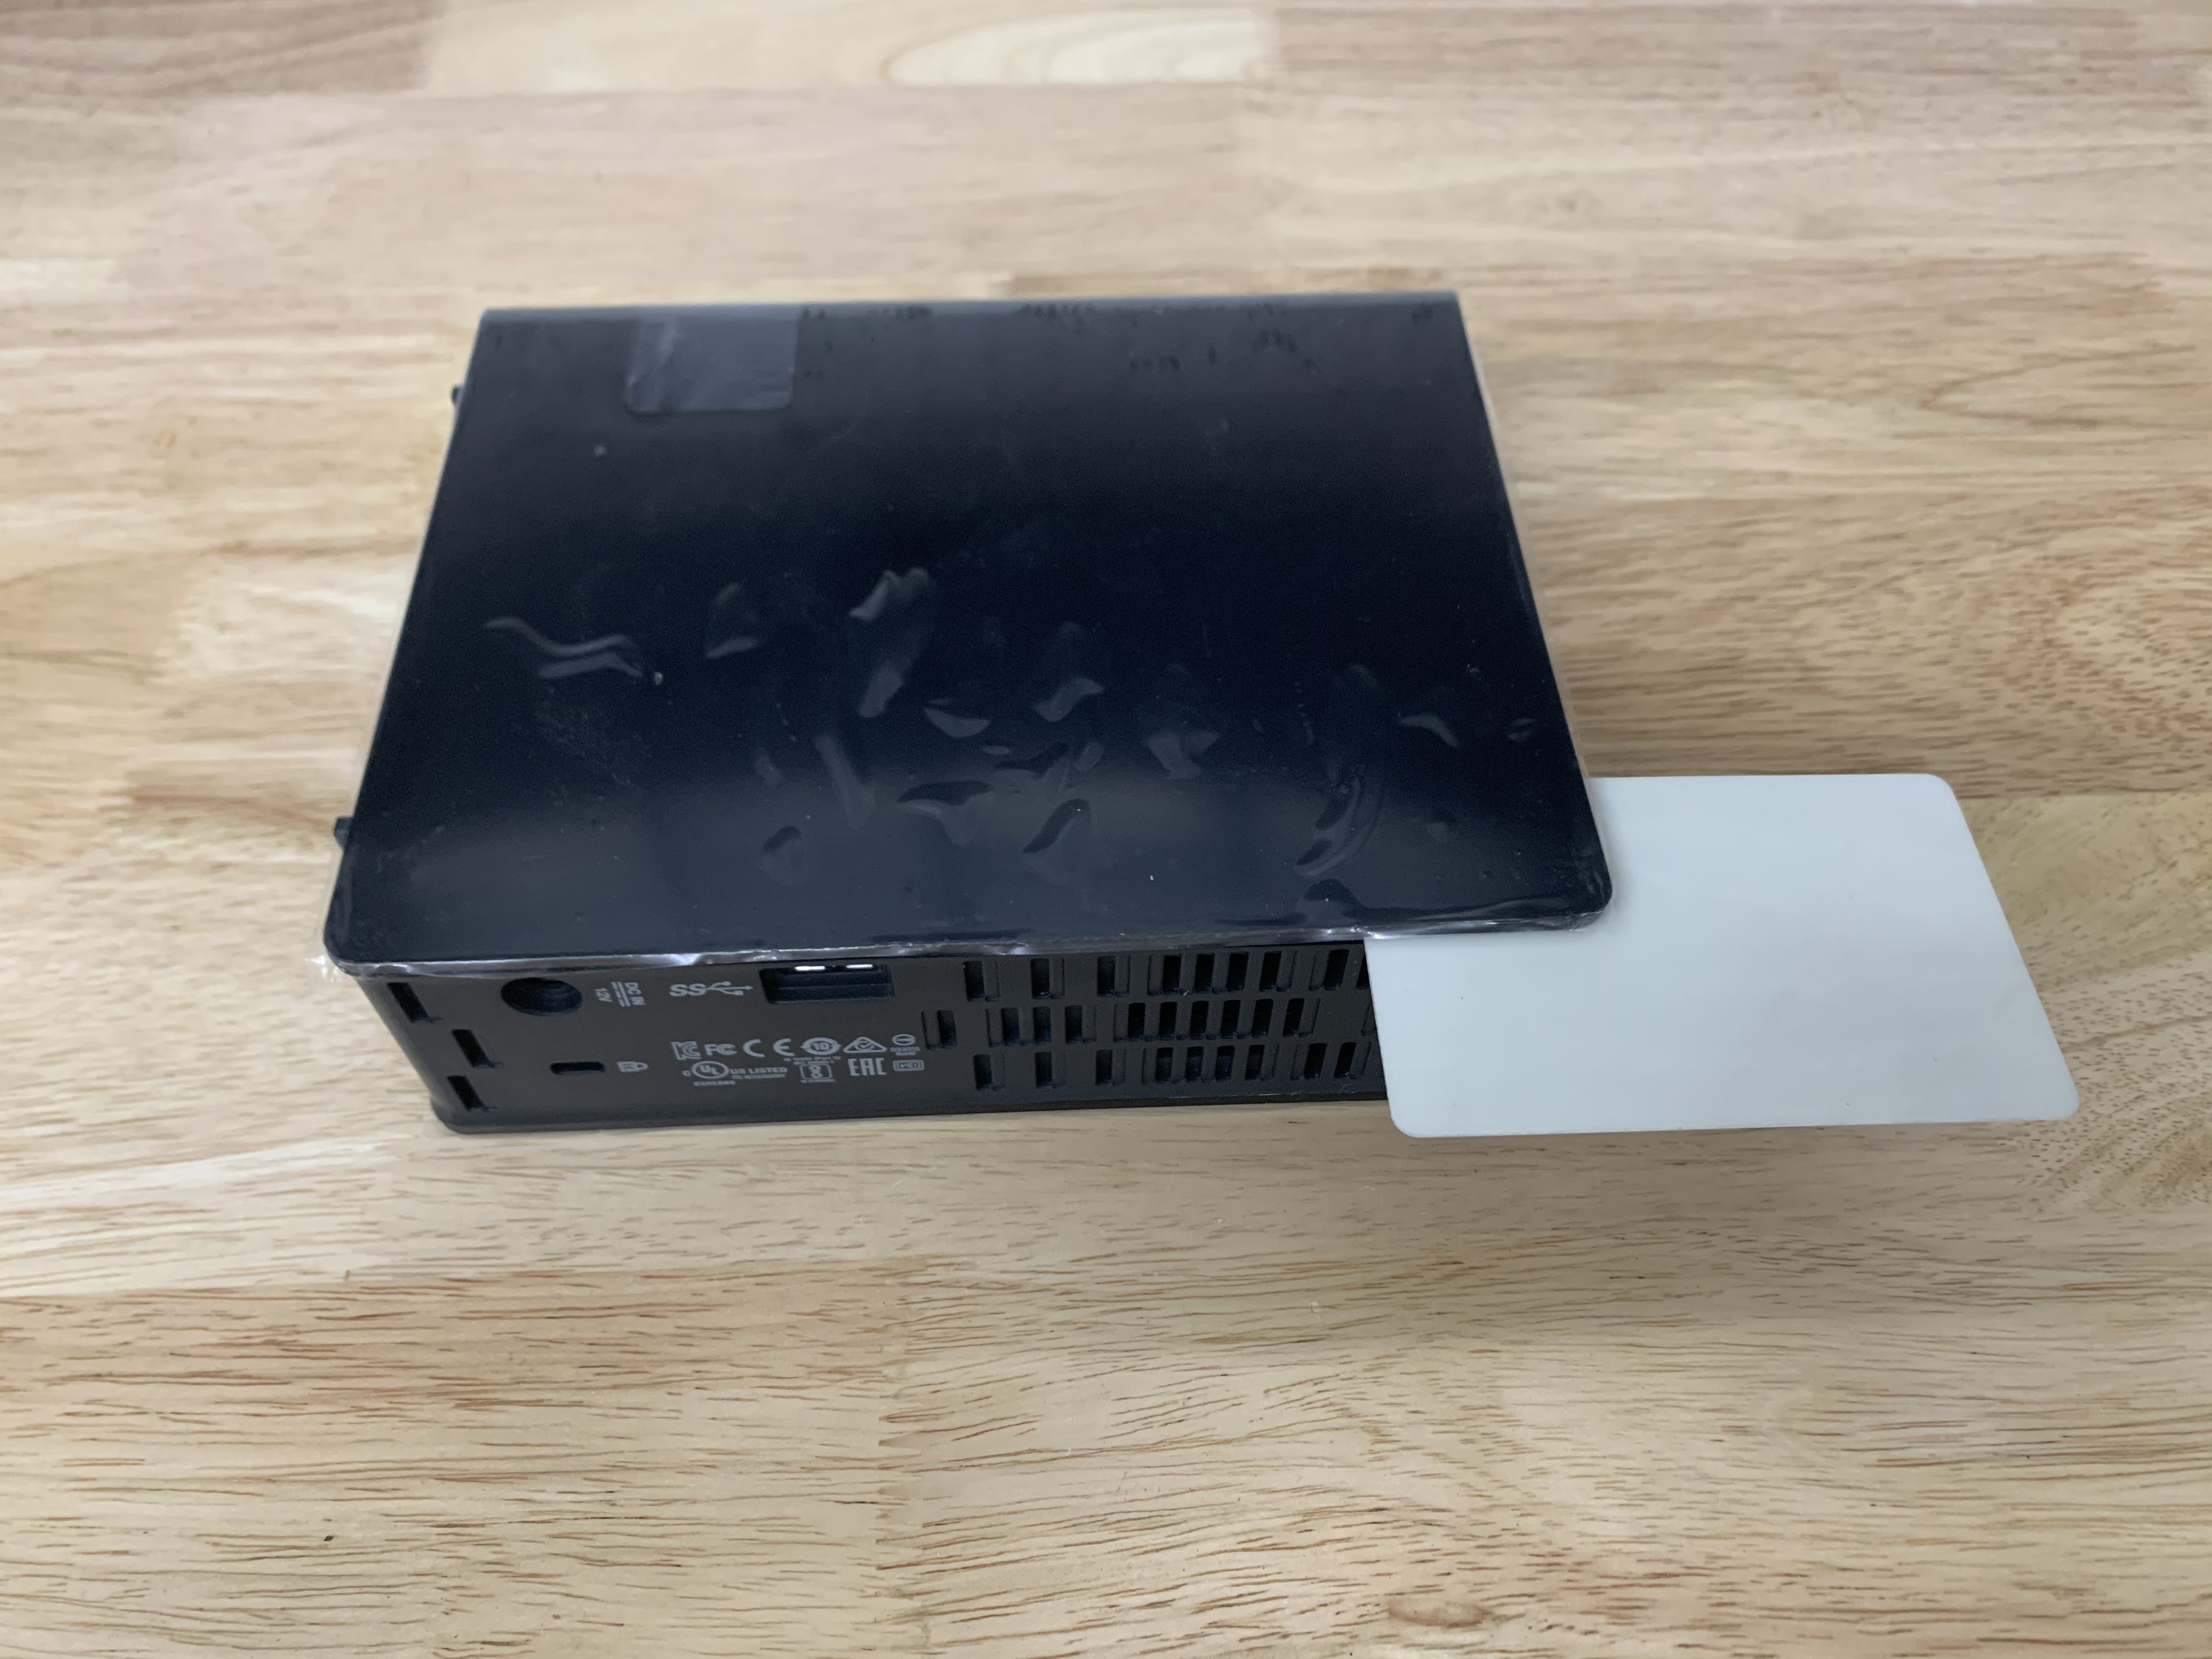 Set your enclosure on it’s side. Stick the card into one of the sides. Don’t go for the tab right away. It’s easiest to go for one of the spots that has an opening and then slide it over to where the tab is.
 Slide it until you hit a tab. Pull back slightly so that it isnt removed but you are able to get around the side edge of the tab. Once you have the card at the front of the middle of the tab, push the corner of the card in. It may take some wiggling but youll know when you get it pressed in.
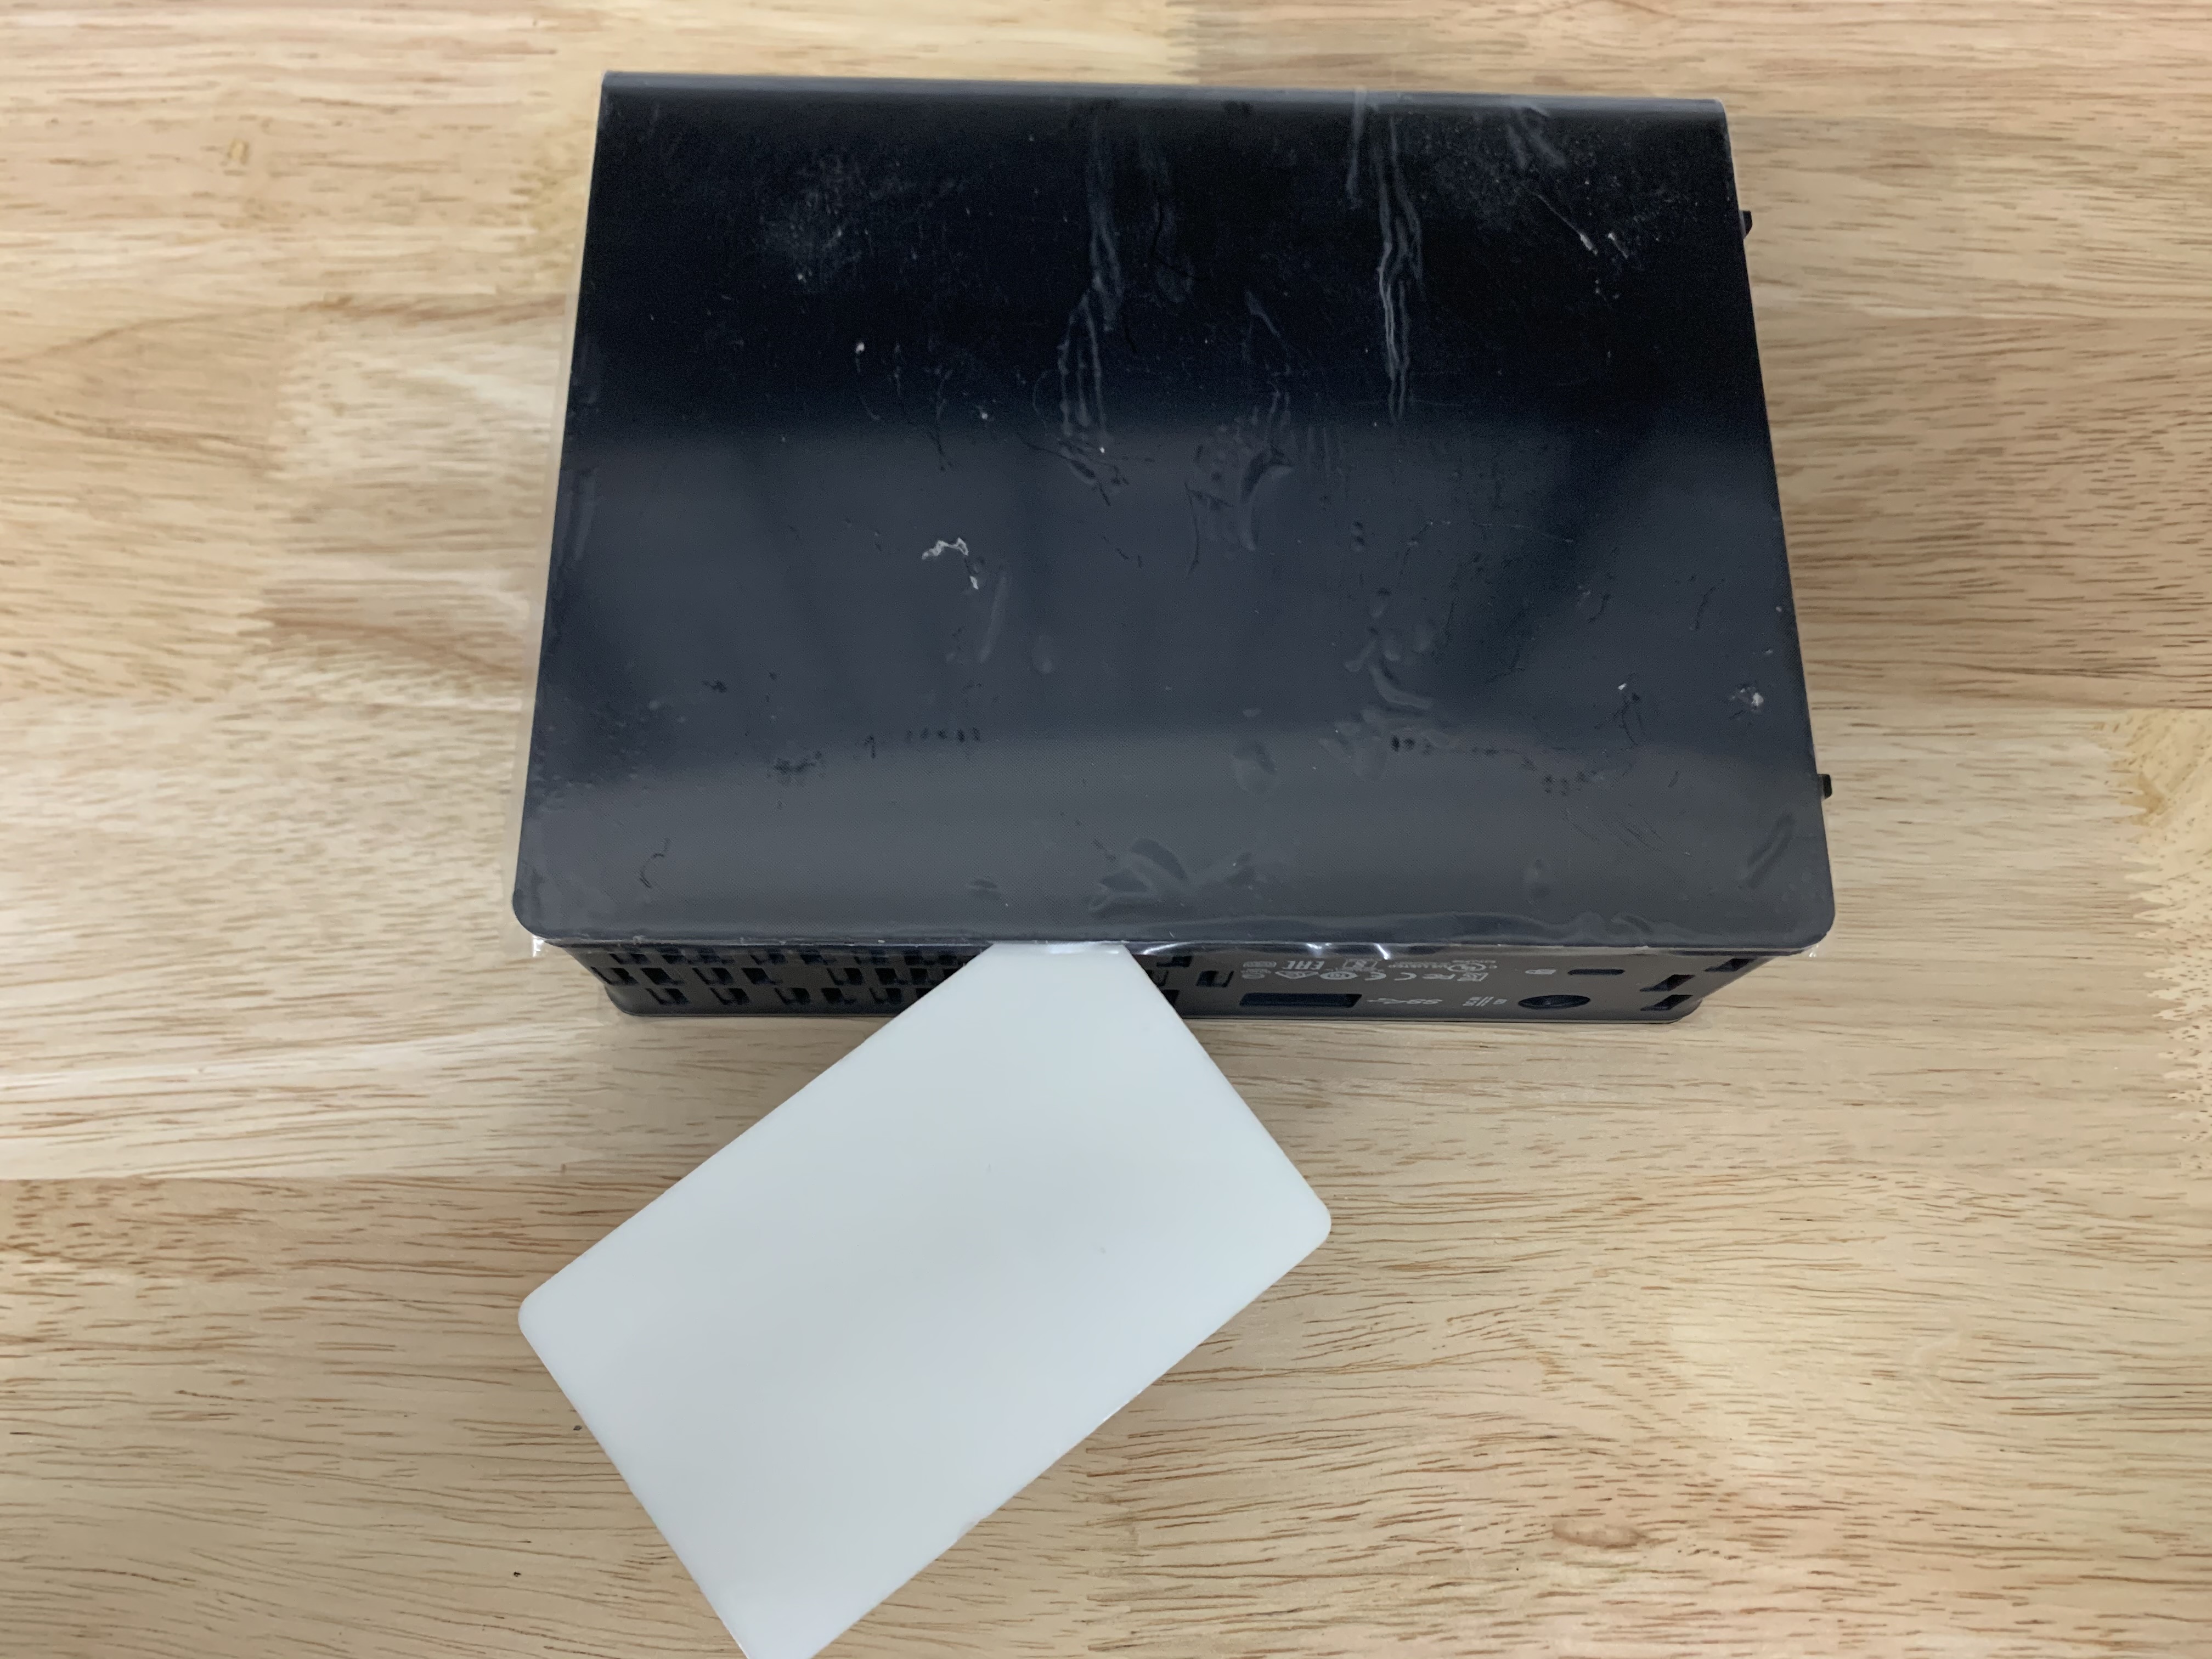
 Grab another card and repeat the last 2 steps. Try to angle your cards in a way that we can eventually stand the enclosure on end without disturbing the cards that are holding the tabs.
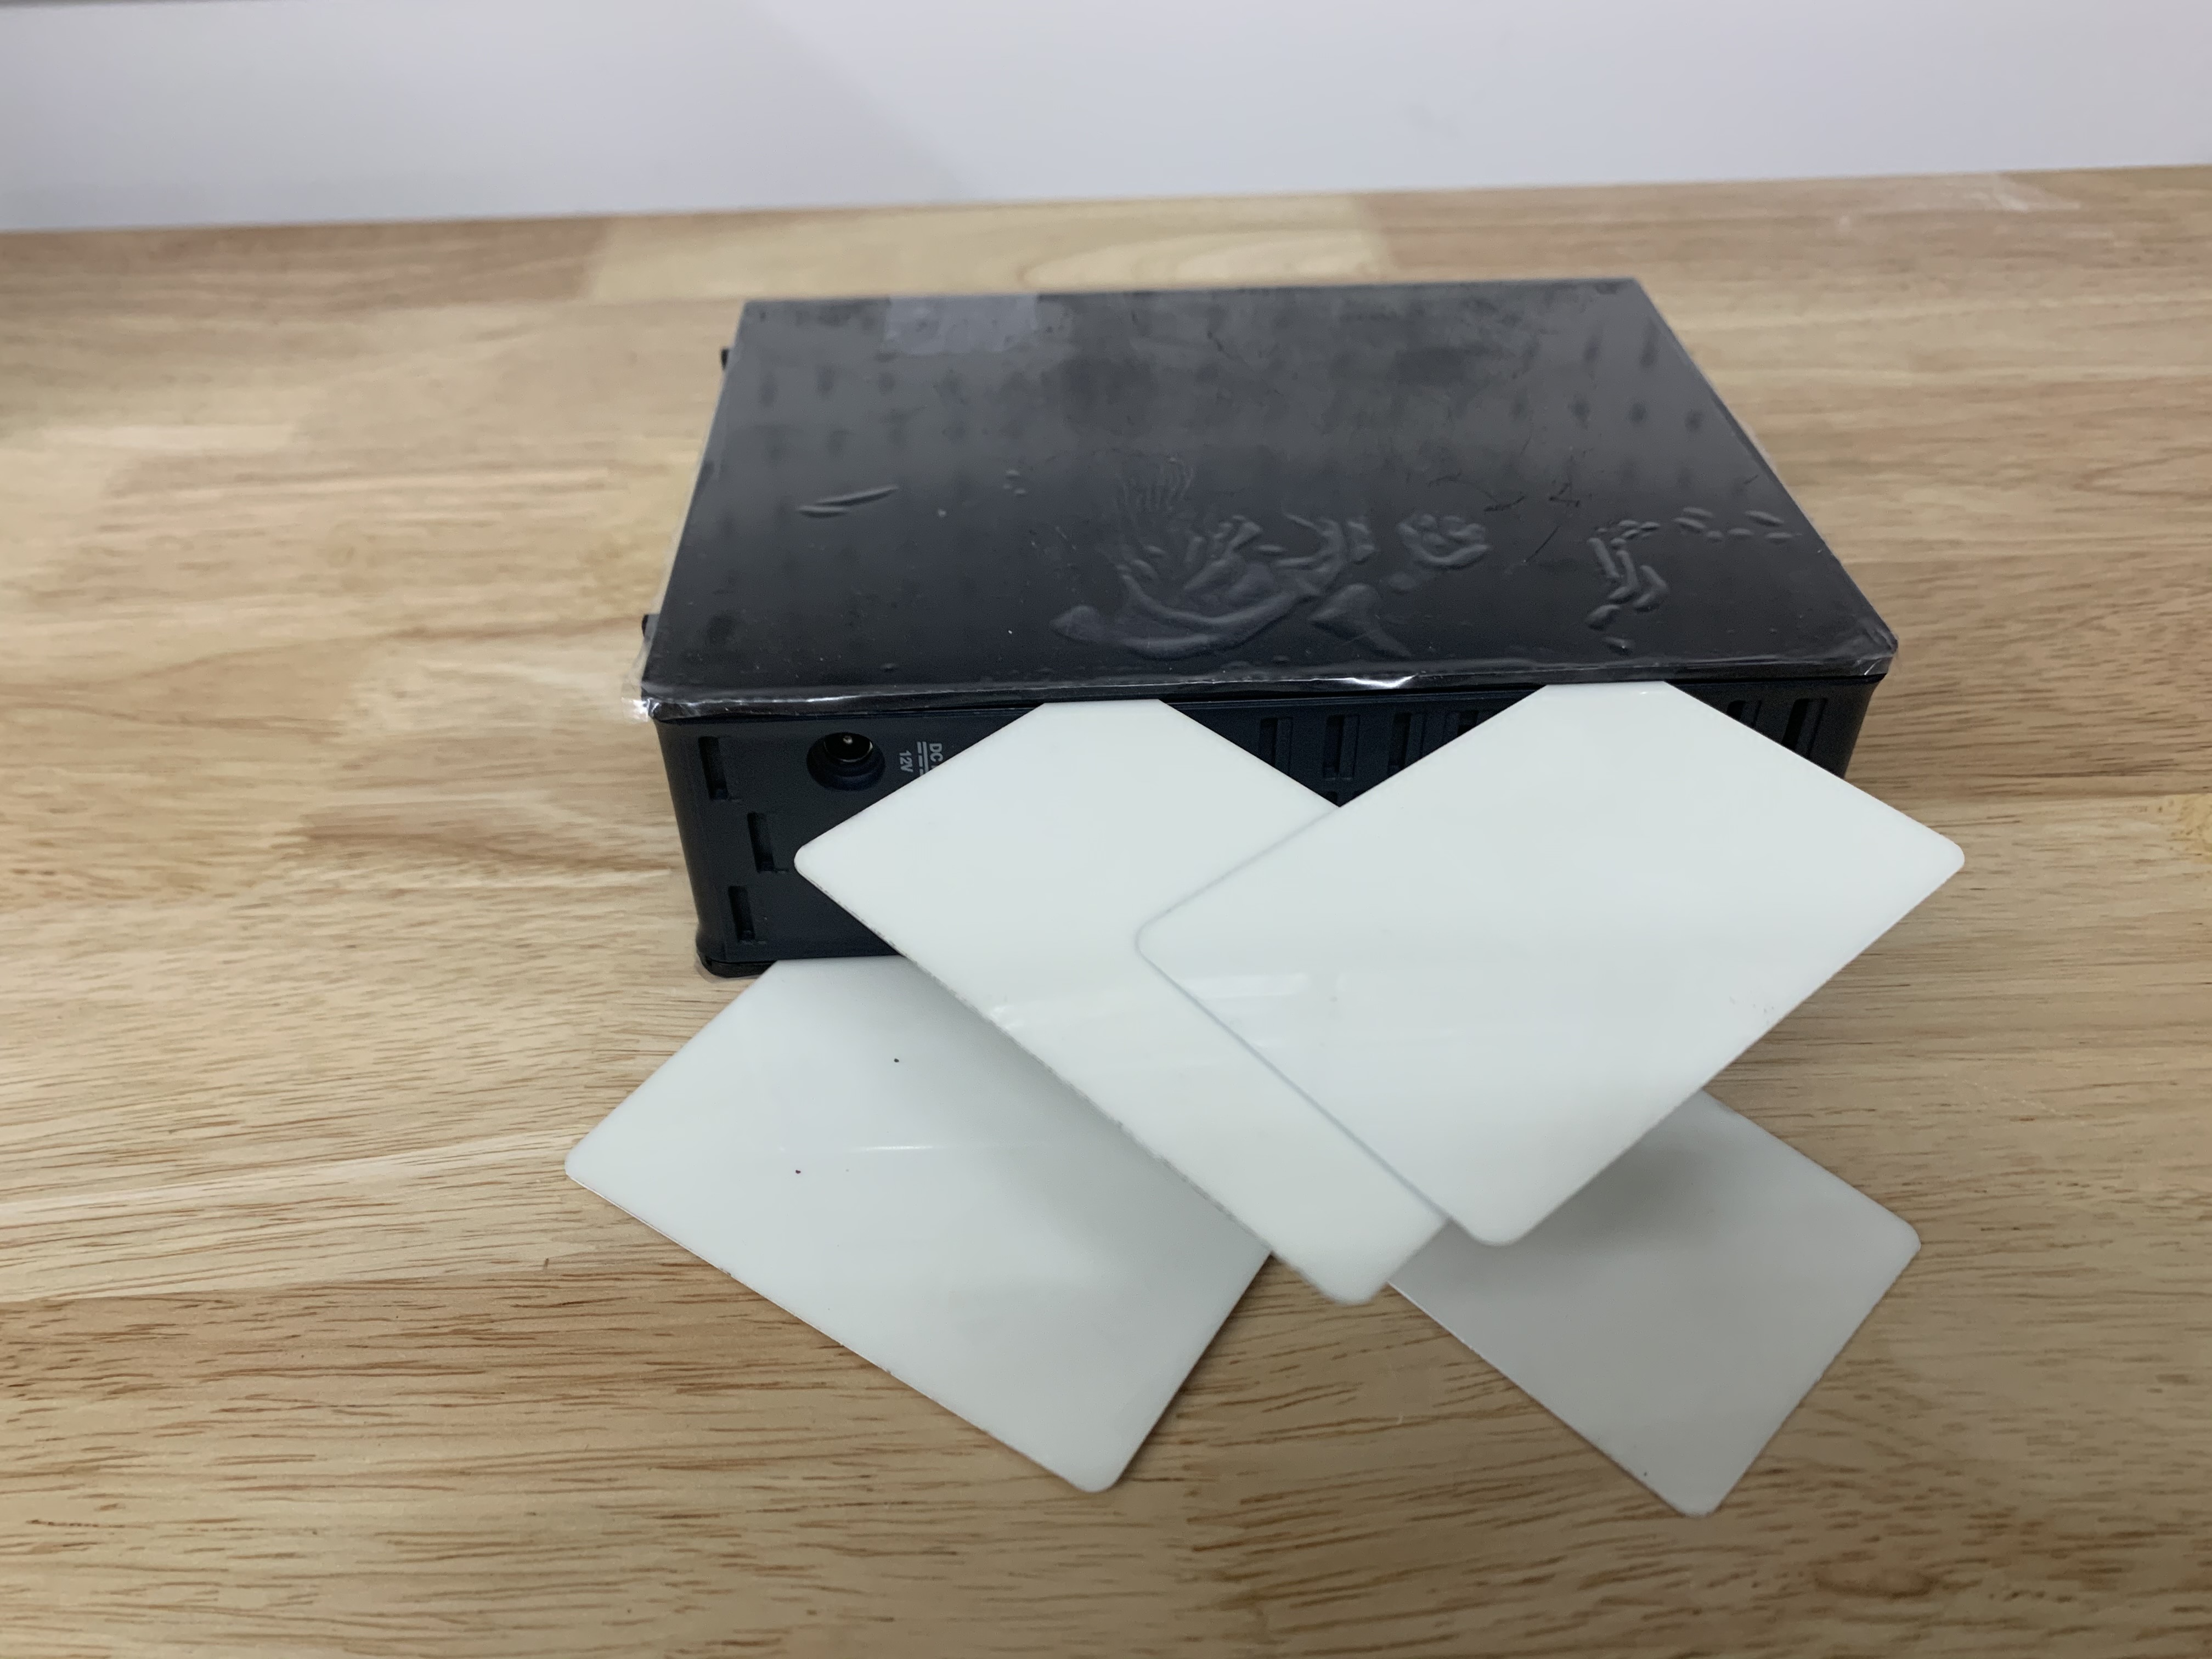 After you get 2 tabs, flip the enclosure on the other side and insert 2 more. Again, pay attention to where the cards are poking out so that you can stand the enclosure on an end.
/blog/09-28-2020/how-to-shuck-a-western-digital-easystore-or-elements-external-drive/
After you get 2 tabs, flip the enclosure on the other side and insert 2 more. Again, pay attention to where the cards are poking out so that you can stand the enclosure on an end.
/blog/09-28-2020/how-to-shuck-a-western-digital-easystore-or-elements-external-drive/
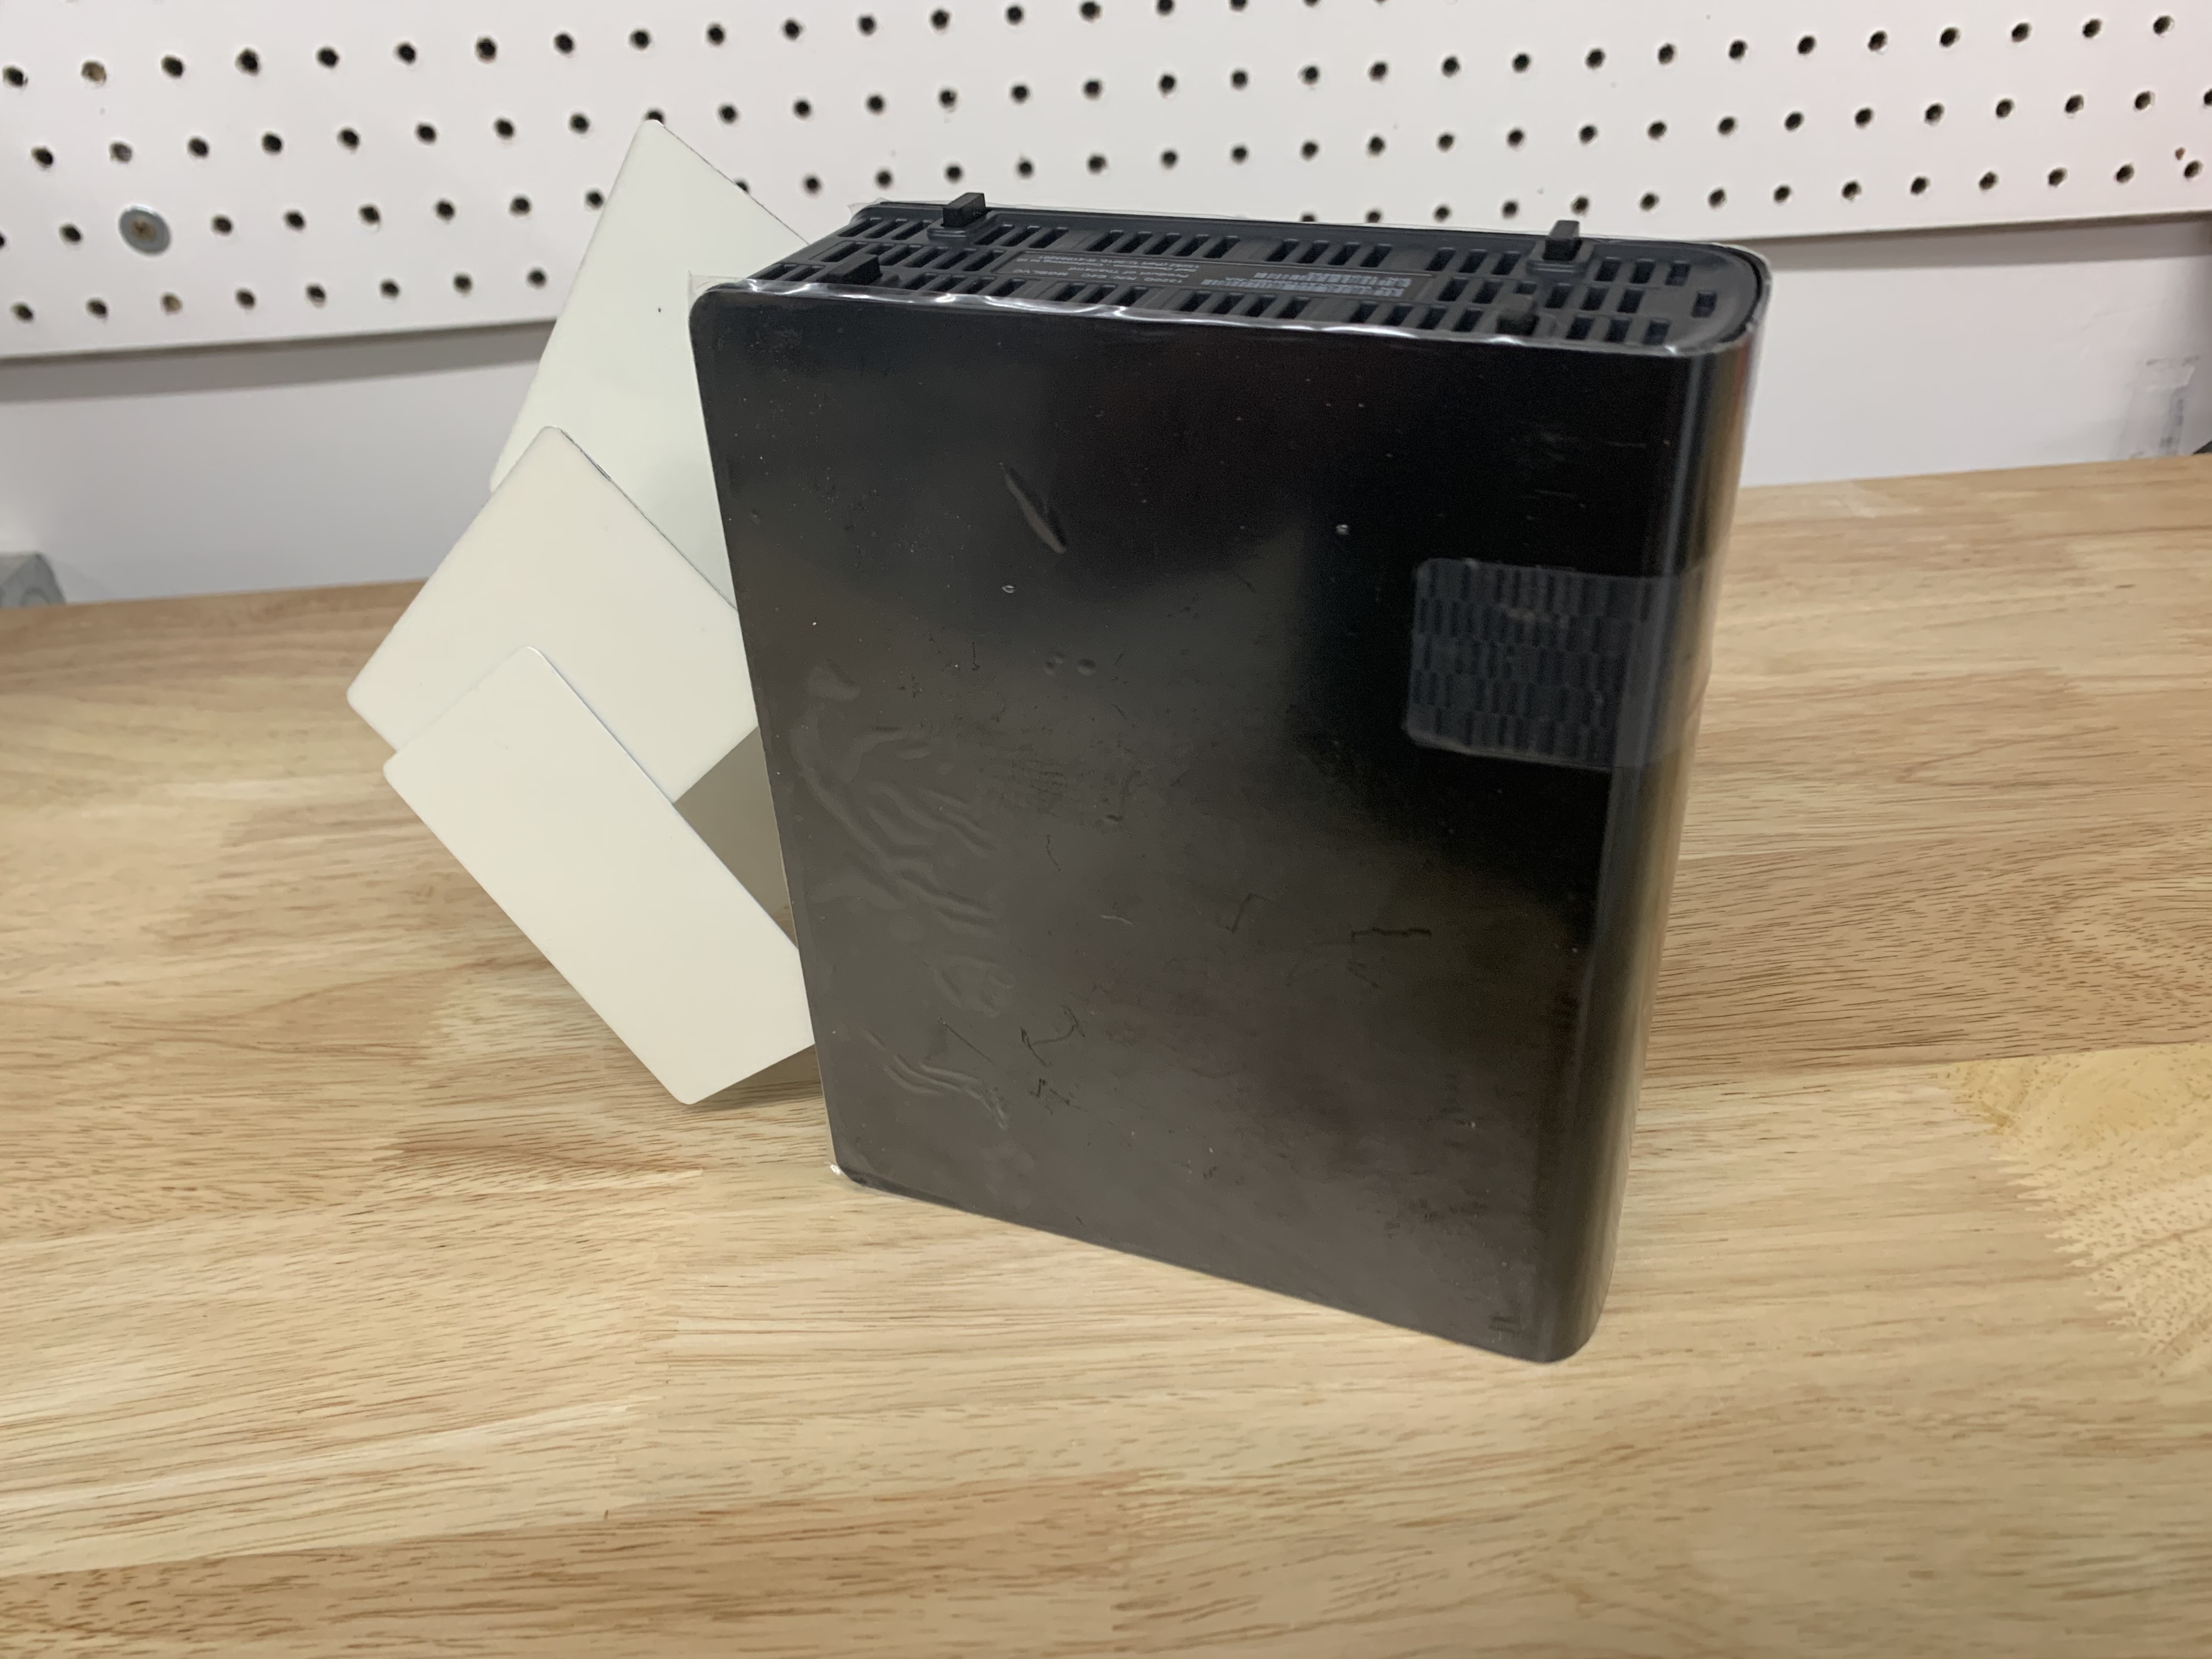 Flip the enclosure on end without moving the cards.
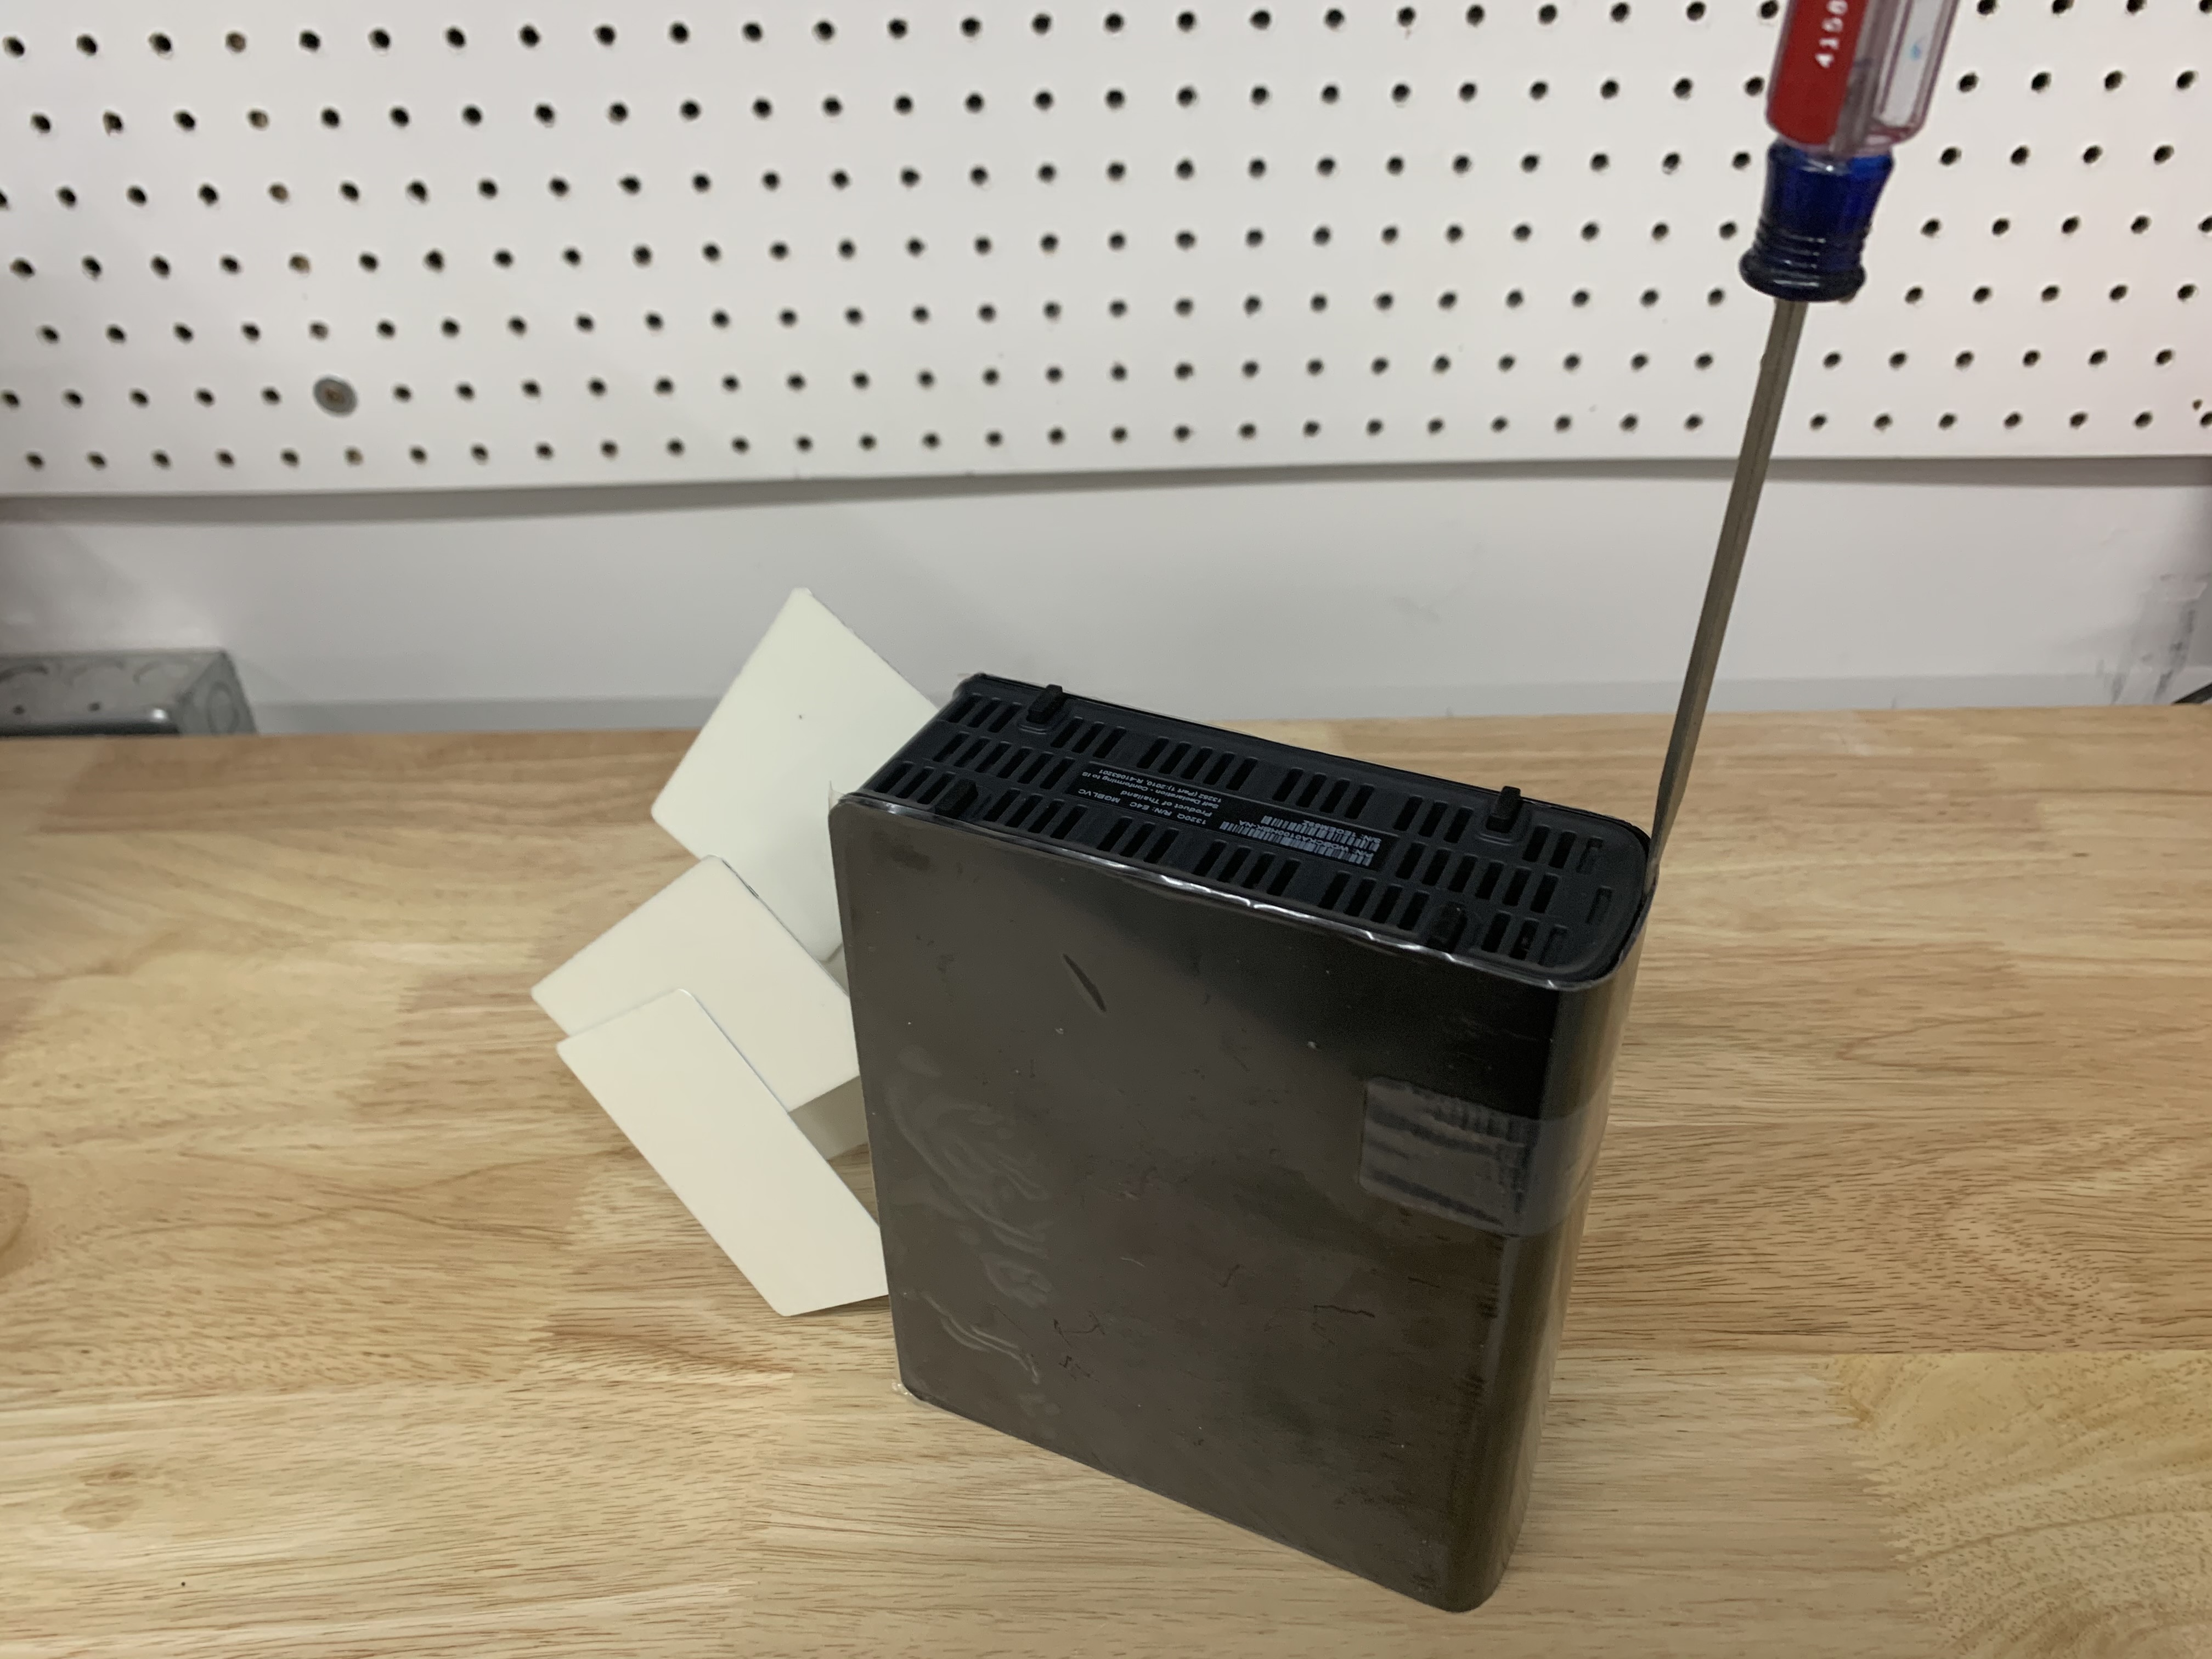 Grab your flat head screwdriver and insert it in the middle of the case. Give it a little pry. If you have all the tabs pressed in, this should be pretty easy. If you feel a lot of resistance, go back and fix your cards/tabs.
 The cards will start to fall out after you pry. That is fine. All we need to do is get the tab over retaining notch.
 You should now be able to slide the case off by hand now. There is nothing more holding onto it.
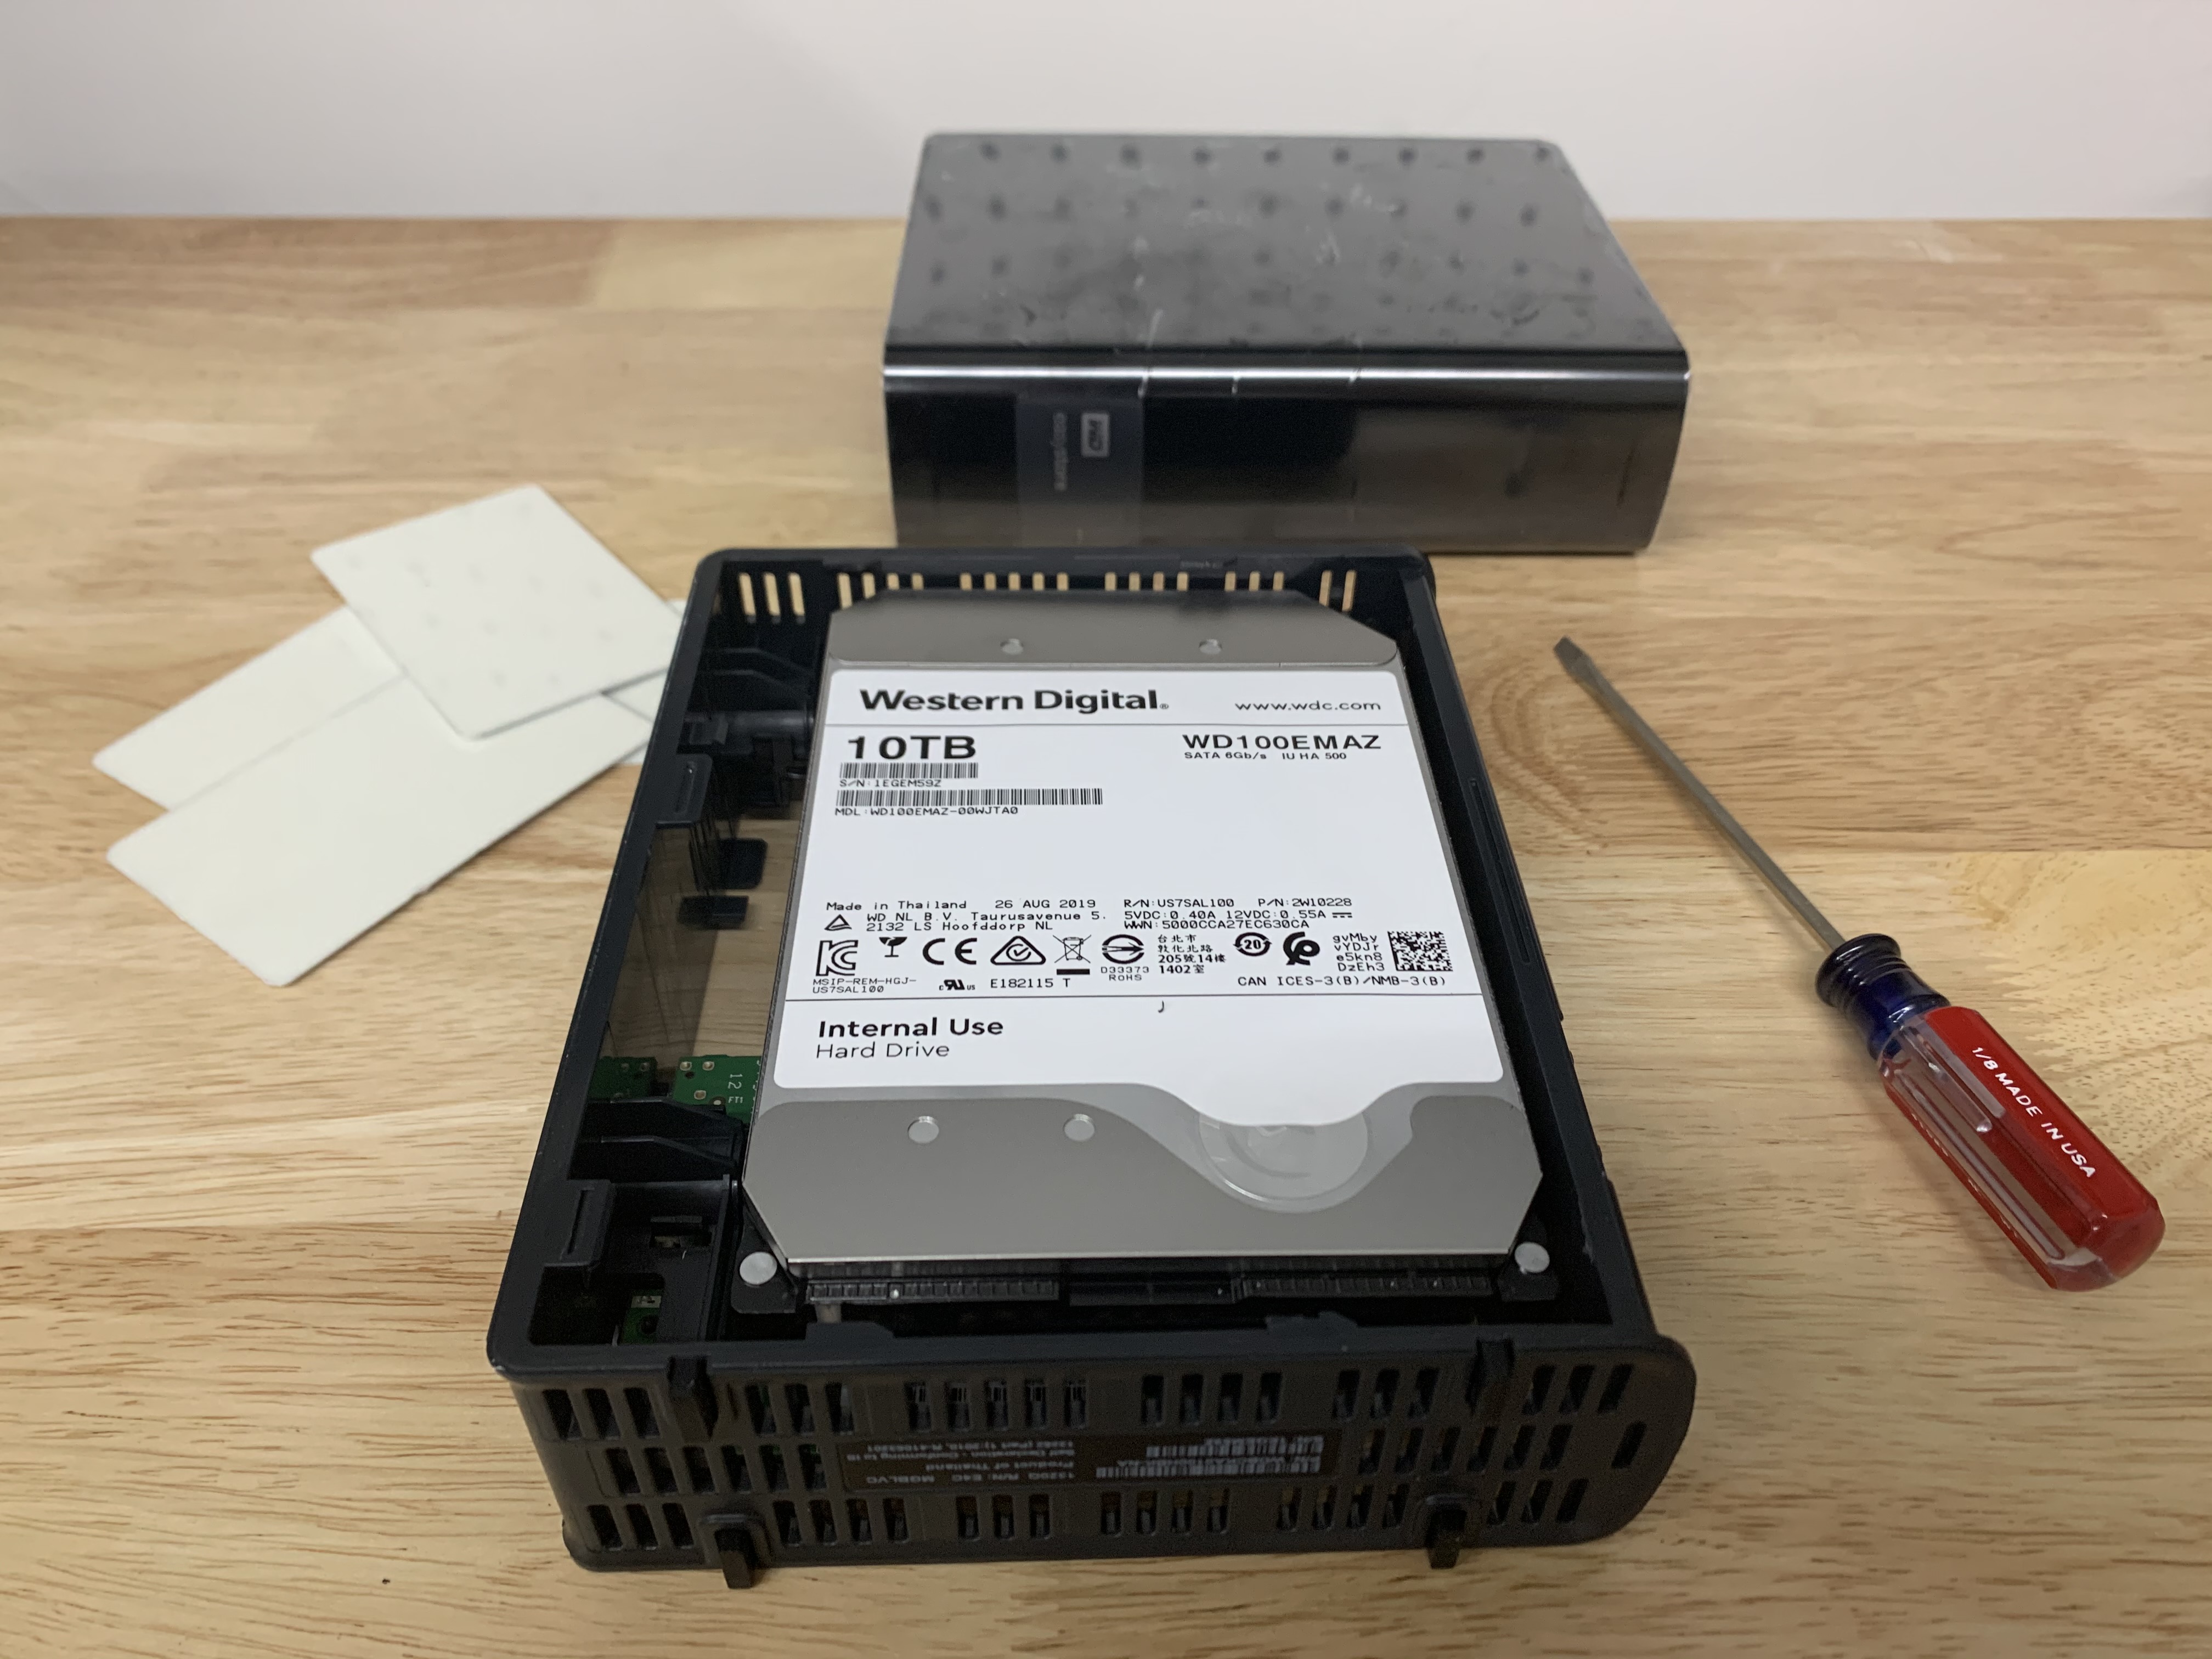 Now we can see our WD White Label drive! Let’s get it out of there.
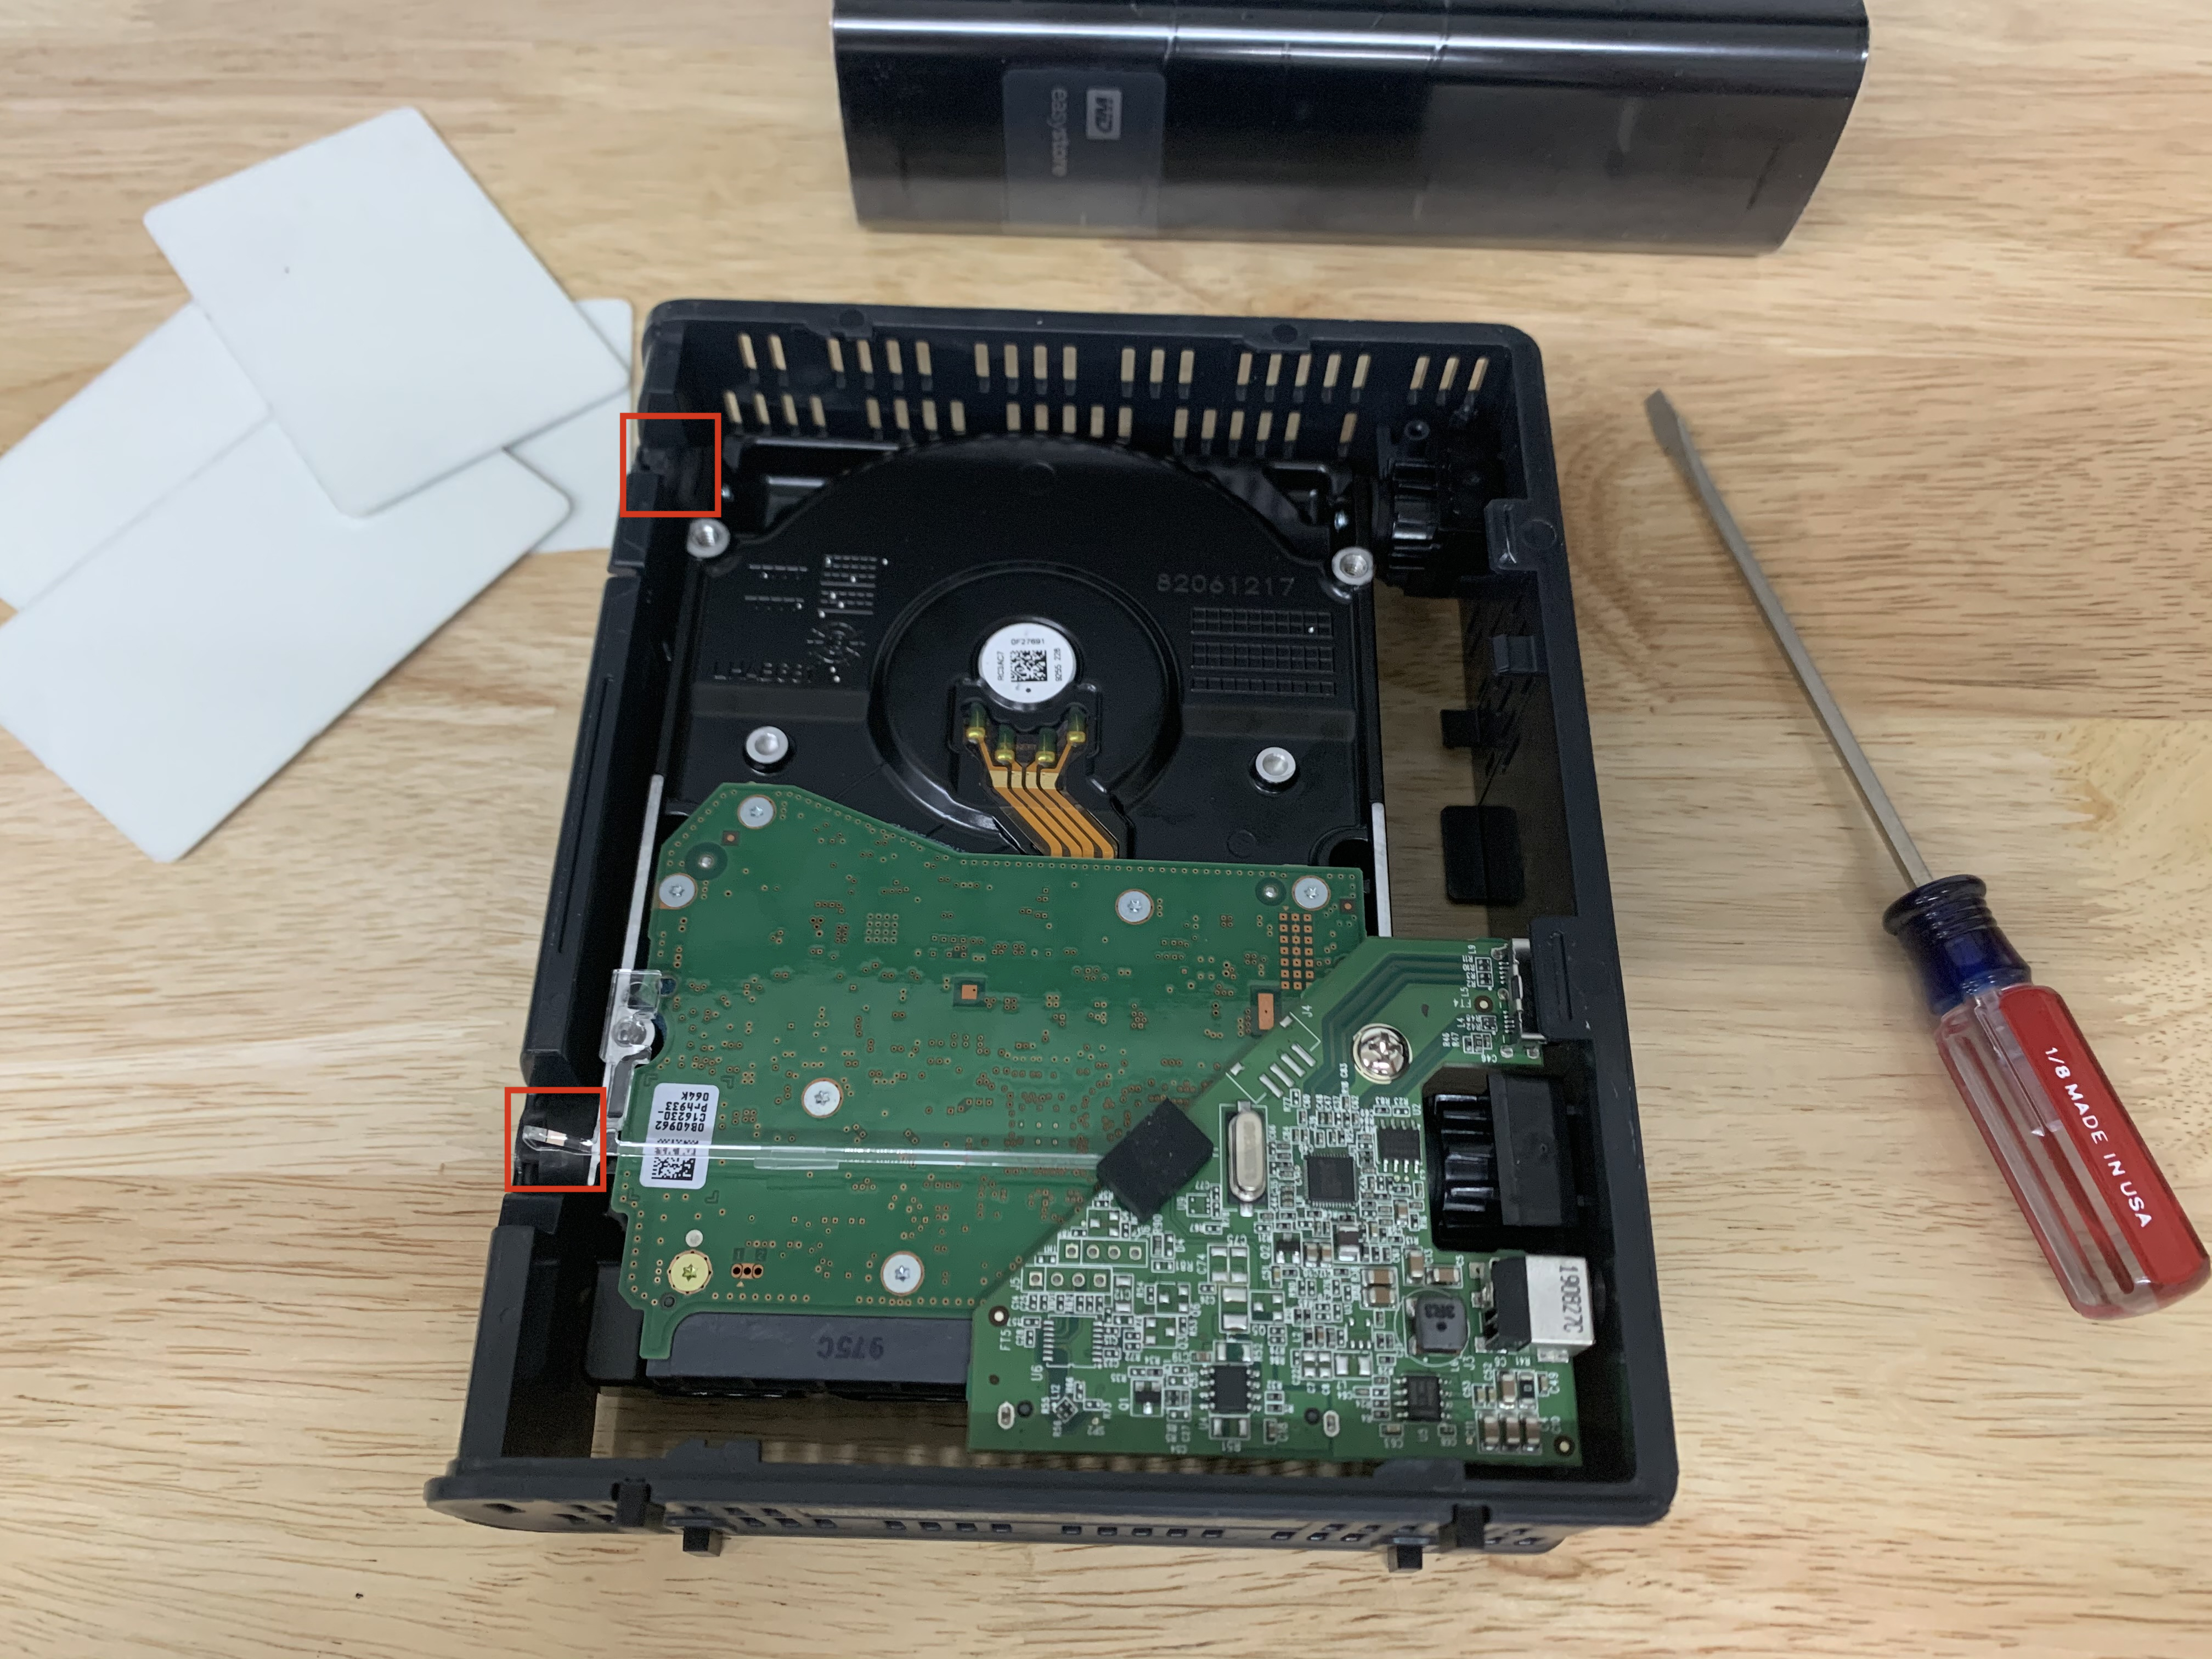 Flip your drive over so you can see the circuit board. The drive is resting in the frame with just rubber feet on each side.
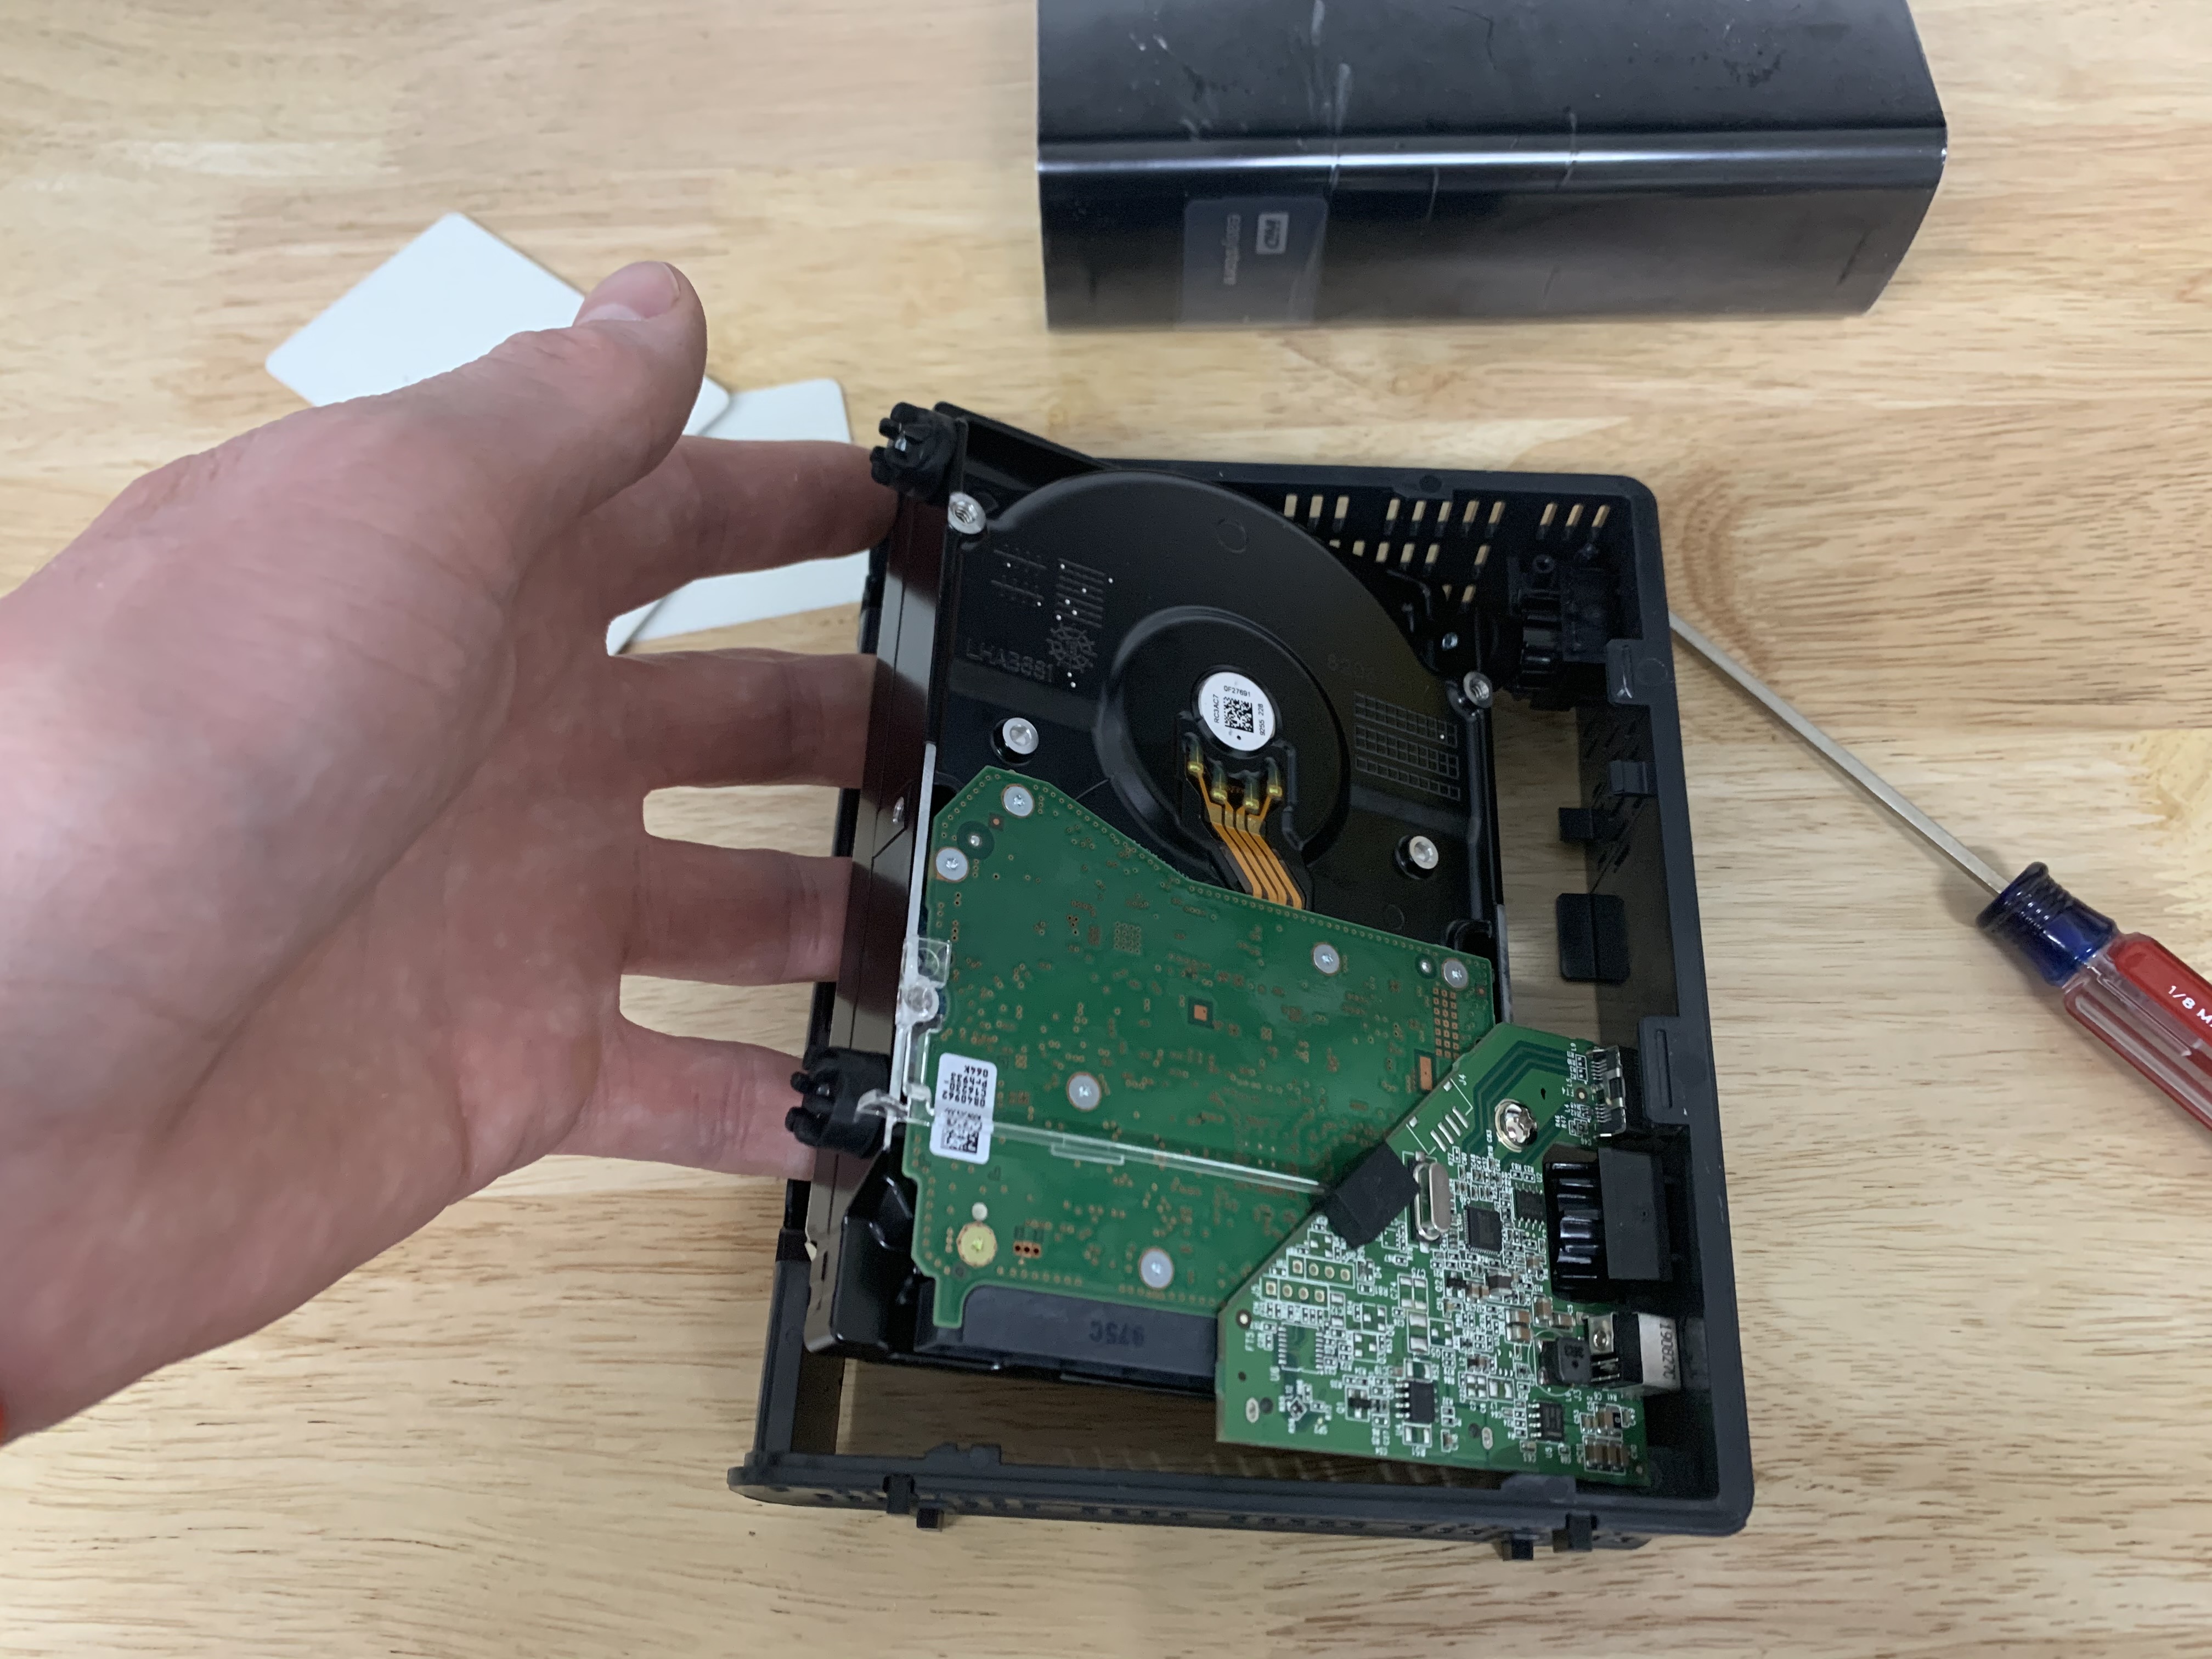 Lift up on the left side and you’ll be able to pull the right side out and to the left.
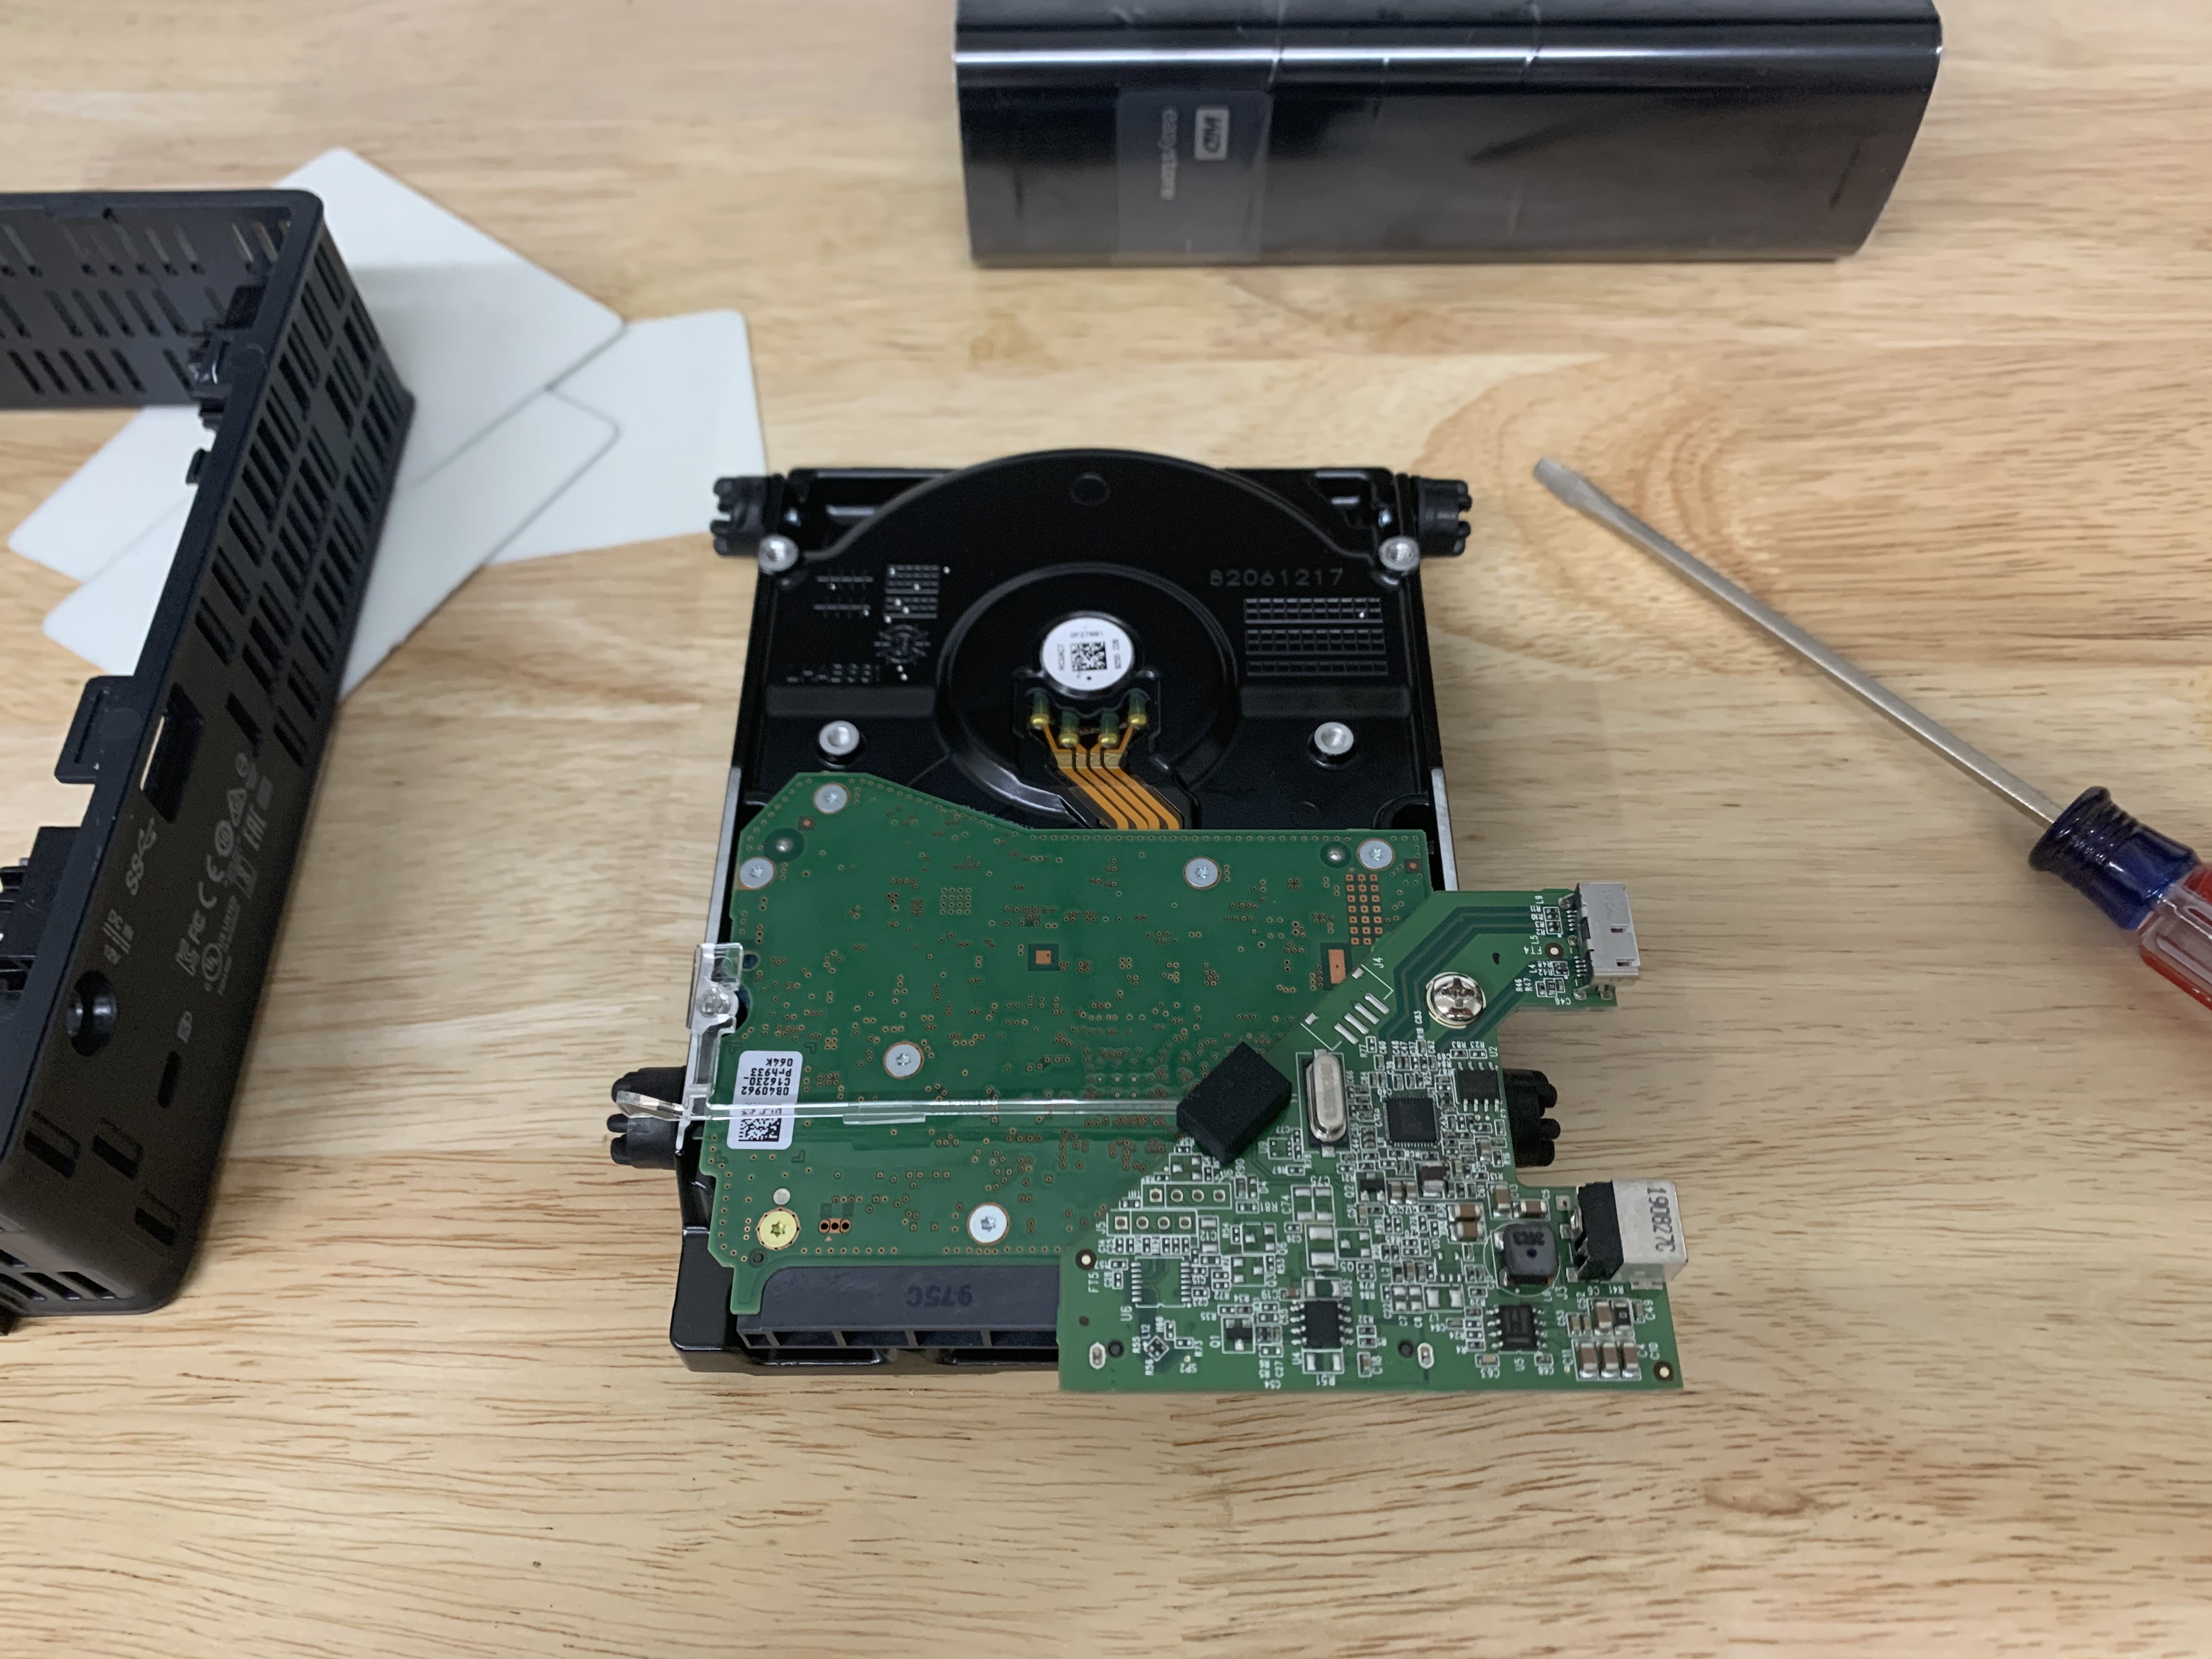 Now we are left with the raw drive, a circuit board and a few mounting pieces.
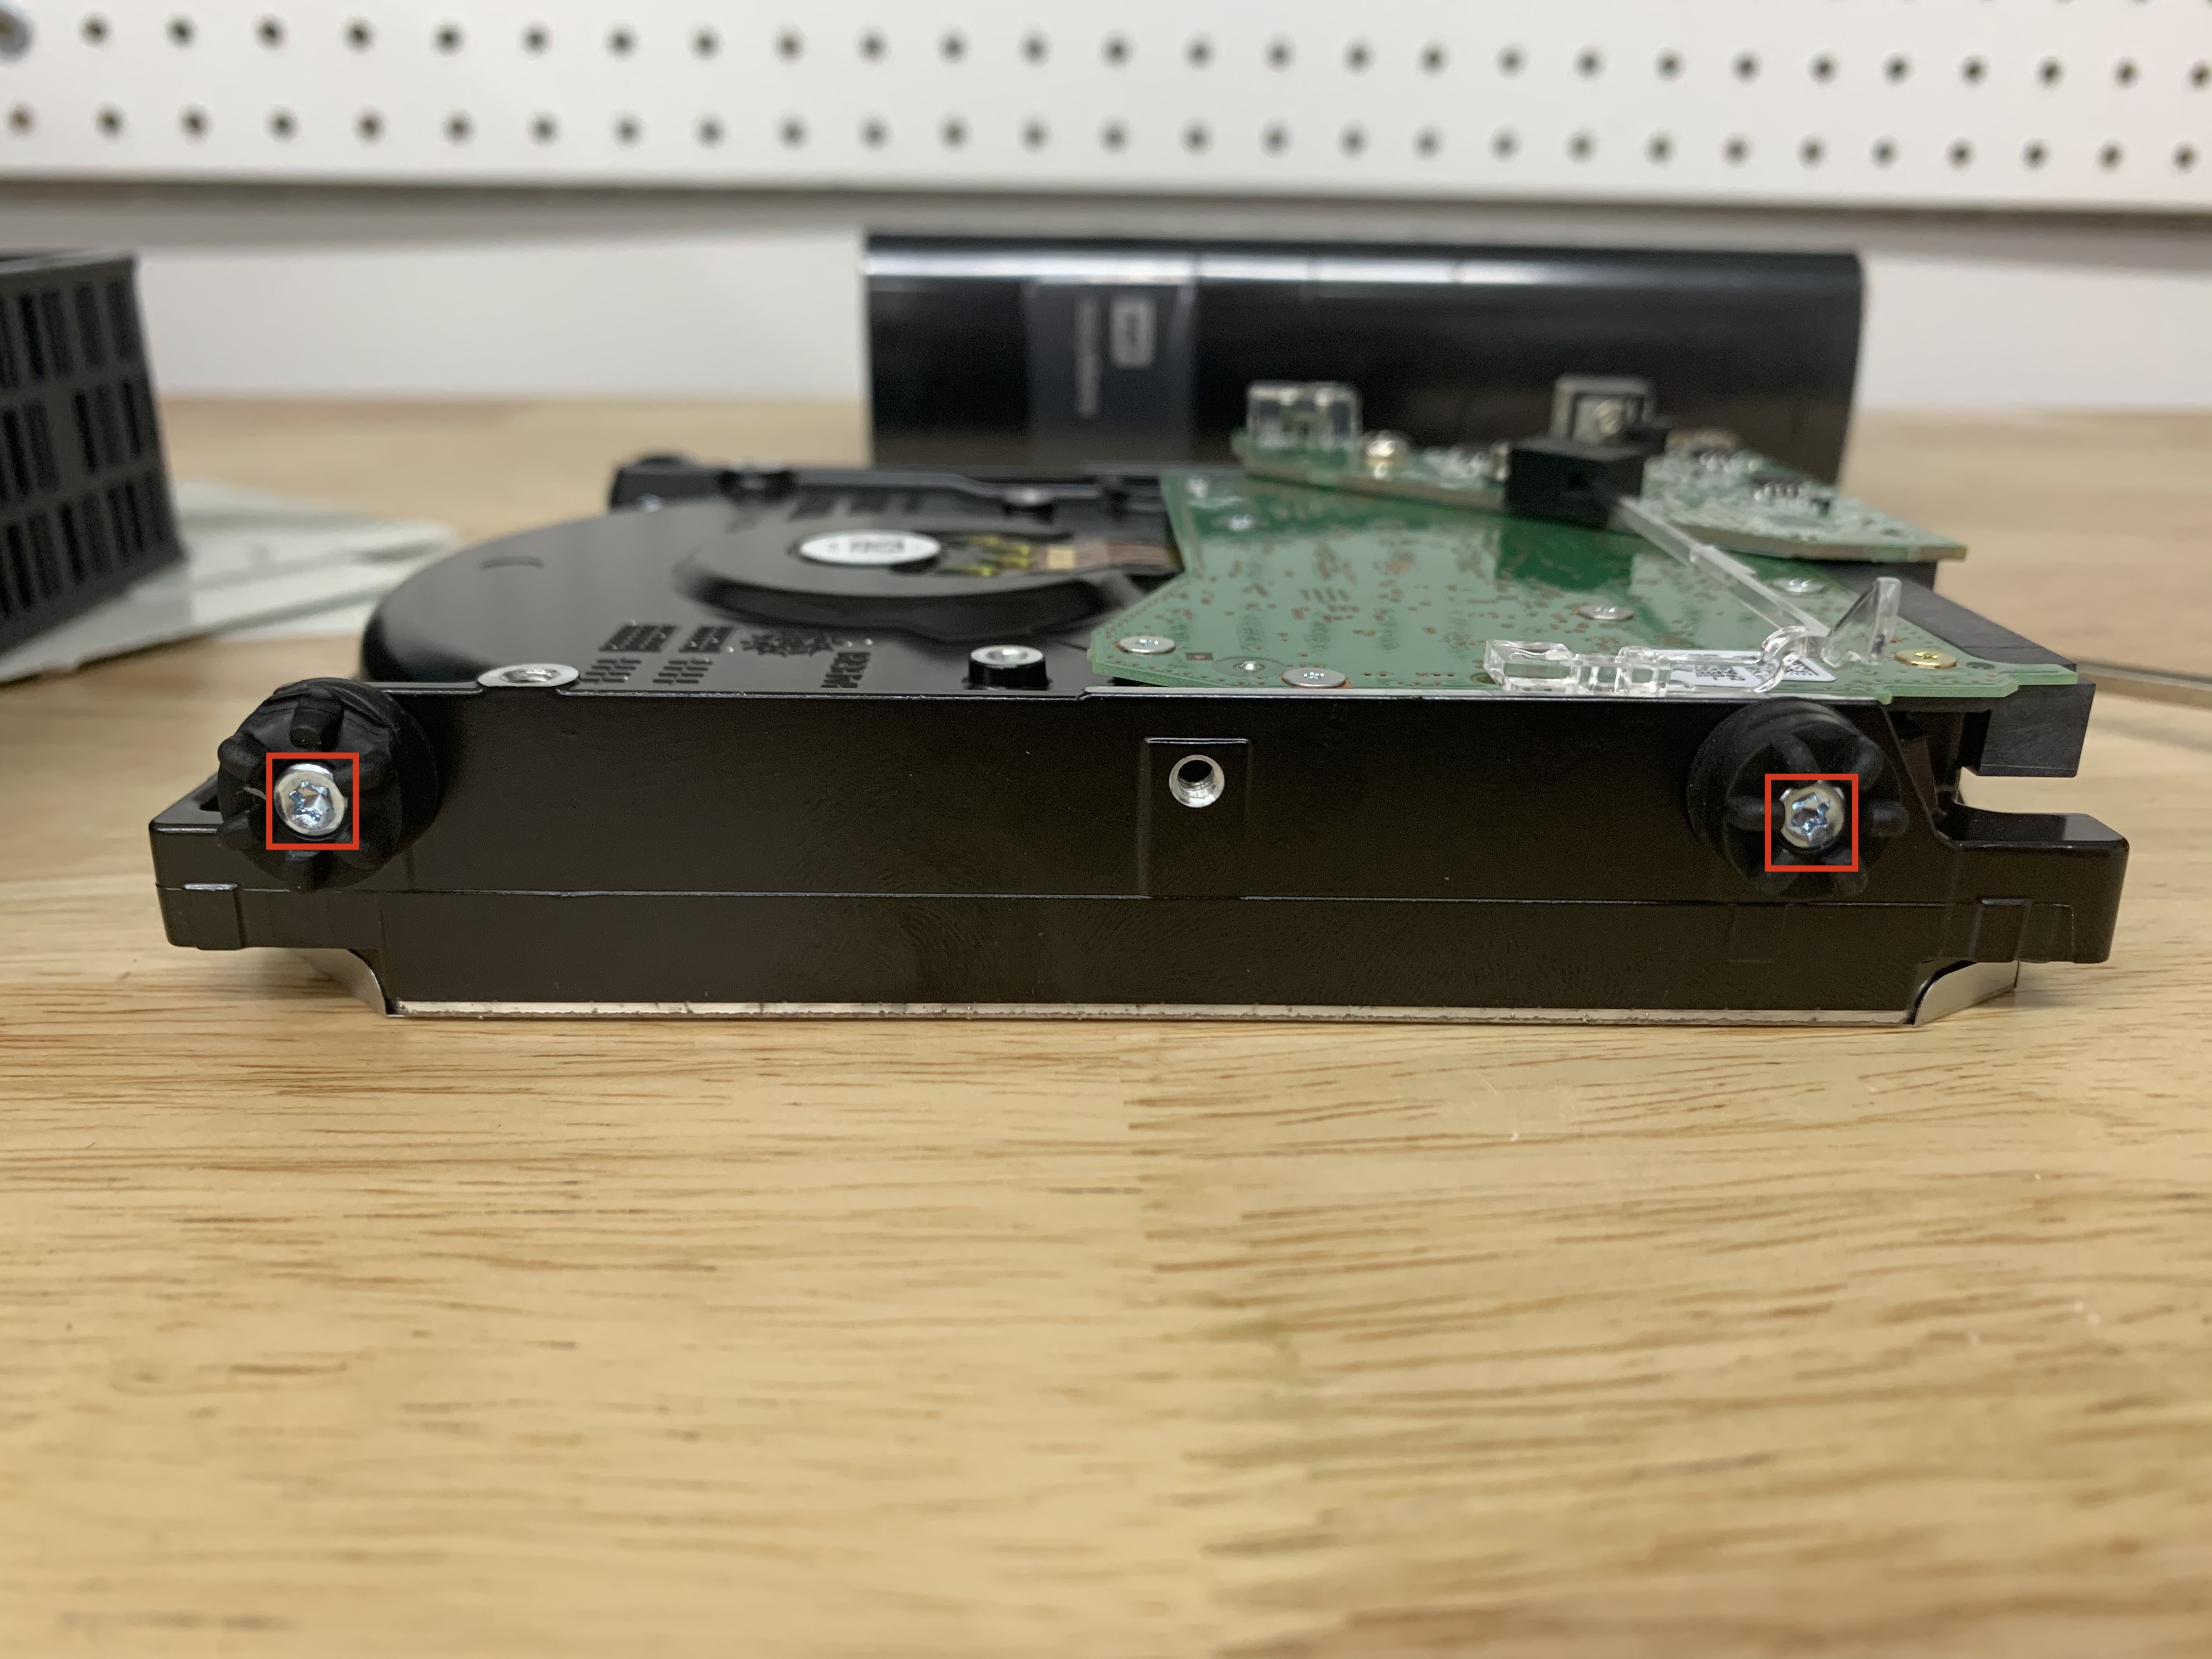 Use your Star Key Wrench Set to remove the all 4 rubber feet.
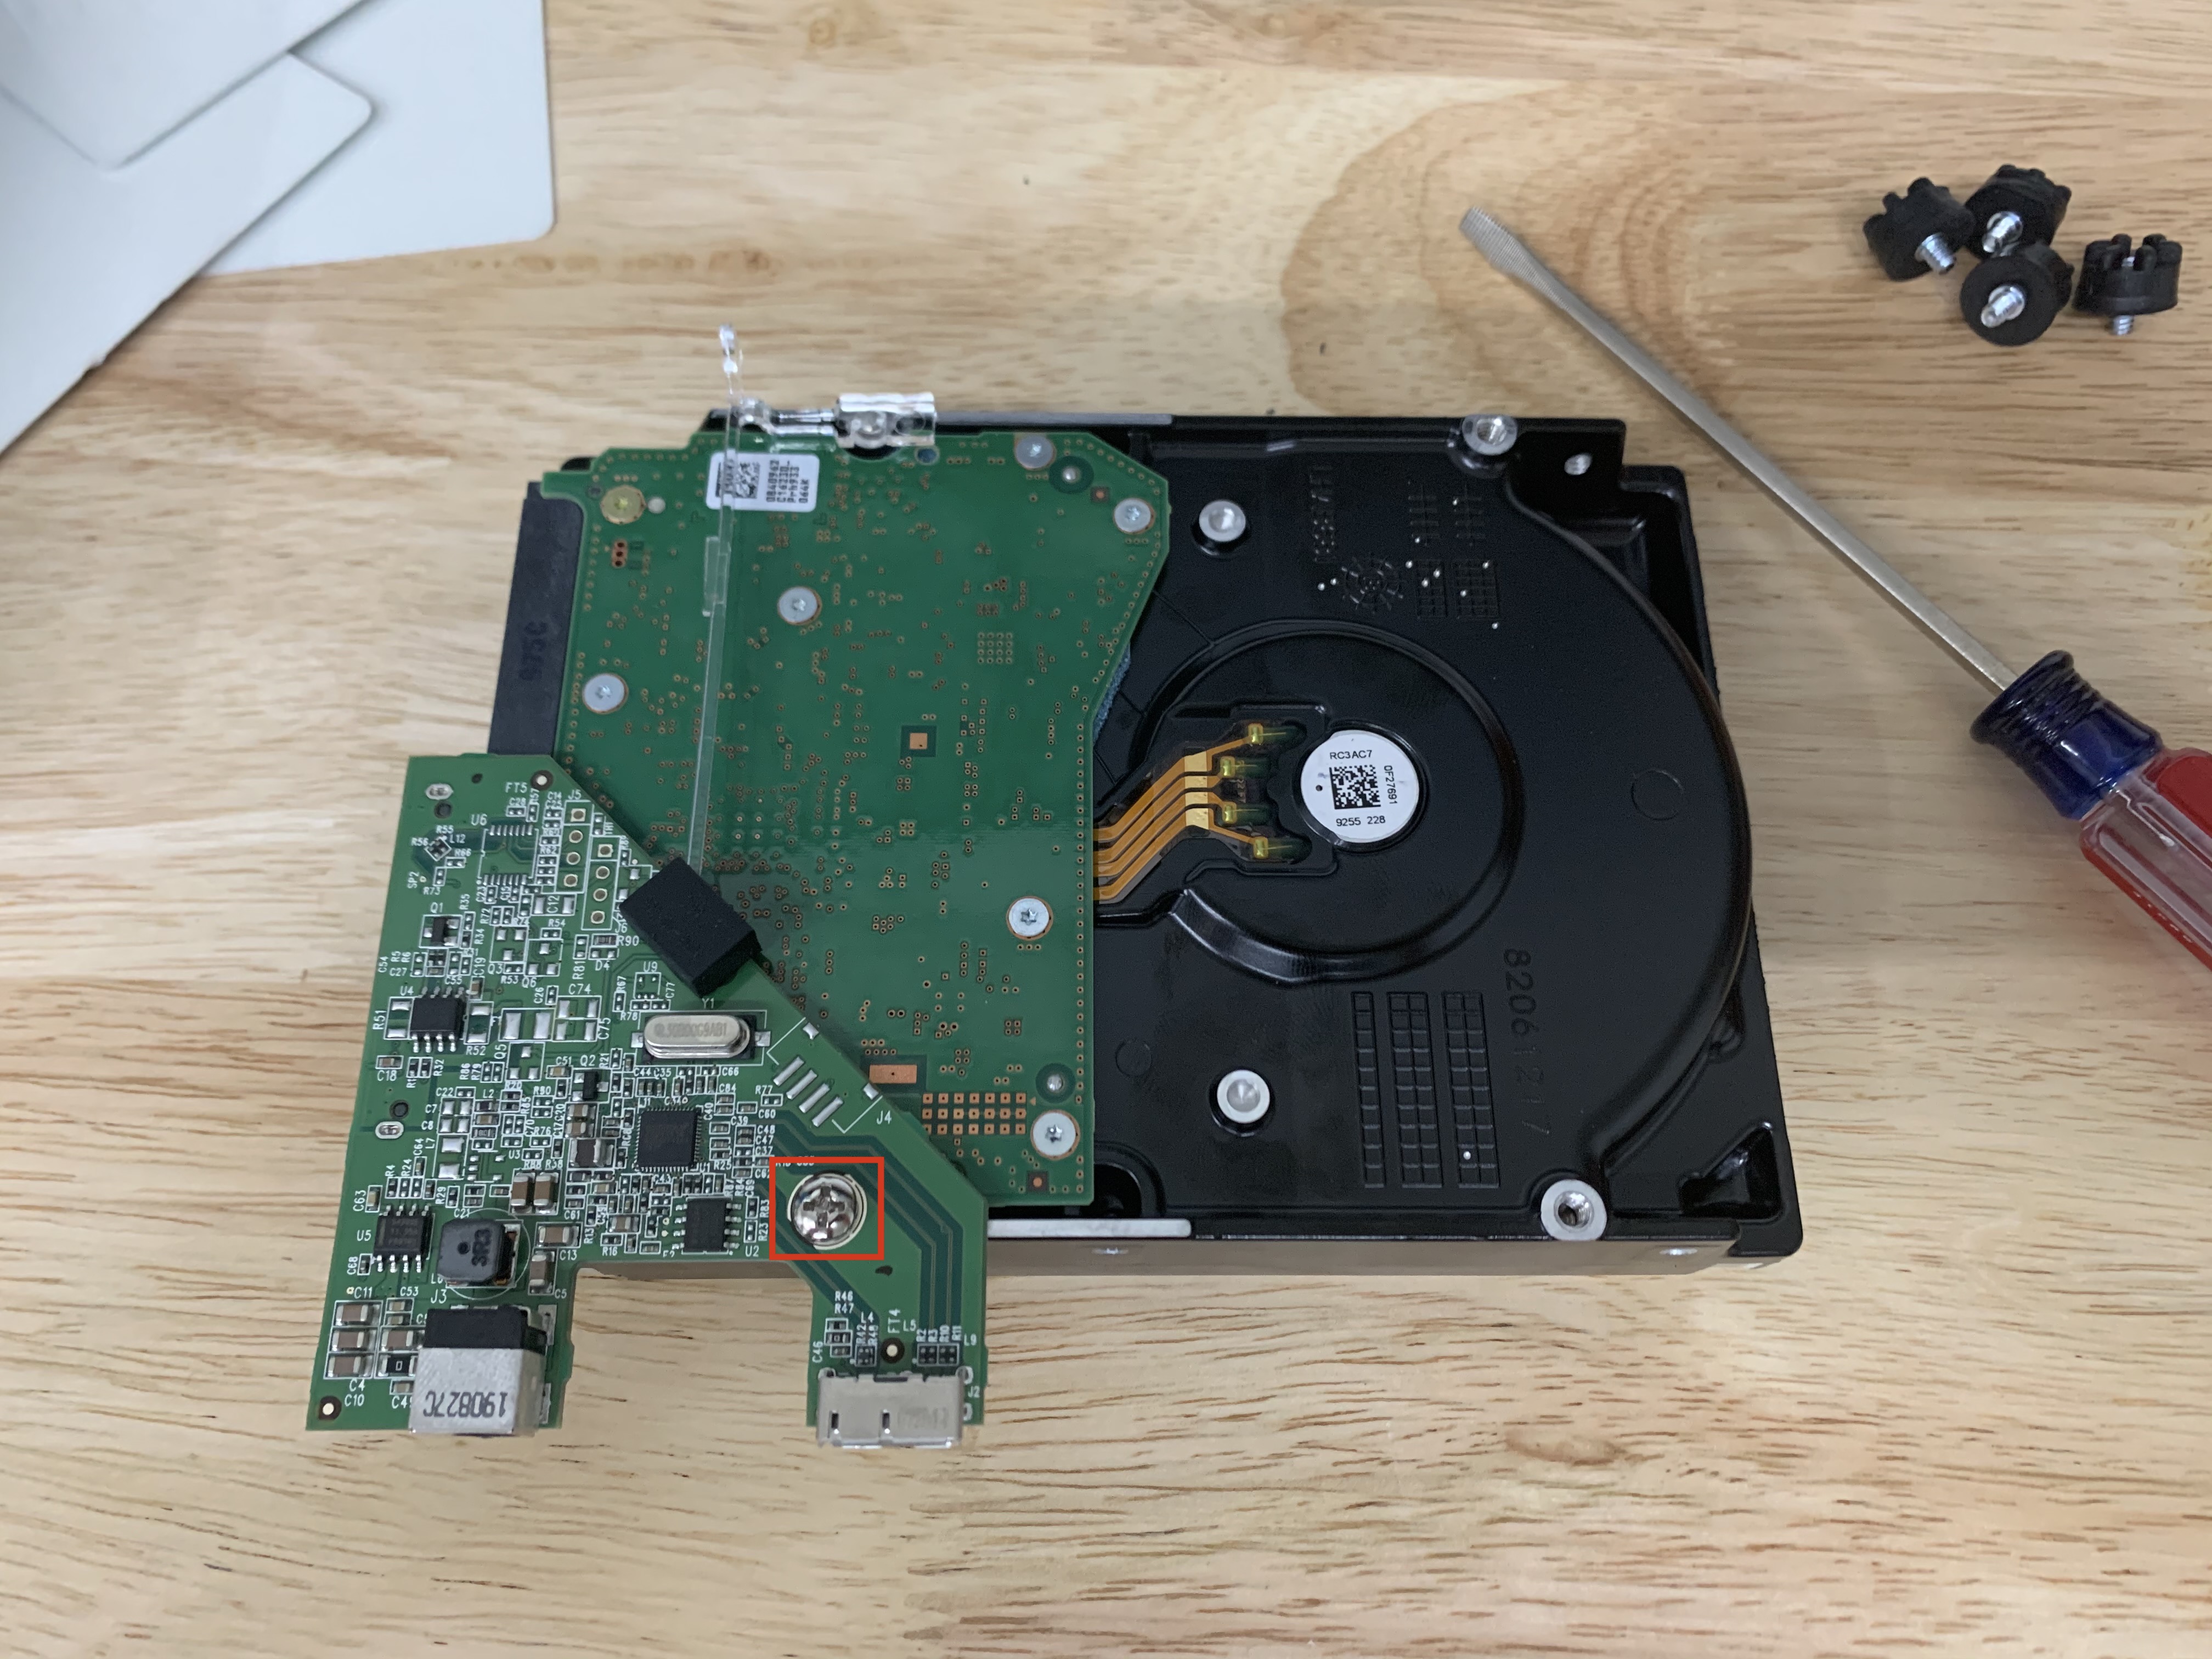 Use a Phillips screw driver to remove the screw holding the controller board down. Do not pull it up yet!
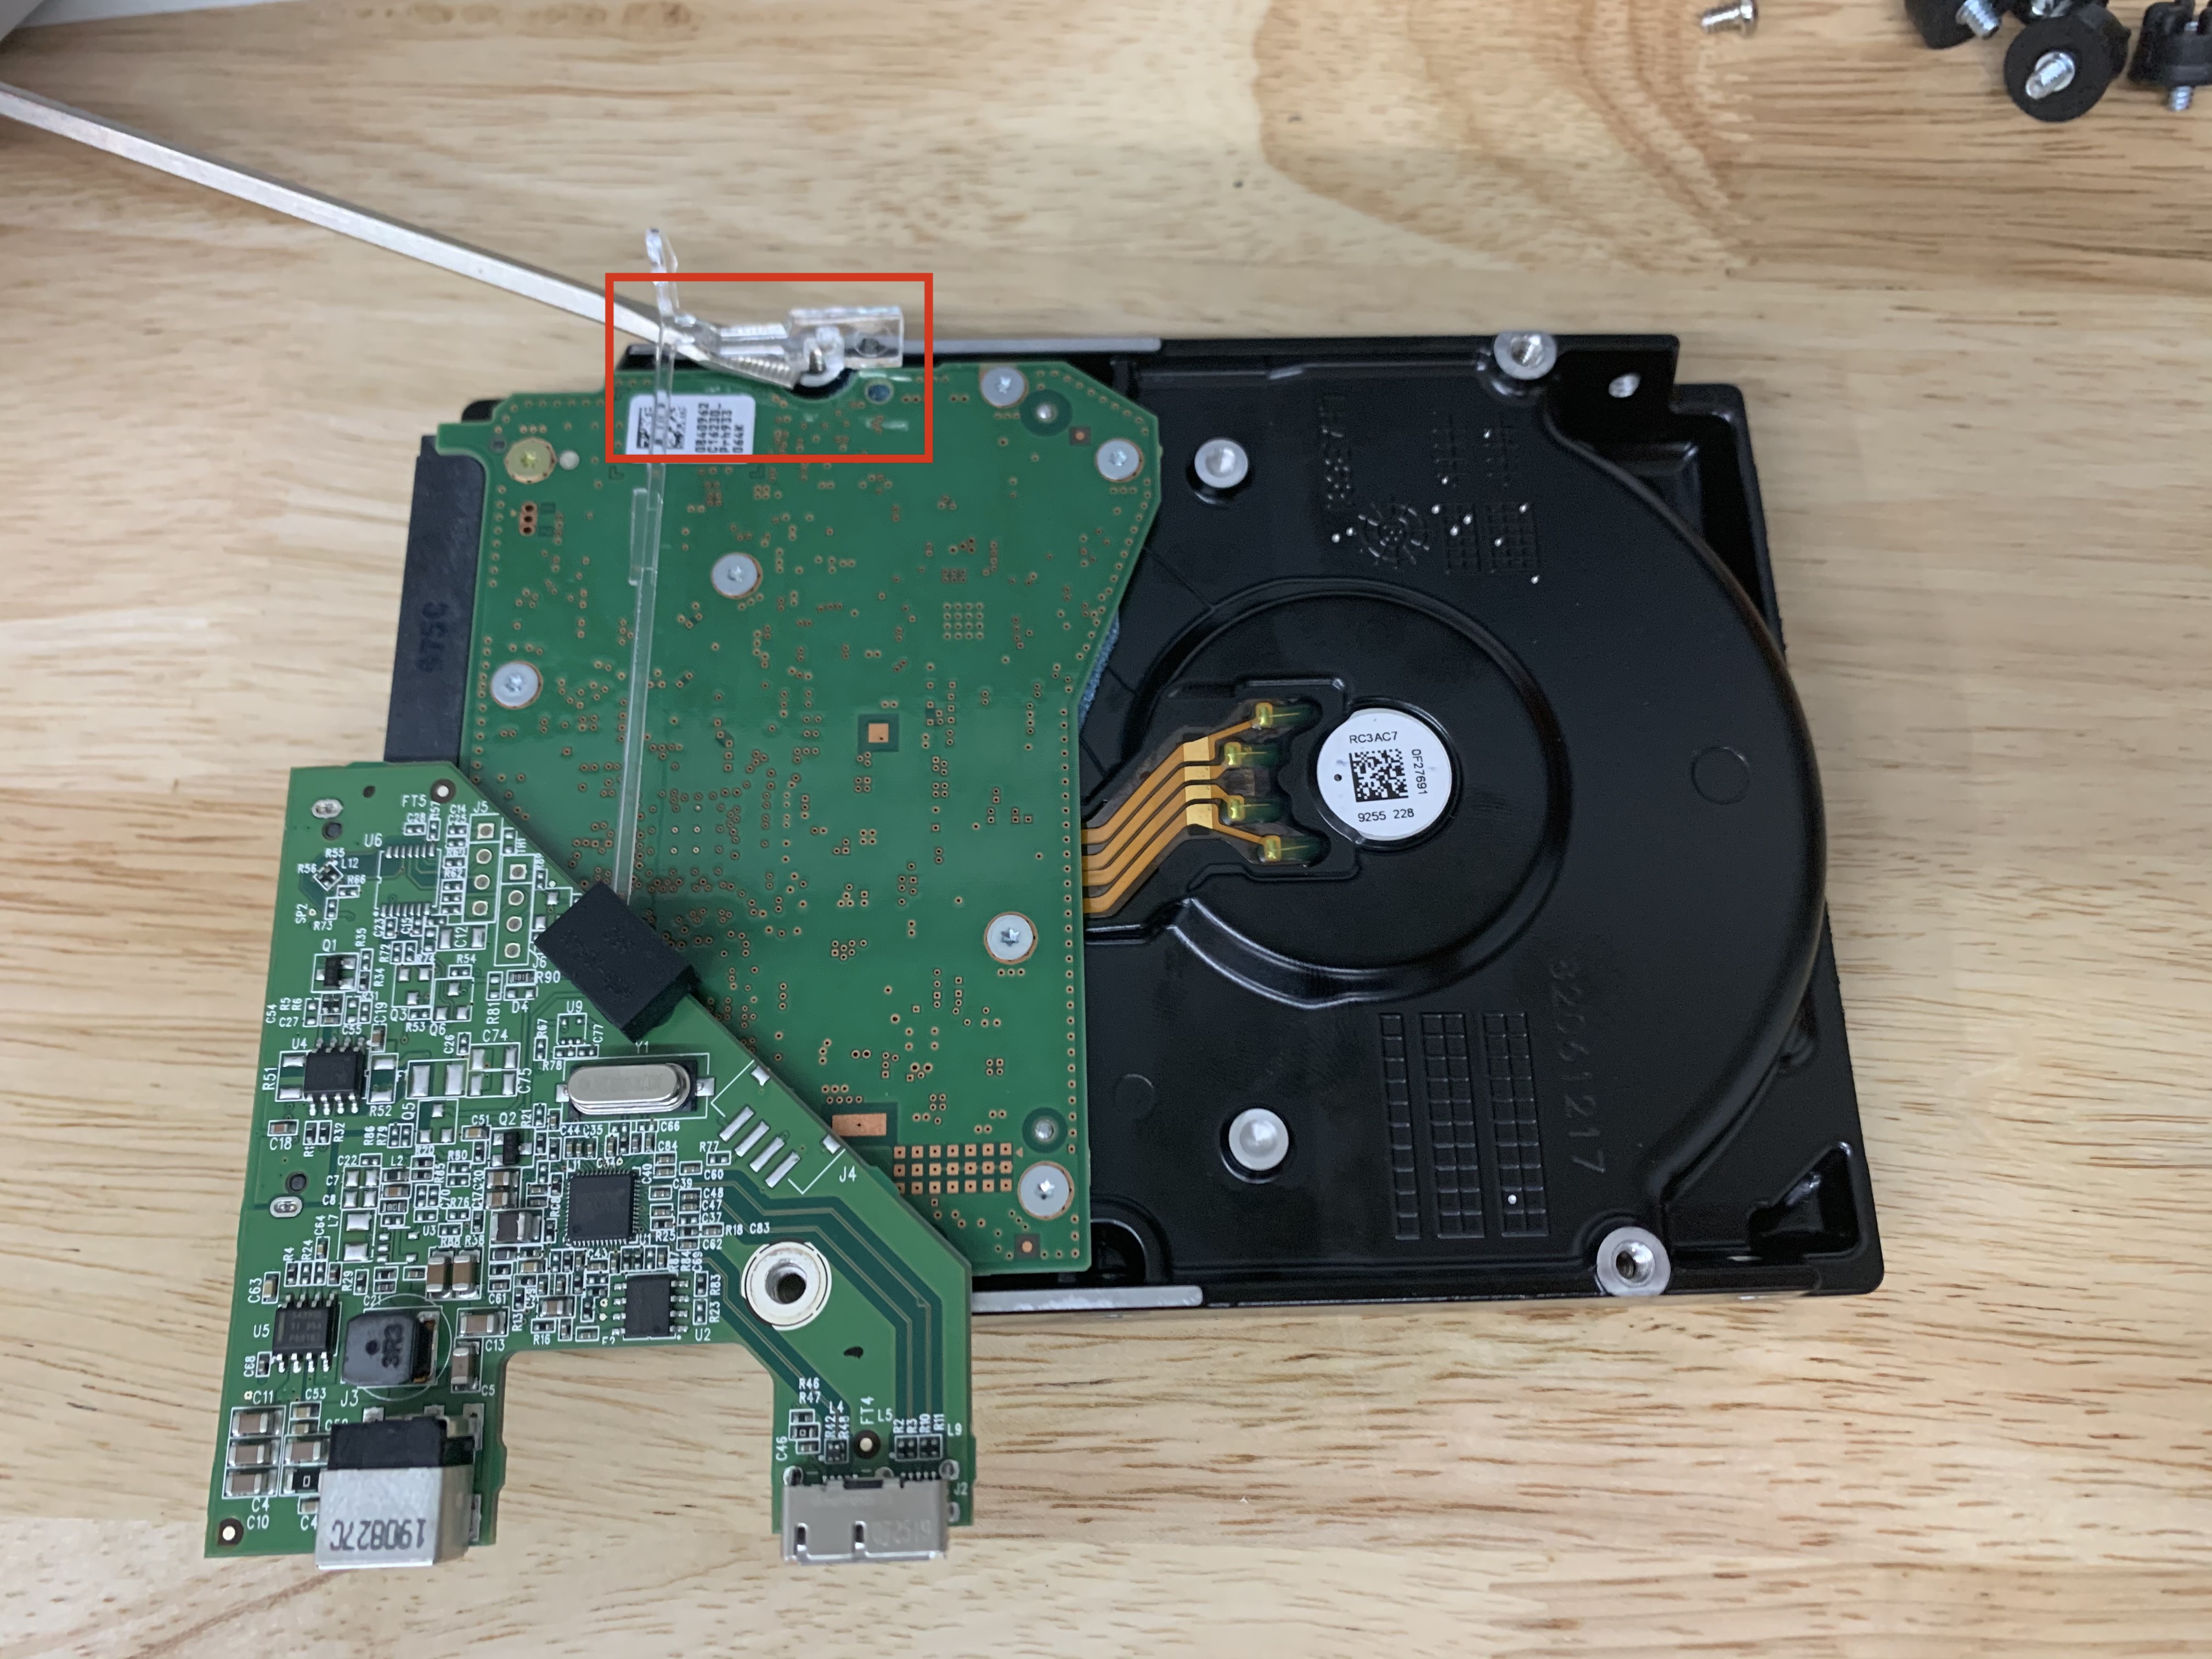 Take a small flathead screwdriver and gently pry the plastic piece out of the hole it is sitting in.
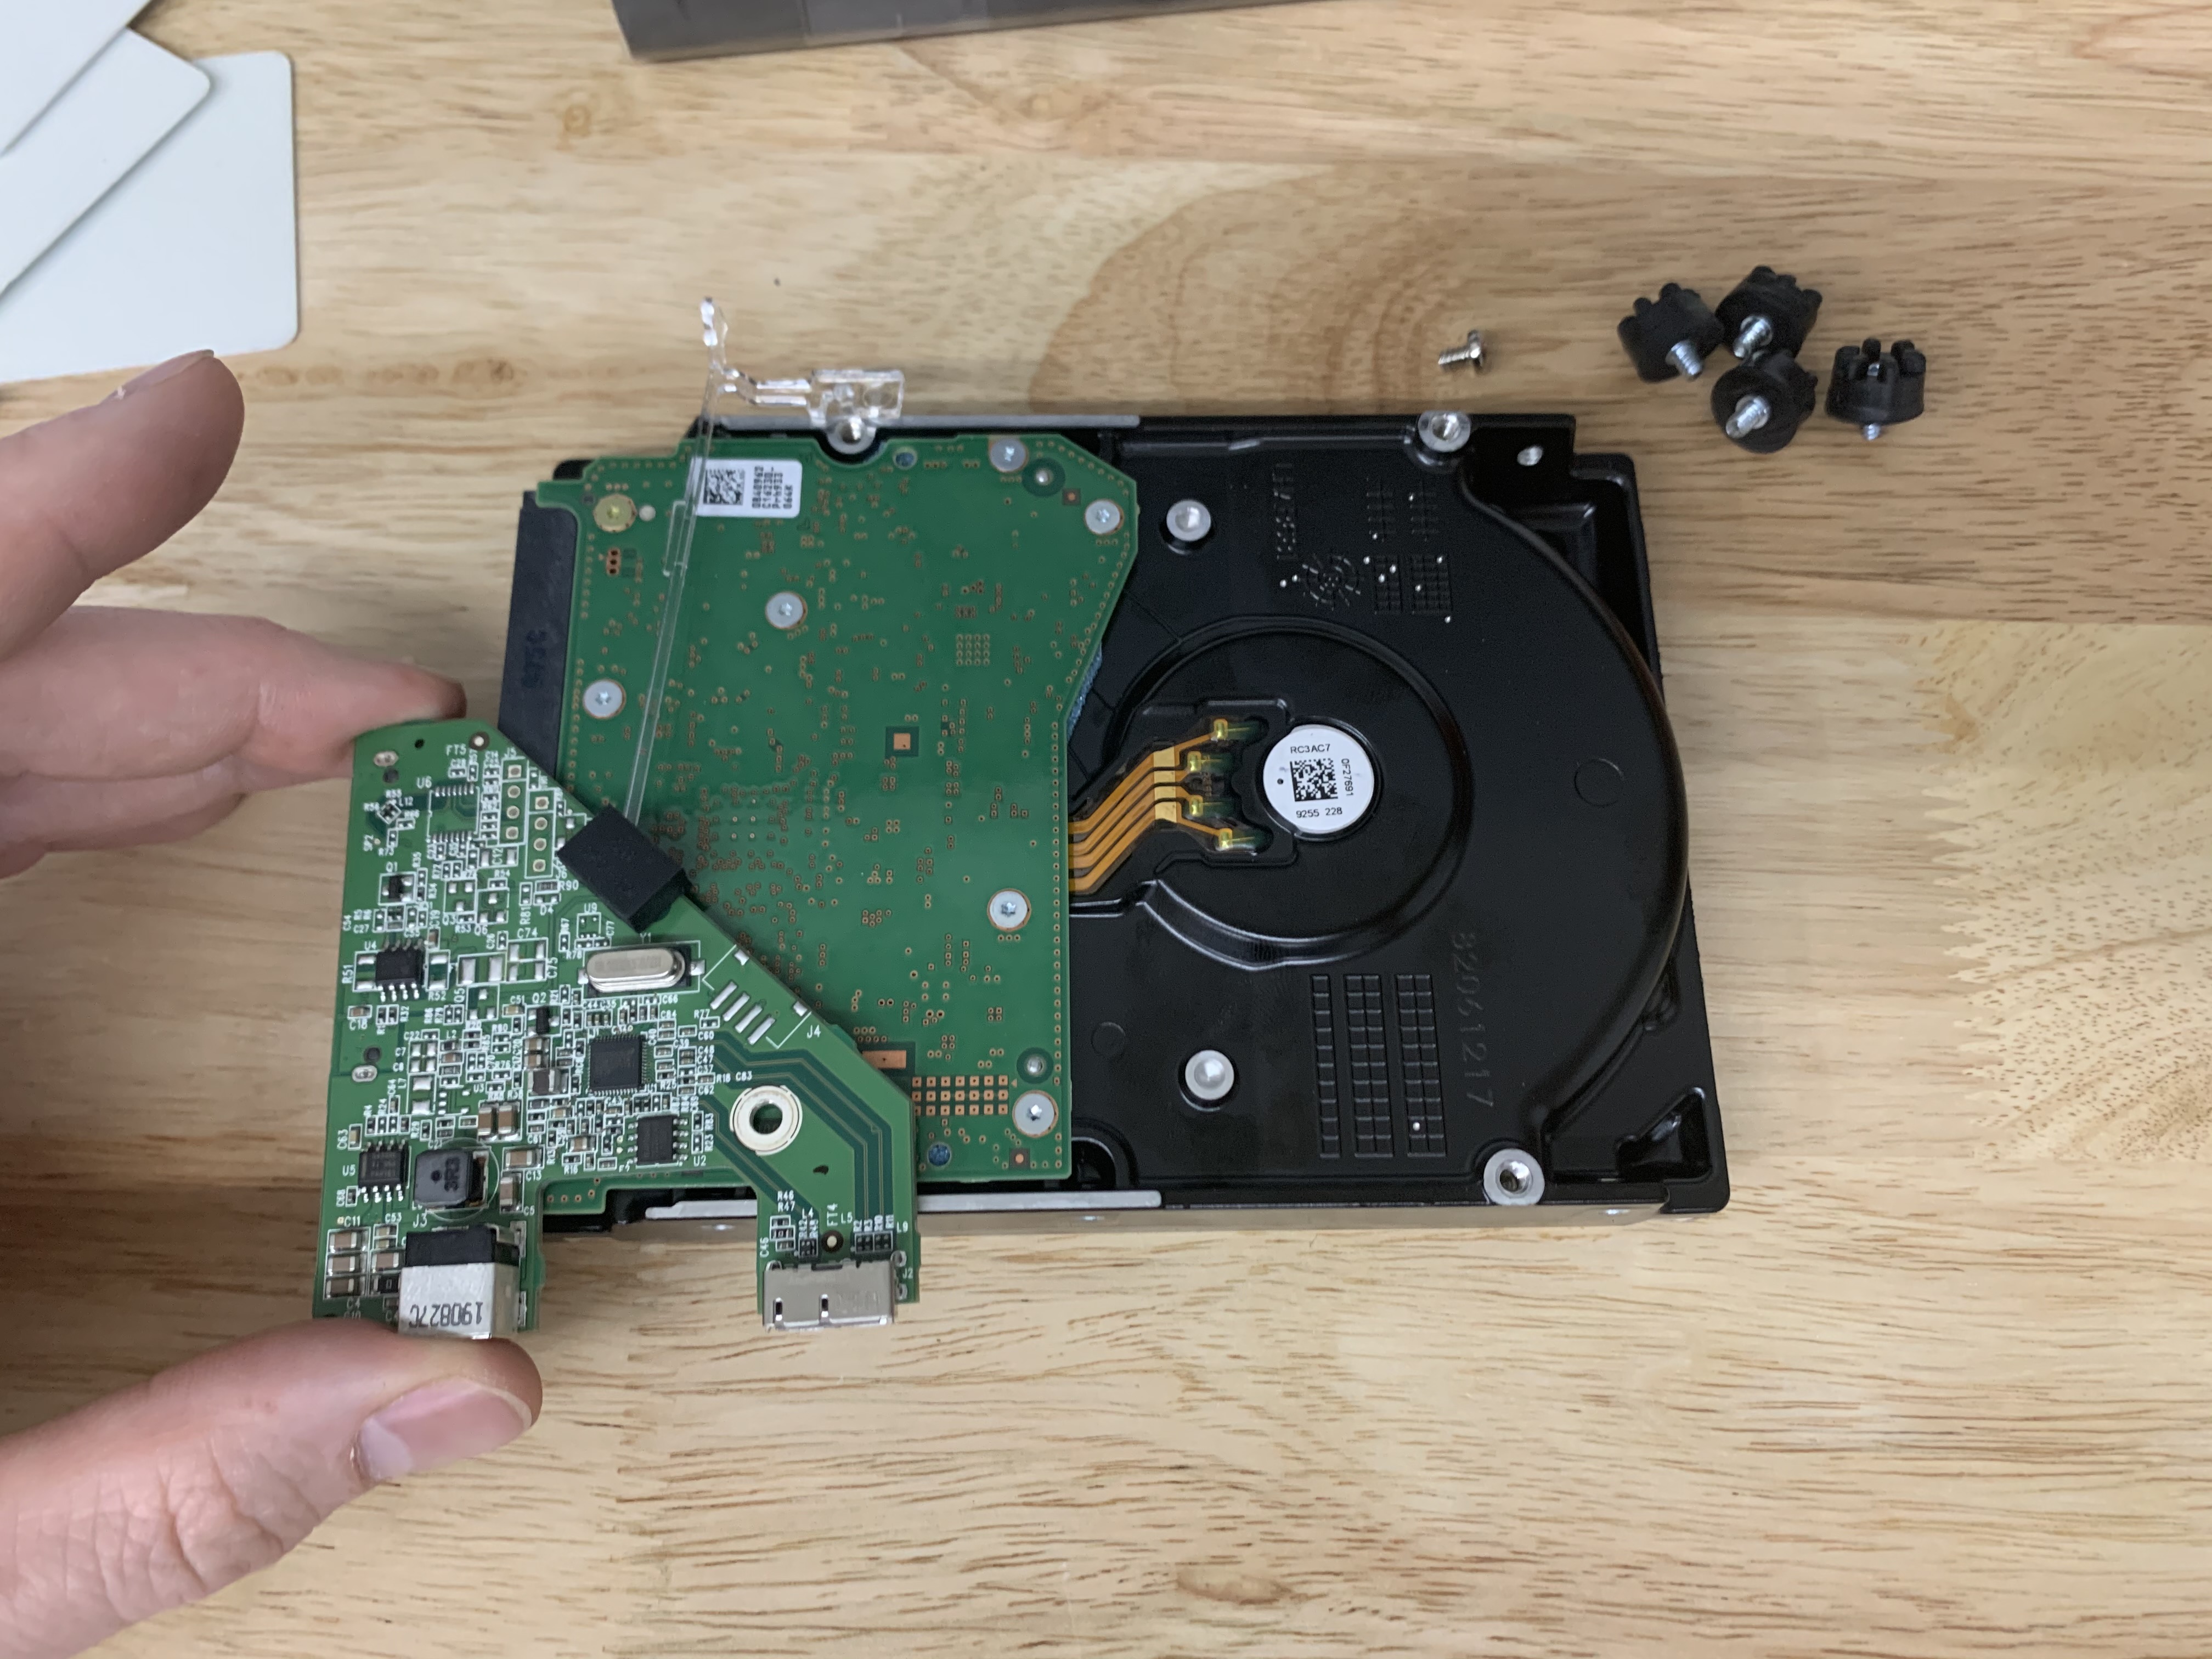 You can now remove the board.
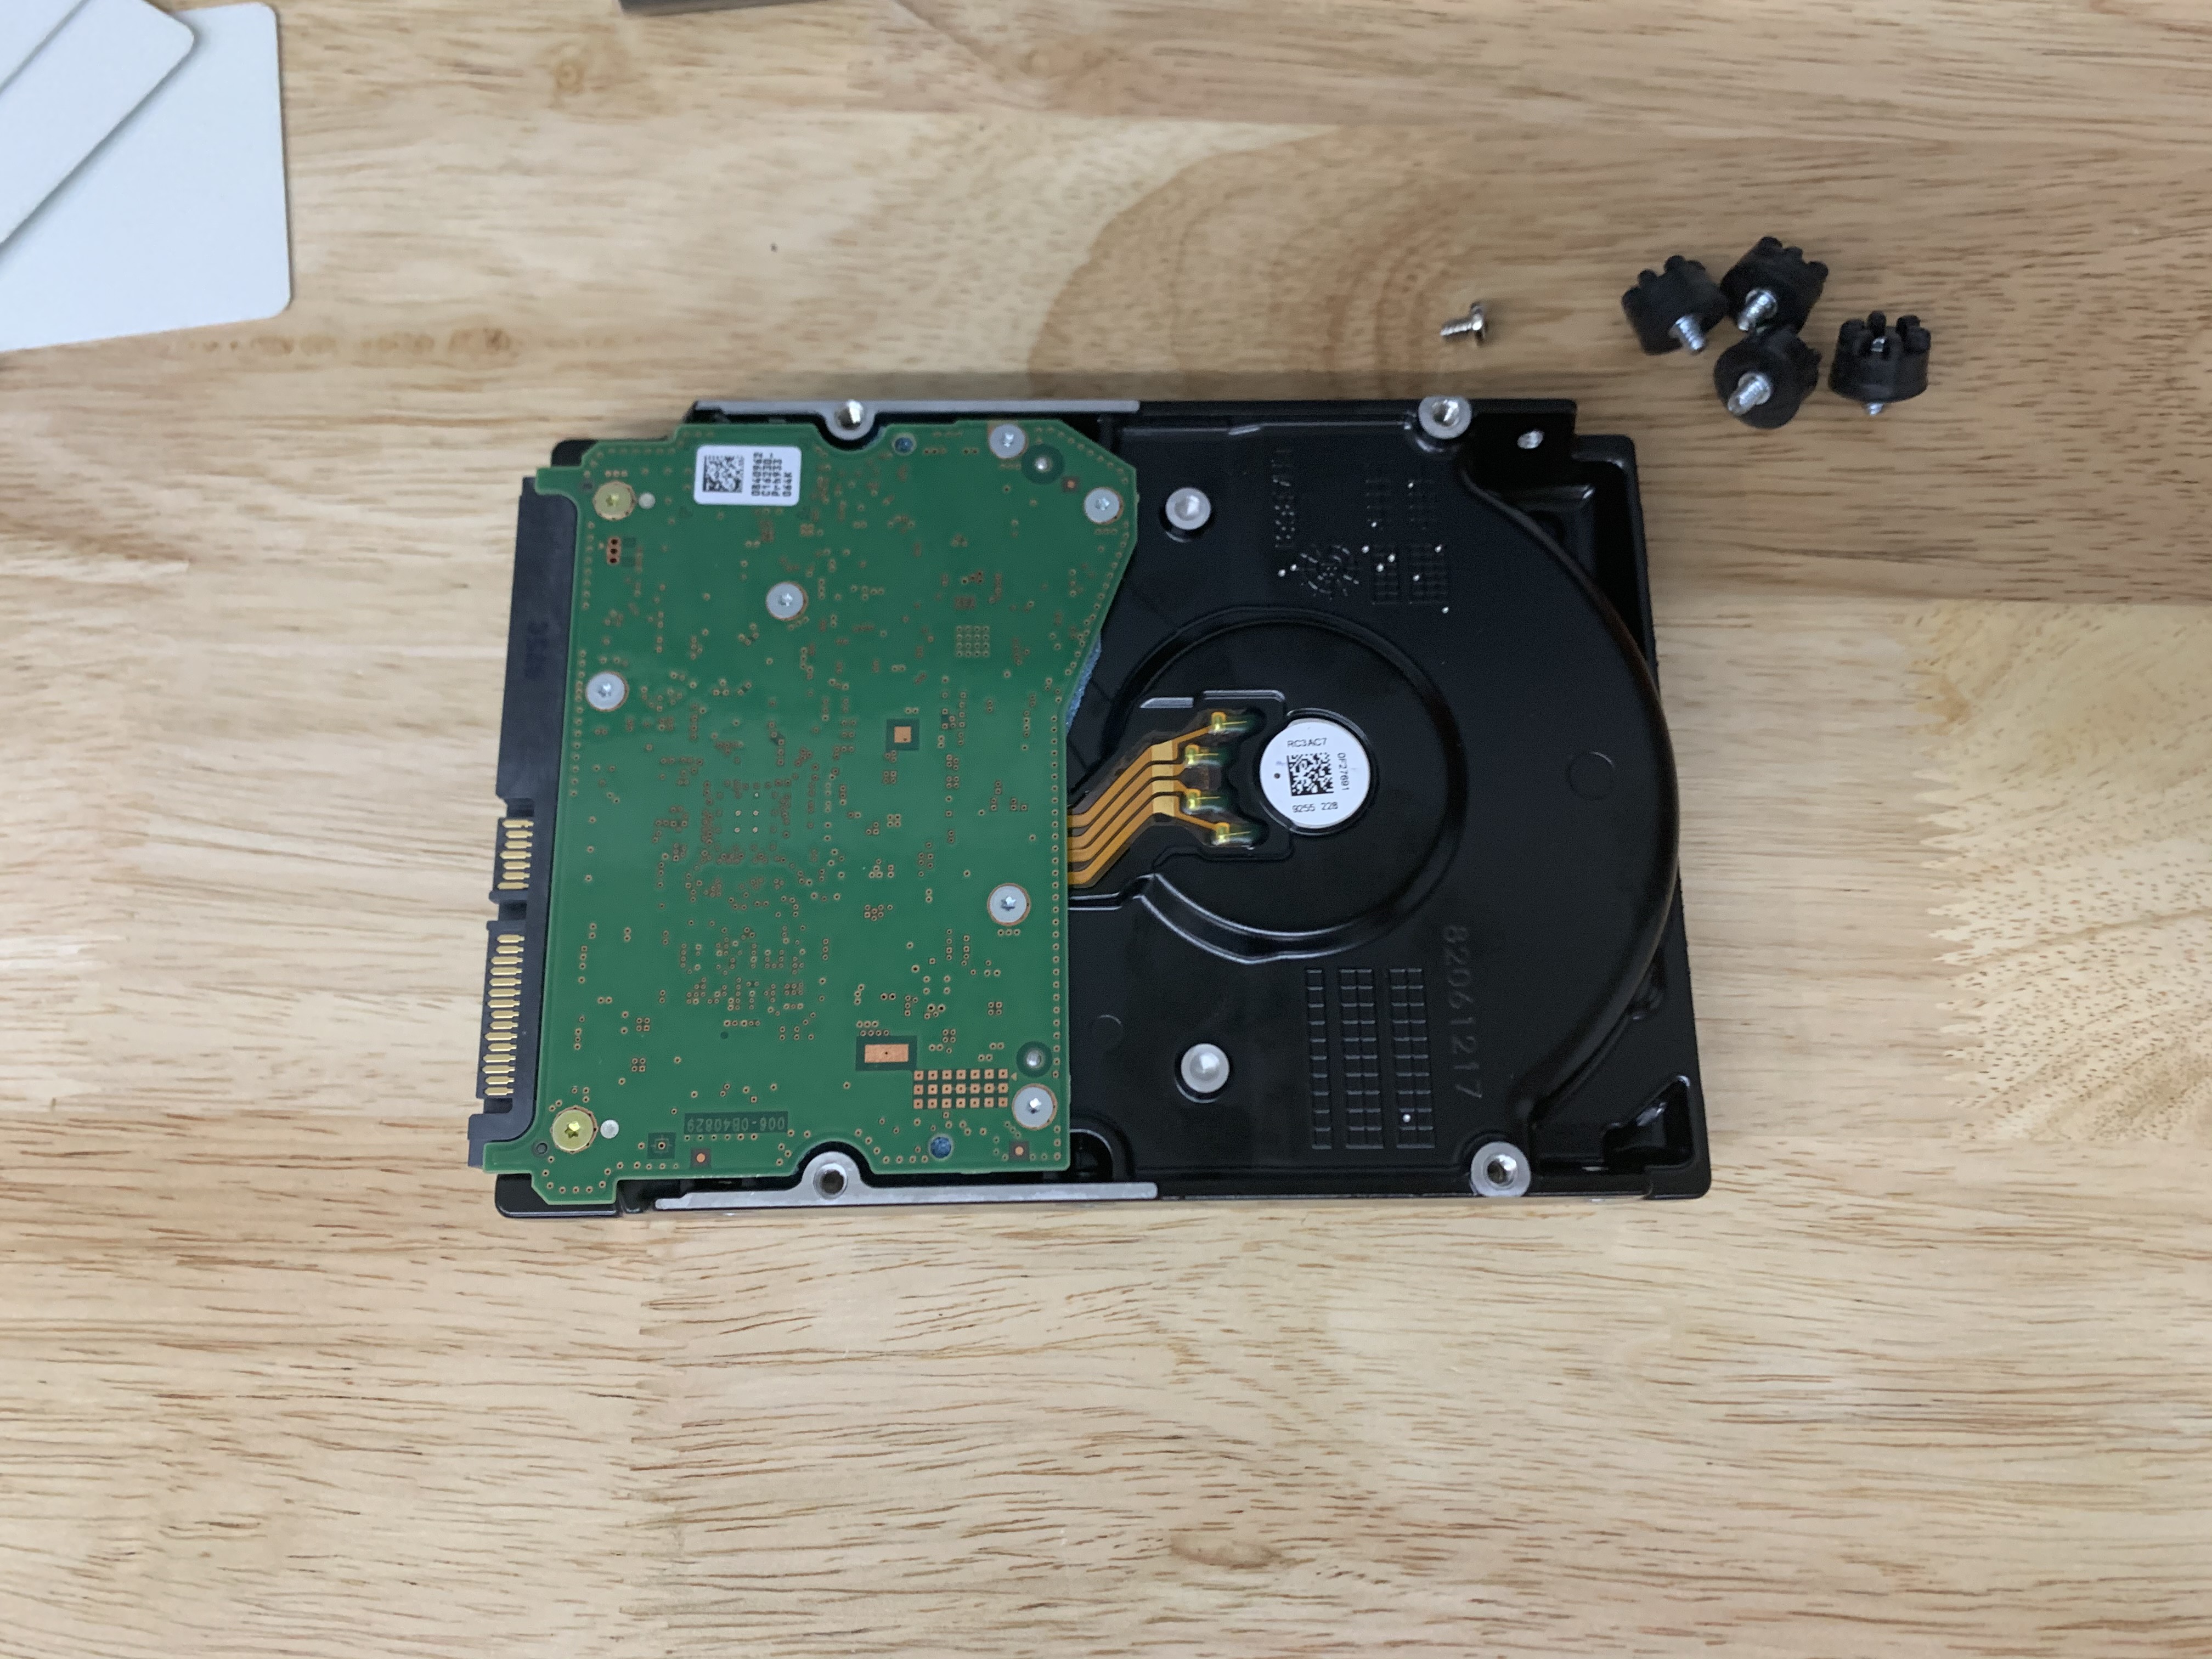 That’s it. Now you can install your drive into your NAS or whatever it is you use for data hoarding!
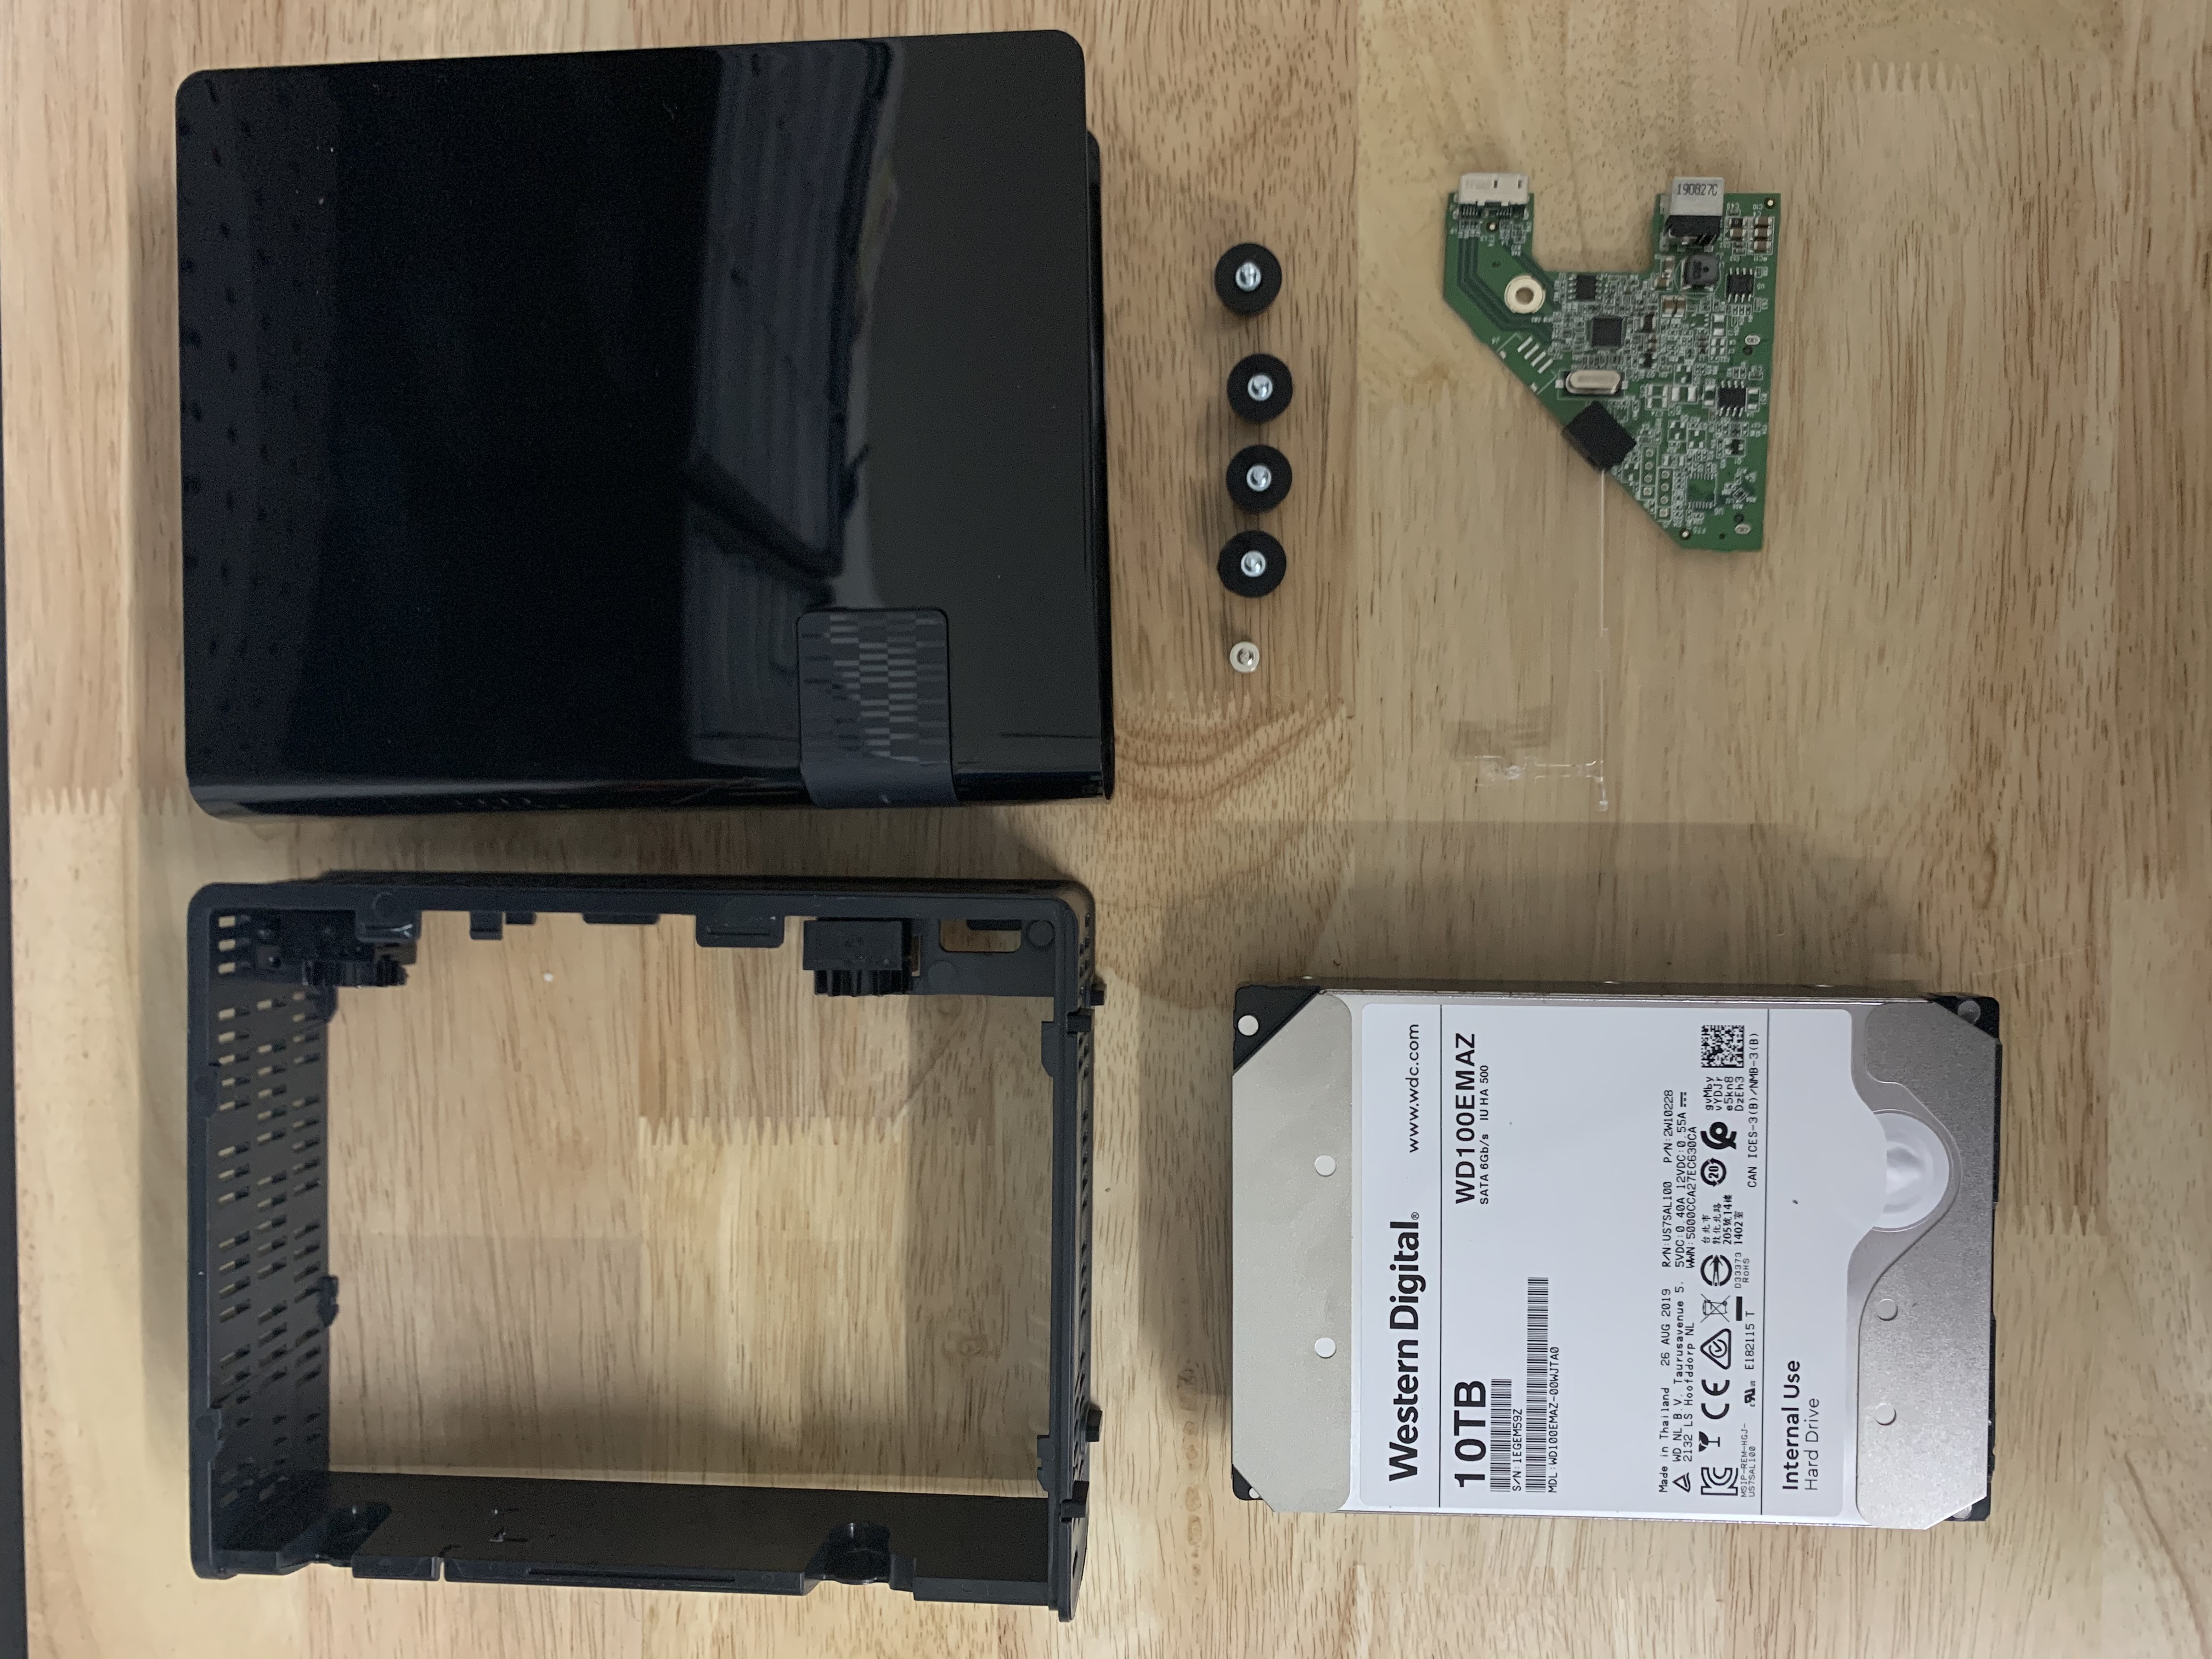 This is everything after being taken apart. If you did it right, you should be able to reassemble if you needed to for some reason.
Conclusion
Hopefully this helped you get your drive apart without breaking anything. It’s the cheapest reliable storage I’ve found. I don’t know for a fact that these WD White Label drives are actually WD RED drives but they’ve been humming along in my NAS 24⁄7 for over 6 months without issue. If possible, I will continue to go this route when I need storage for a NAS device.
Let me know if you have any questions on Twitter.