Connect To An L2TP VPN From Mac And iOS
How To Connect to an L2TP VPN Using MacOS or iOS
I will show you how to connect to an L2TP VPN using MacOS or iOS.
Checkout this post on how to setup an L2TP VPN if you don’t already have an L2TP VPN setup..
The process is very similar for all operating systems. You should only need the following information for Mac, iOS, Linux, Android and Windows
| IP where USG is located | Get your IP from this site |
| Username | tynick |
| Password | F$*bhjd66682 |
| Pre-Shared Key | P7HV@e78B&eT |
Configuring L2TP Client On iOS
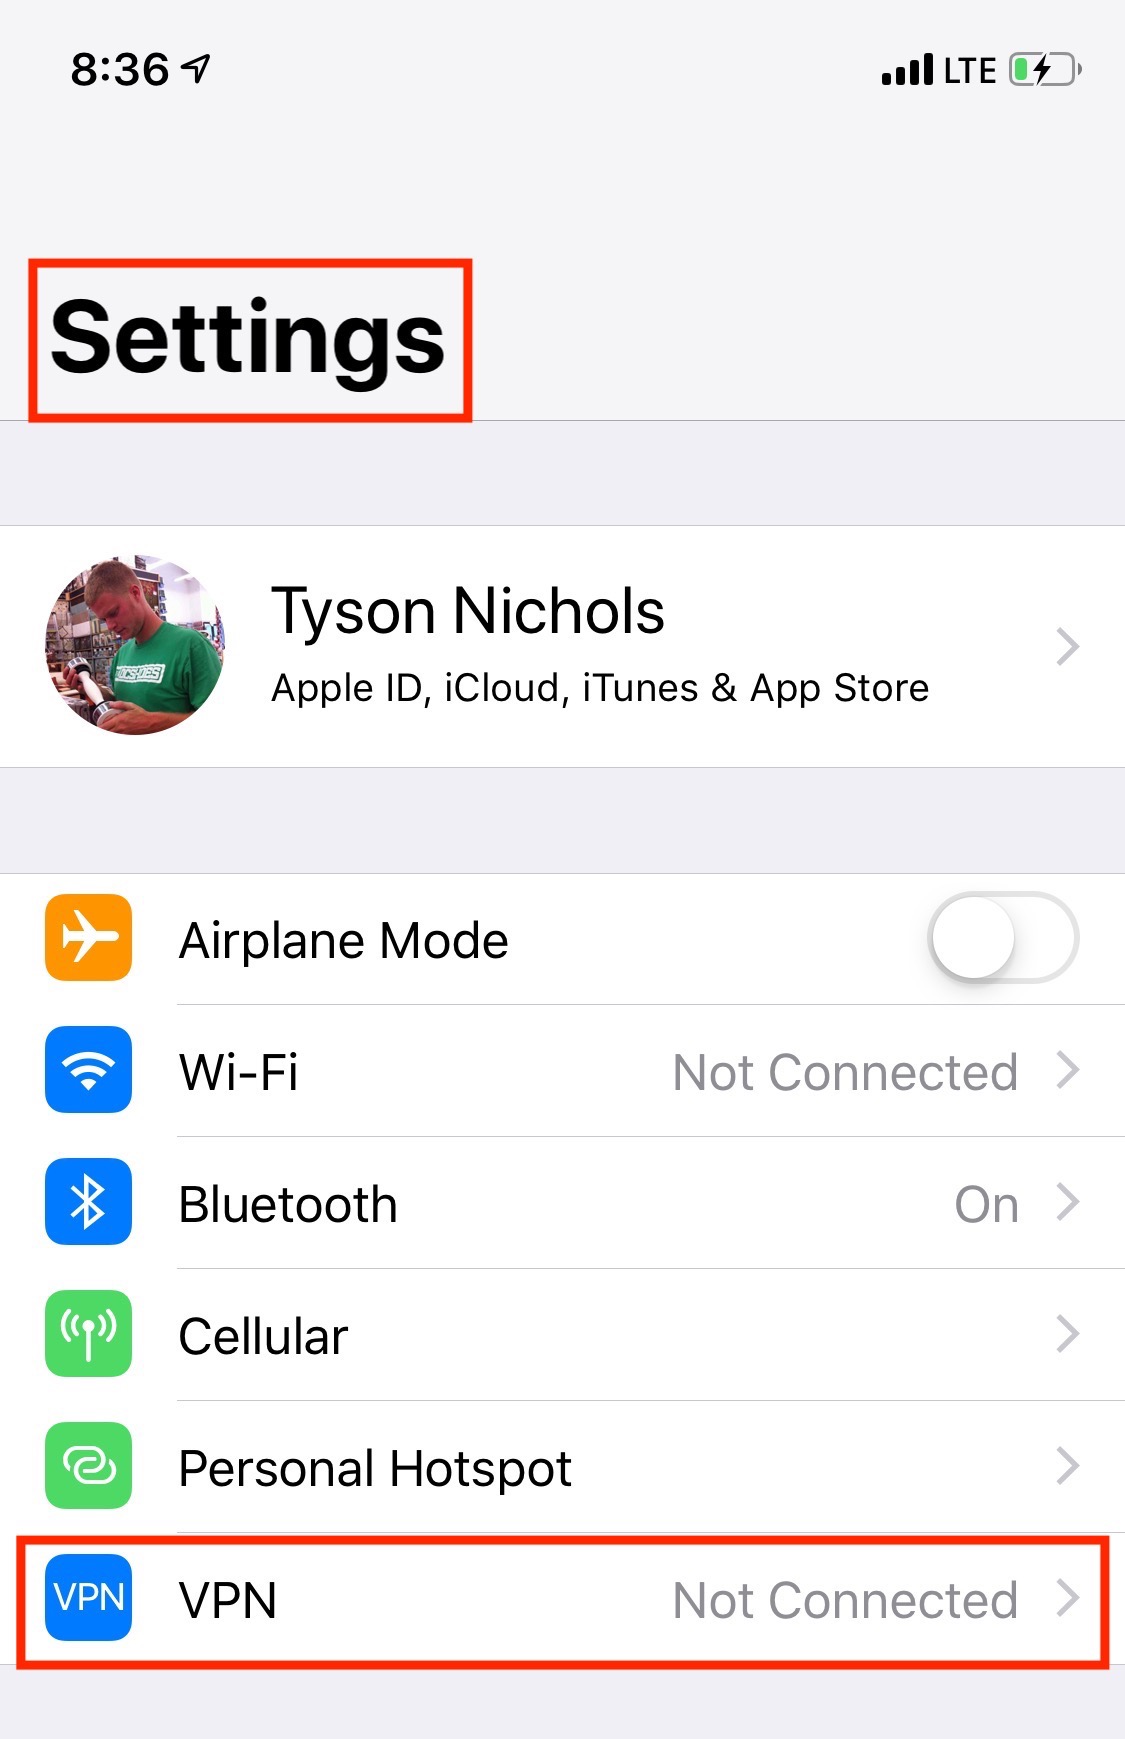
Start out by going to Settings on iOS and then select VPN.
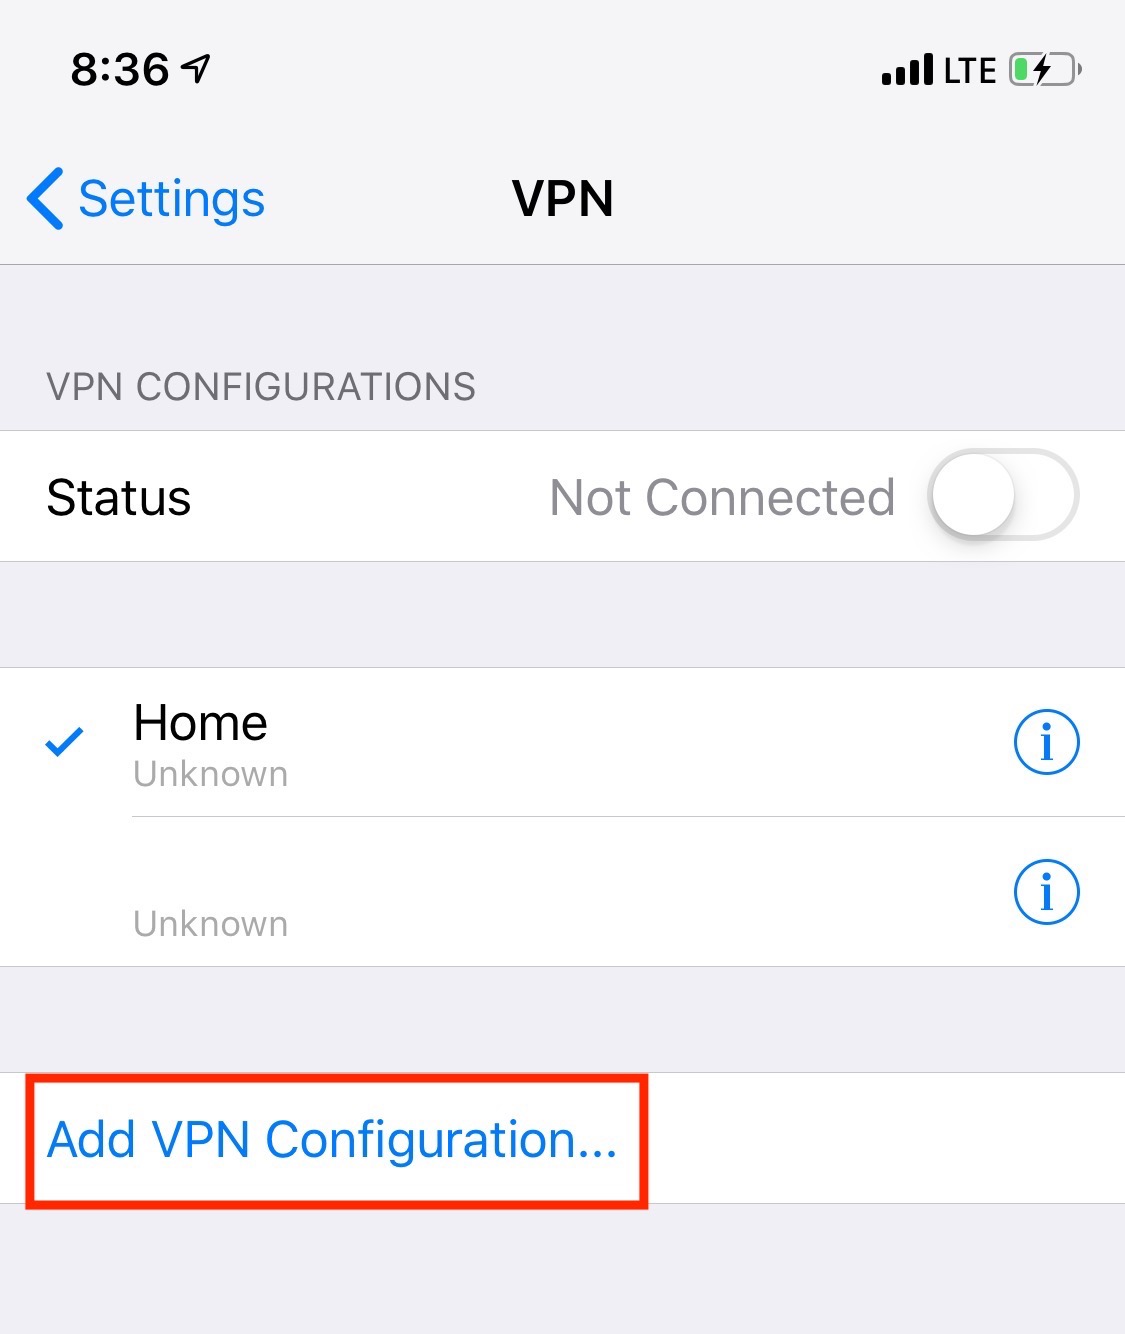
Select Add VPN Configuration...
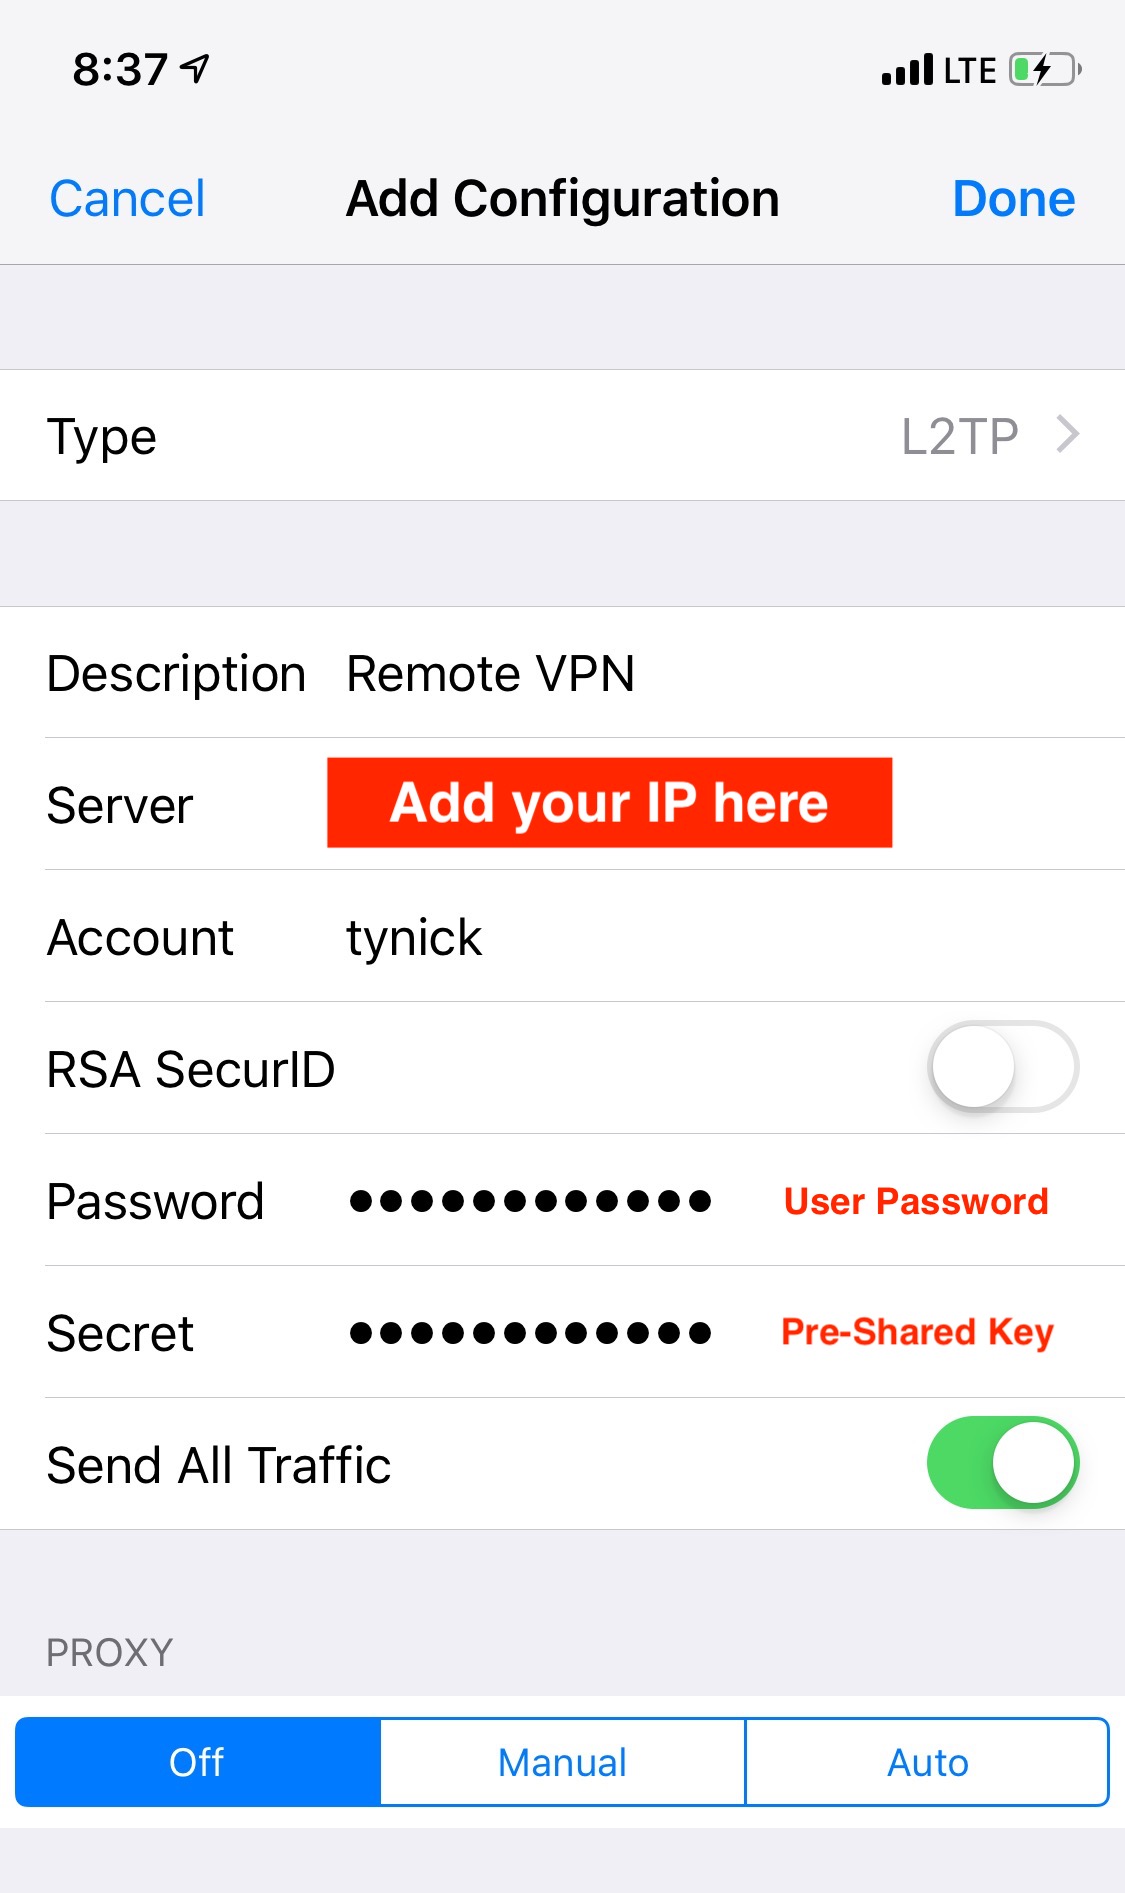
Enter your information as follows.
| Type | L2TP |
| Description | Remote VPN |
| Server | Get your IP from this site |
| Account | tynick |
| RSA SecurID | Leave Unchecked |
| Password | F$*bhjd66682 |
| Secret | P7HV@e78B&eT |
| Send All Traffic | Check this only if you want all traffic to be routed through the VPN. |
| Proxy | Off |
Select Done when complete.
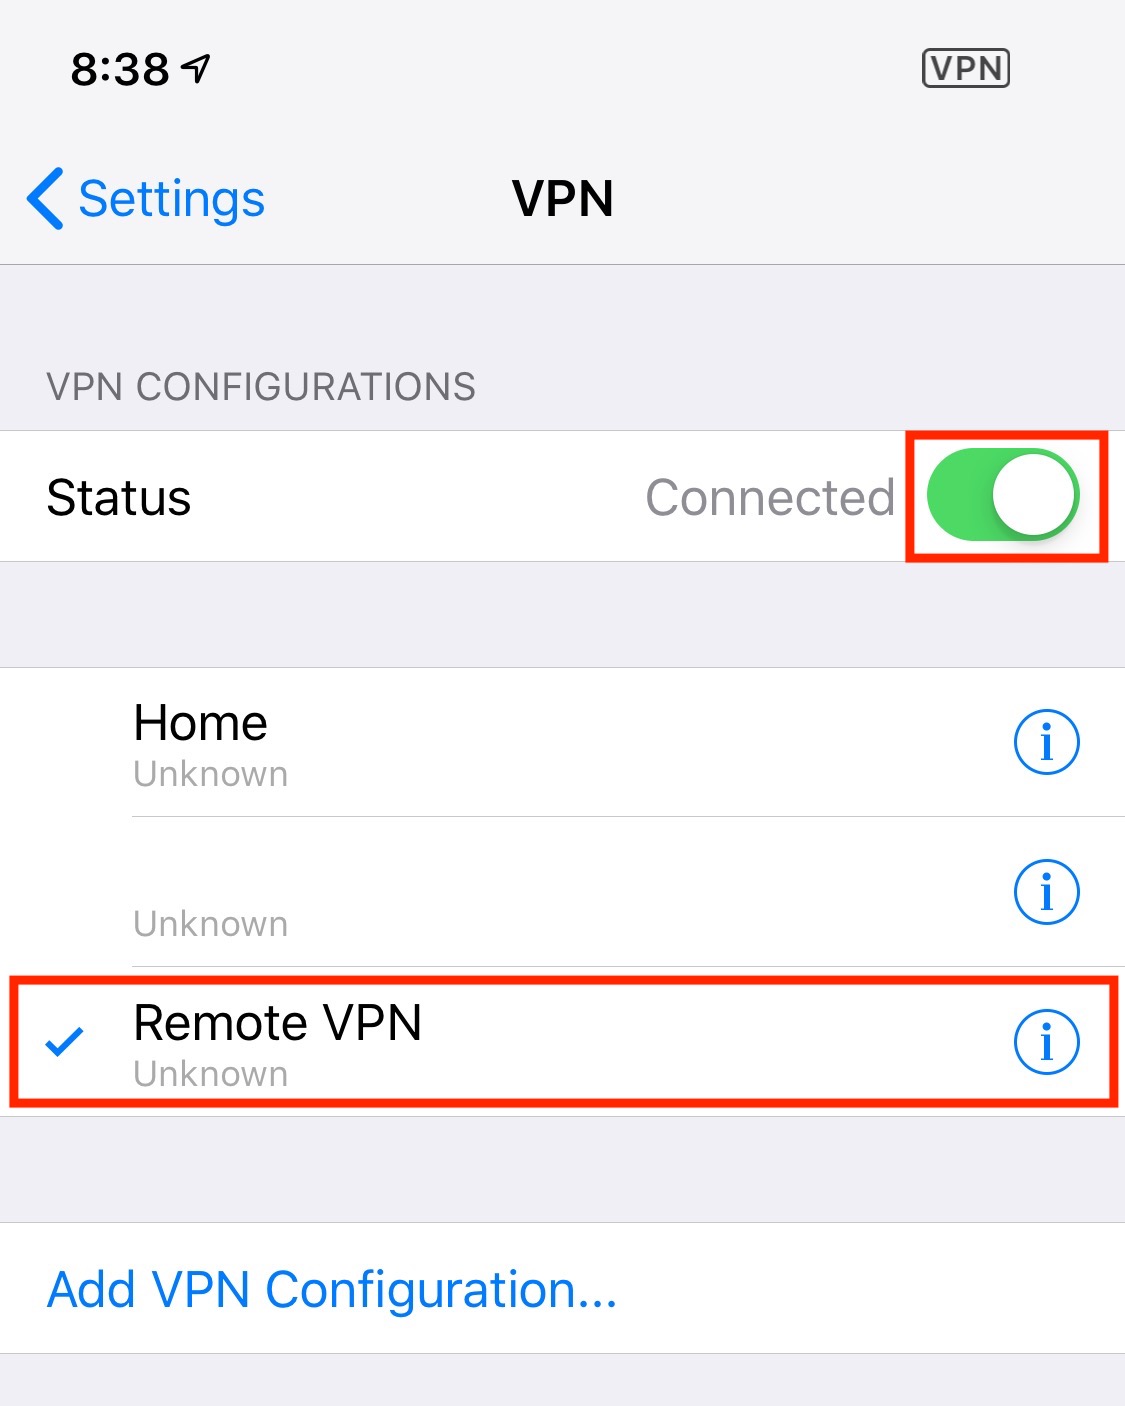
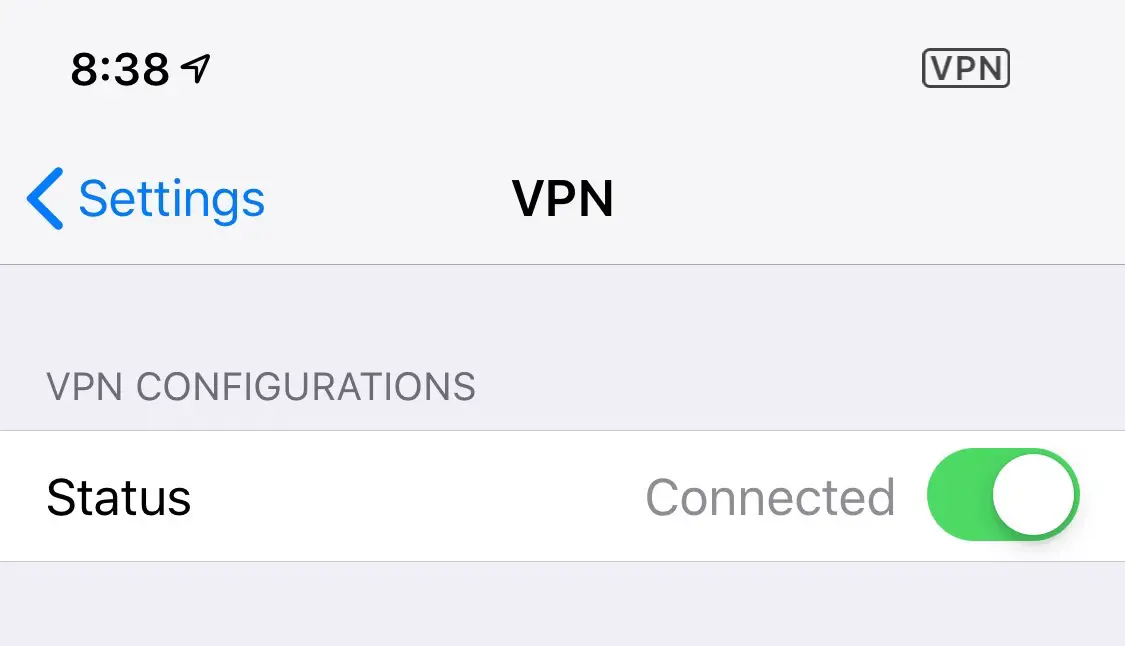
Select Remote VPN or whatever you named it and then turn the Status switch to the on position.
Configuring L2TP Client On MacOS
Start by opening System Preferences in MacOS.
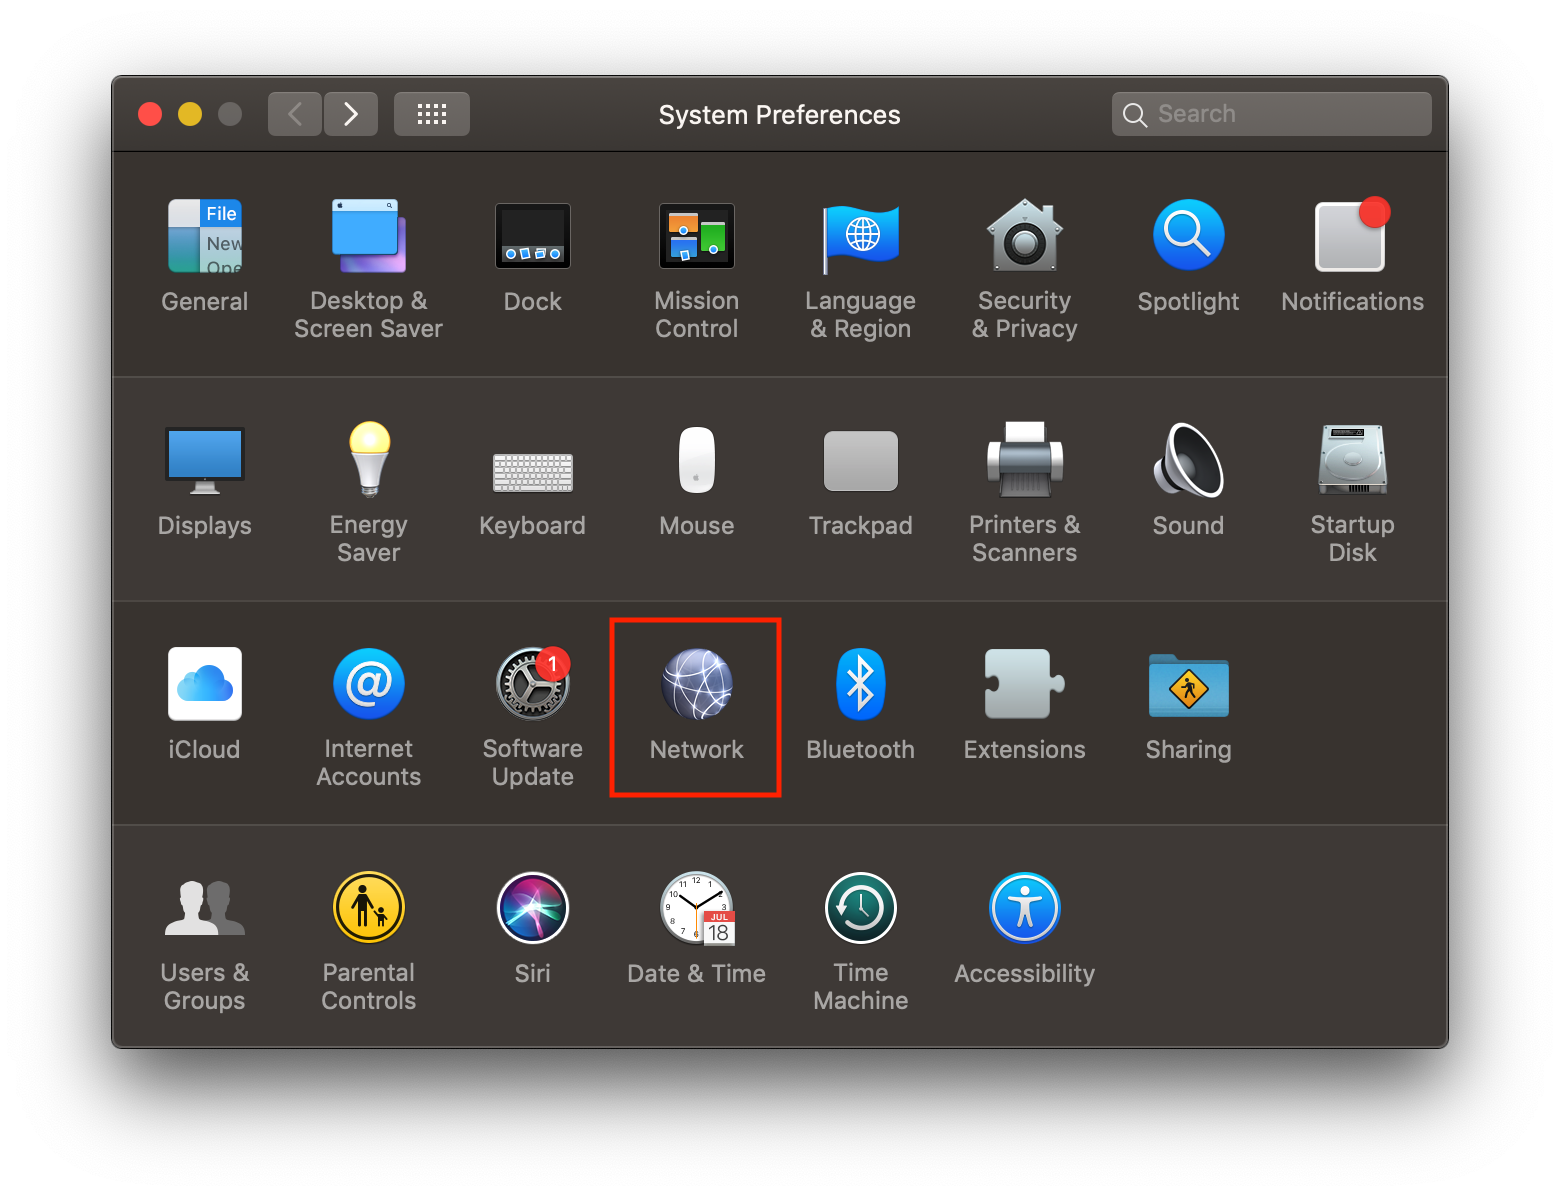
Select Network from the System Preferences menu.
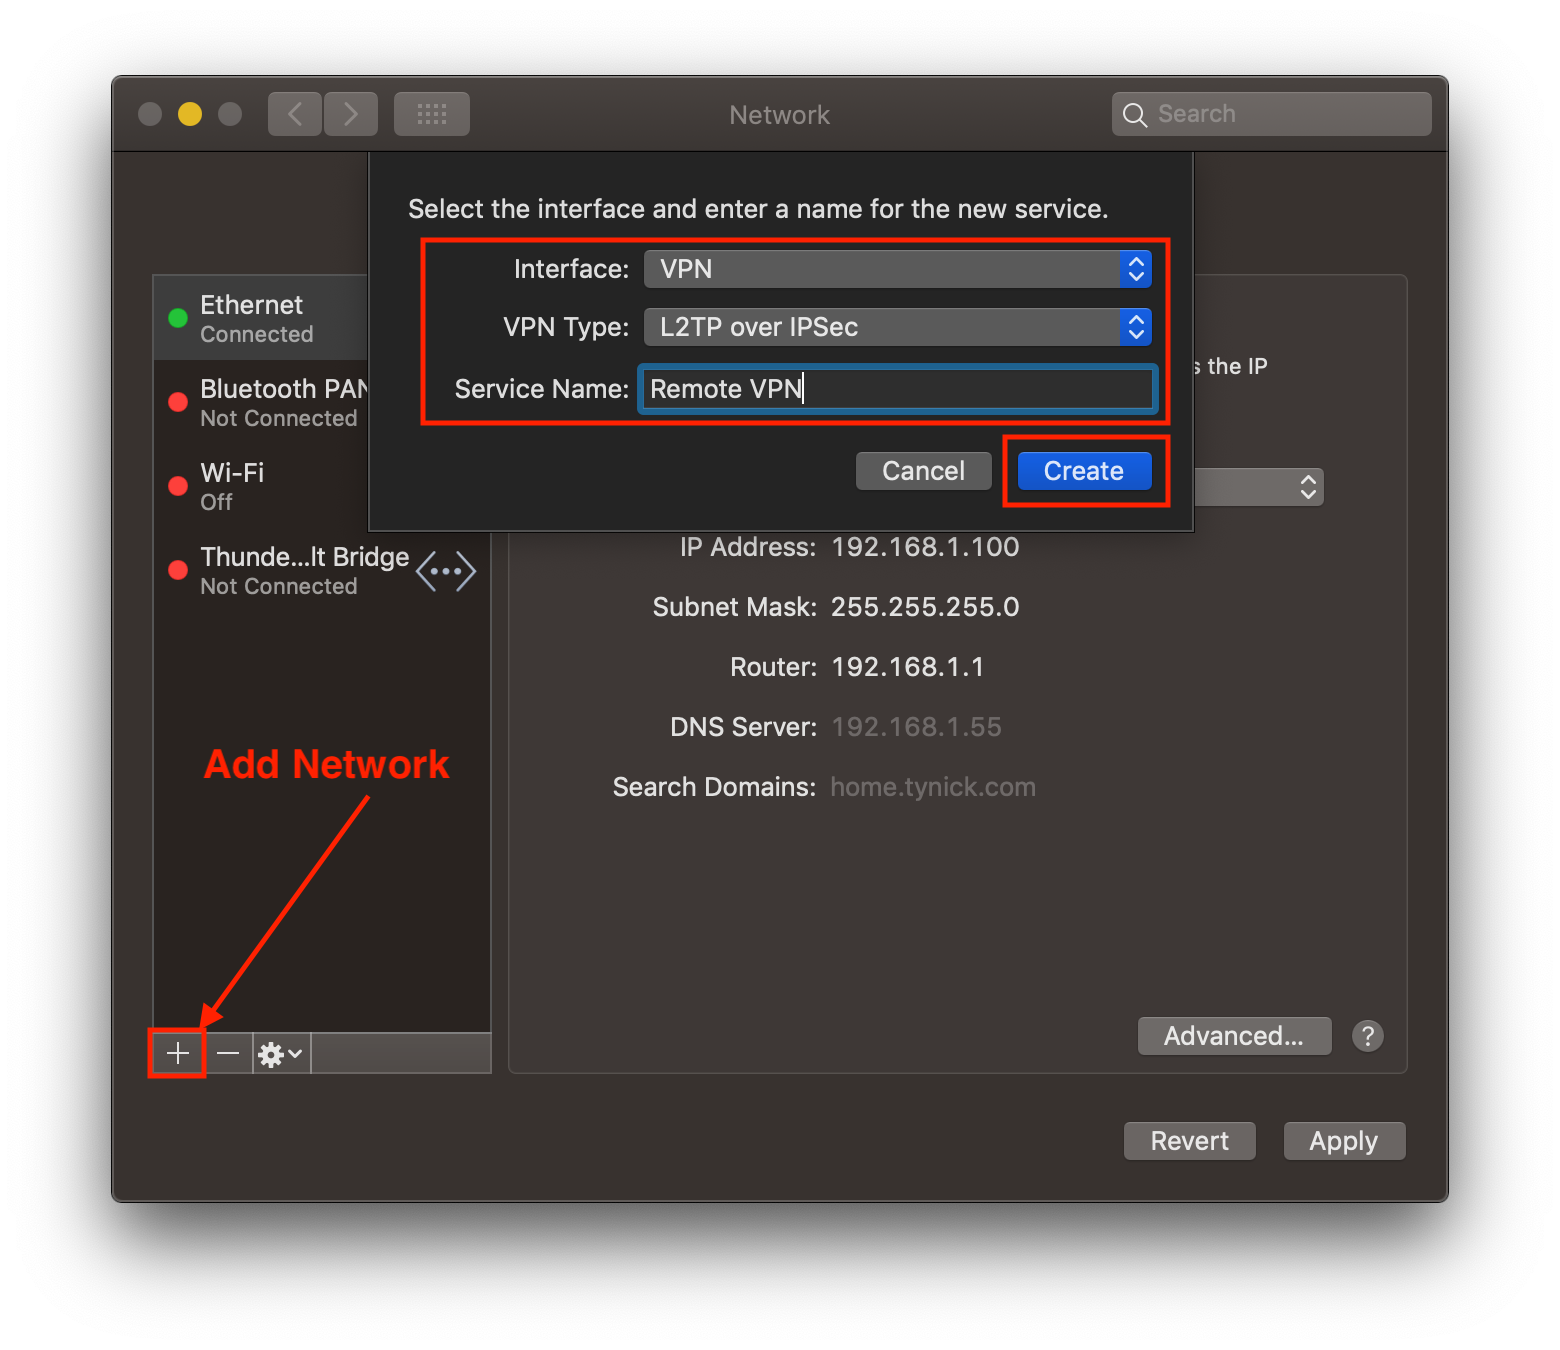
Click the + to add a network.
| Interface | VPN |
| VPN Type | L2TP over IPSec |
| Service Name | Remote VPN |
Select Create when you have the information entered.
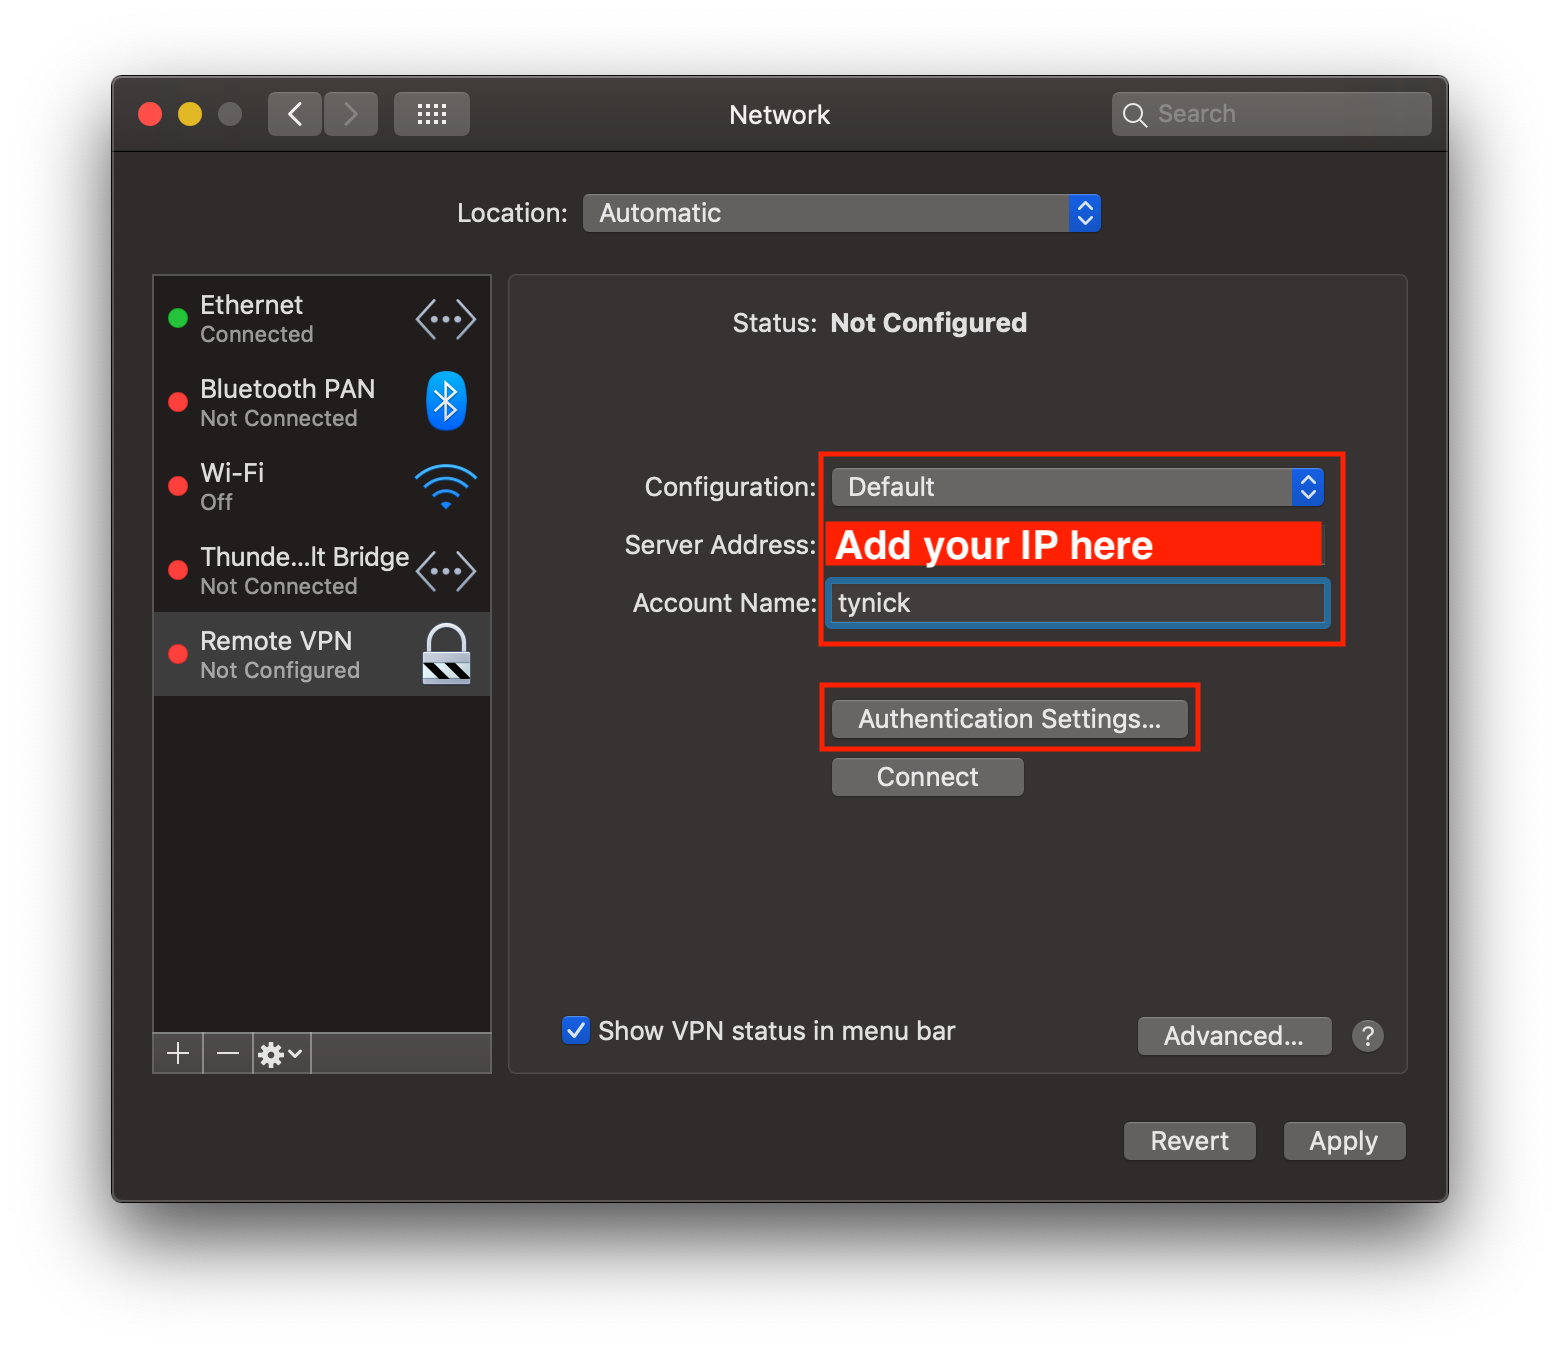
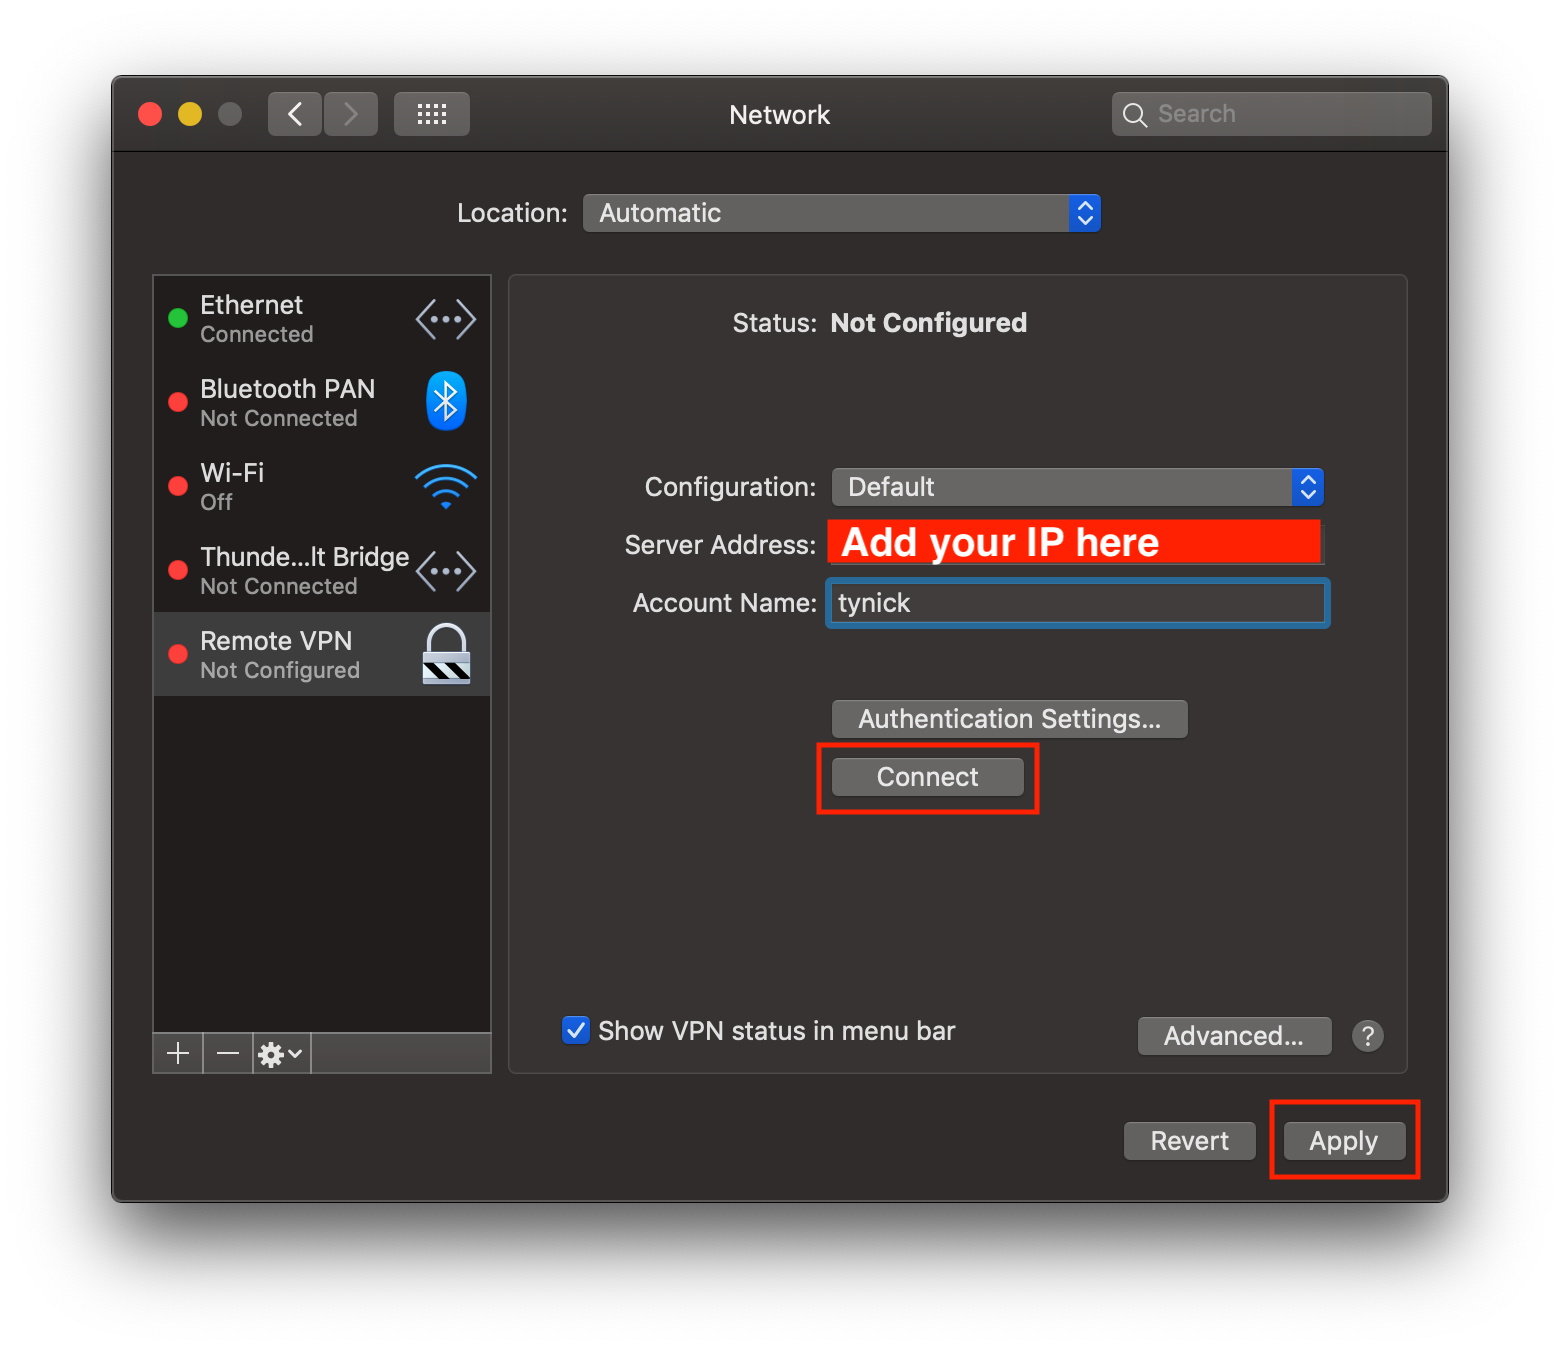
| Configuration | Default |
| Server Address | Get your IP from this site |
| Account Name | tynick |
Select Authentication Settings... when complete.
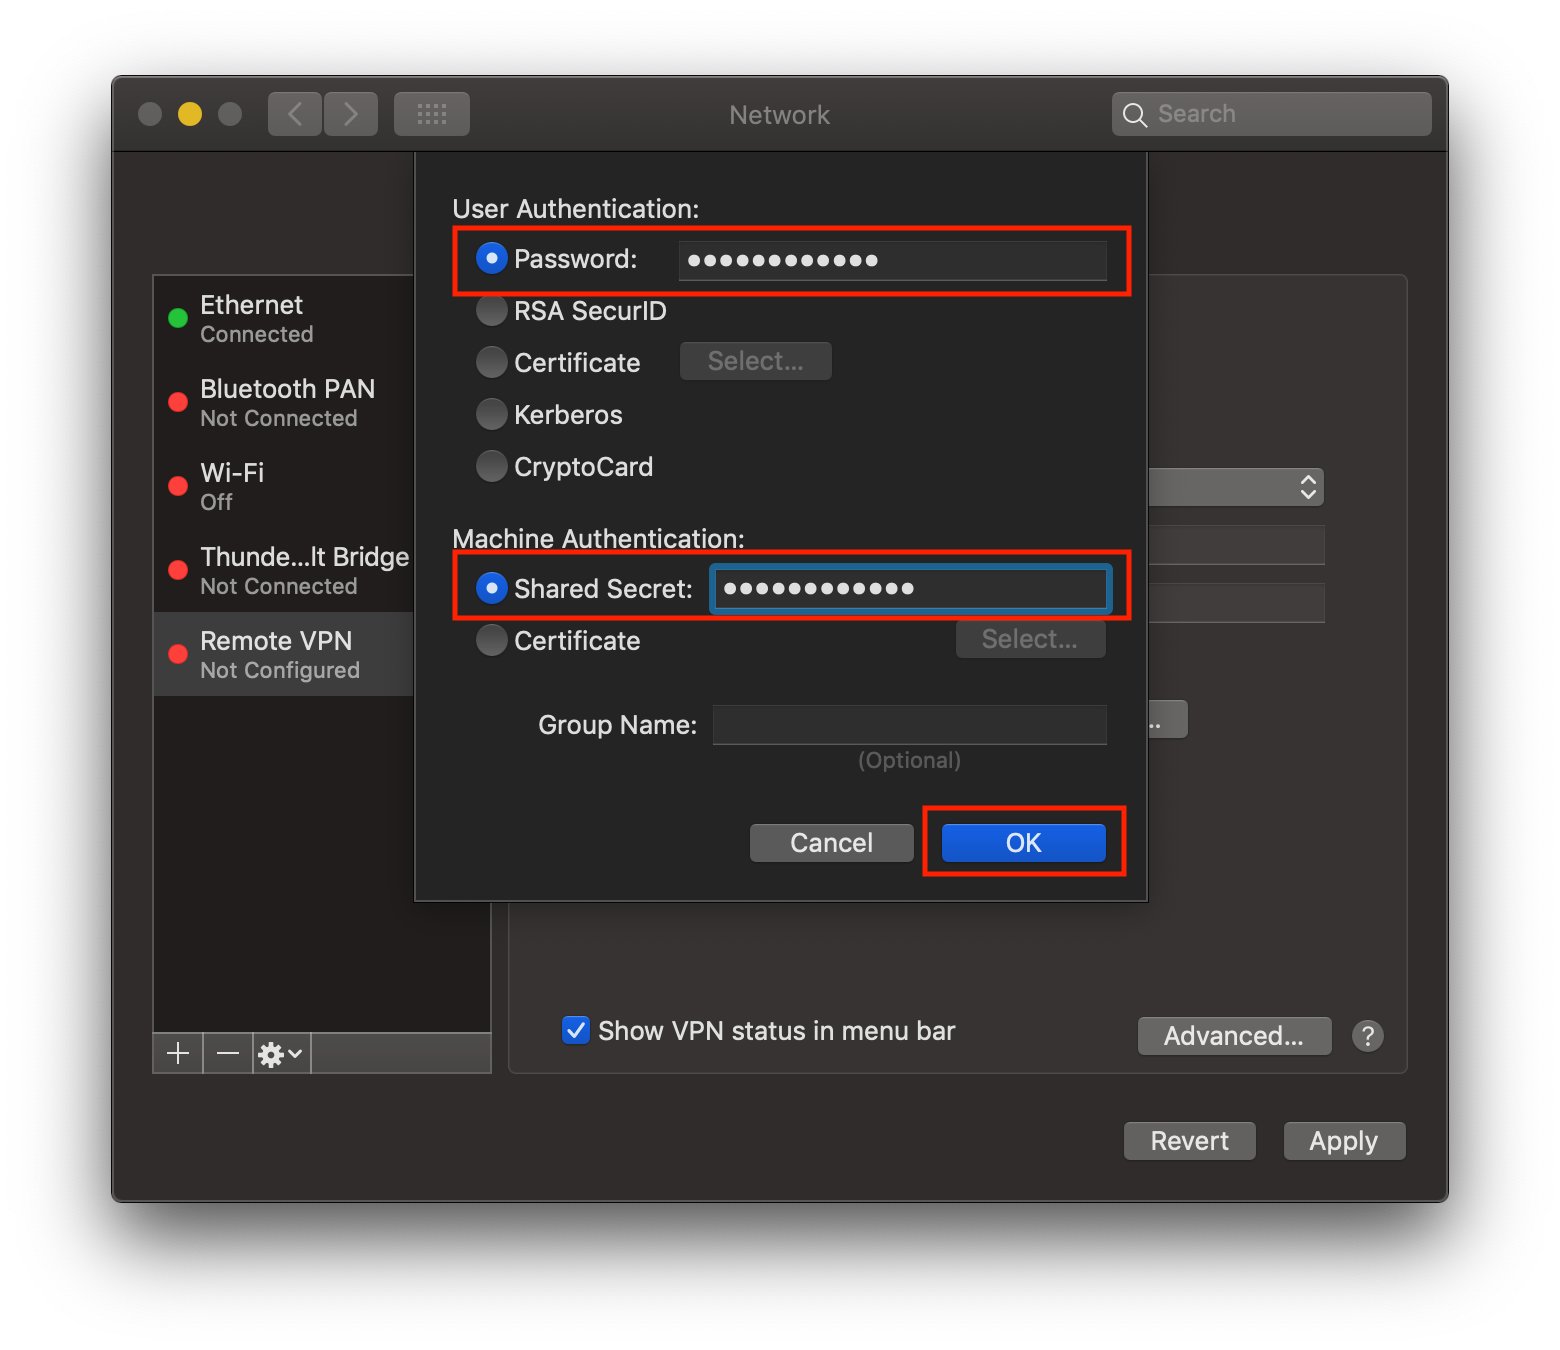
| Password | F$*bhjd66682 |
| Shared Secret | P7HV@e78B&eT |
Select OK when finished.
If you would like to send all traffic through this connection, that checkbox is under Advanced...
Select Apply and then Connect.
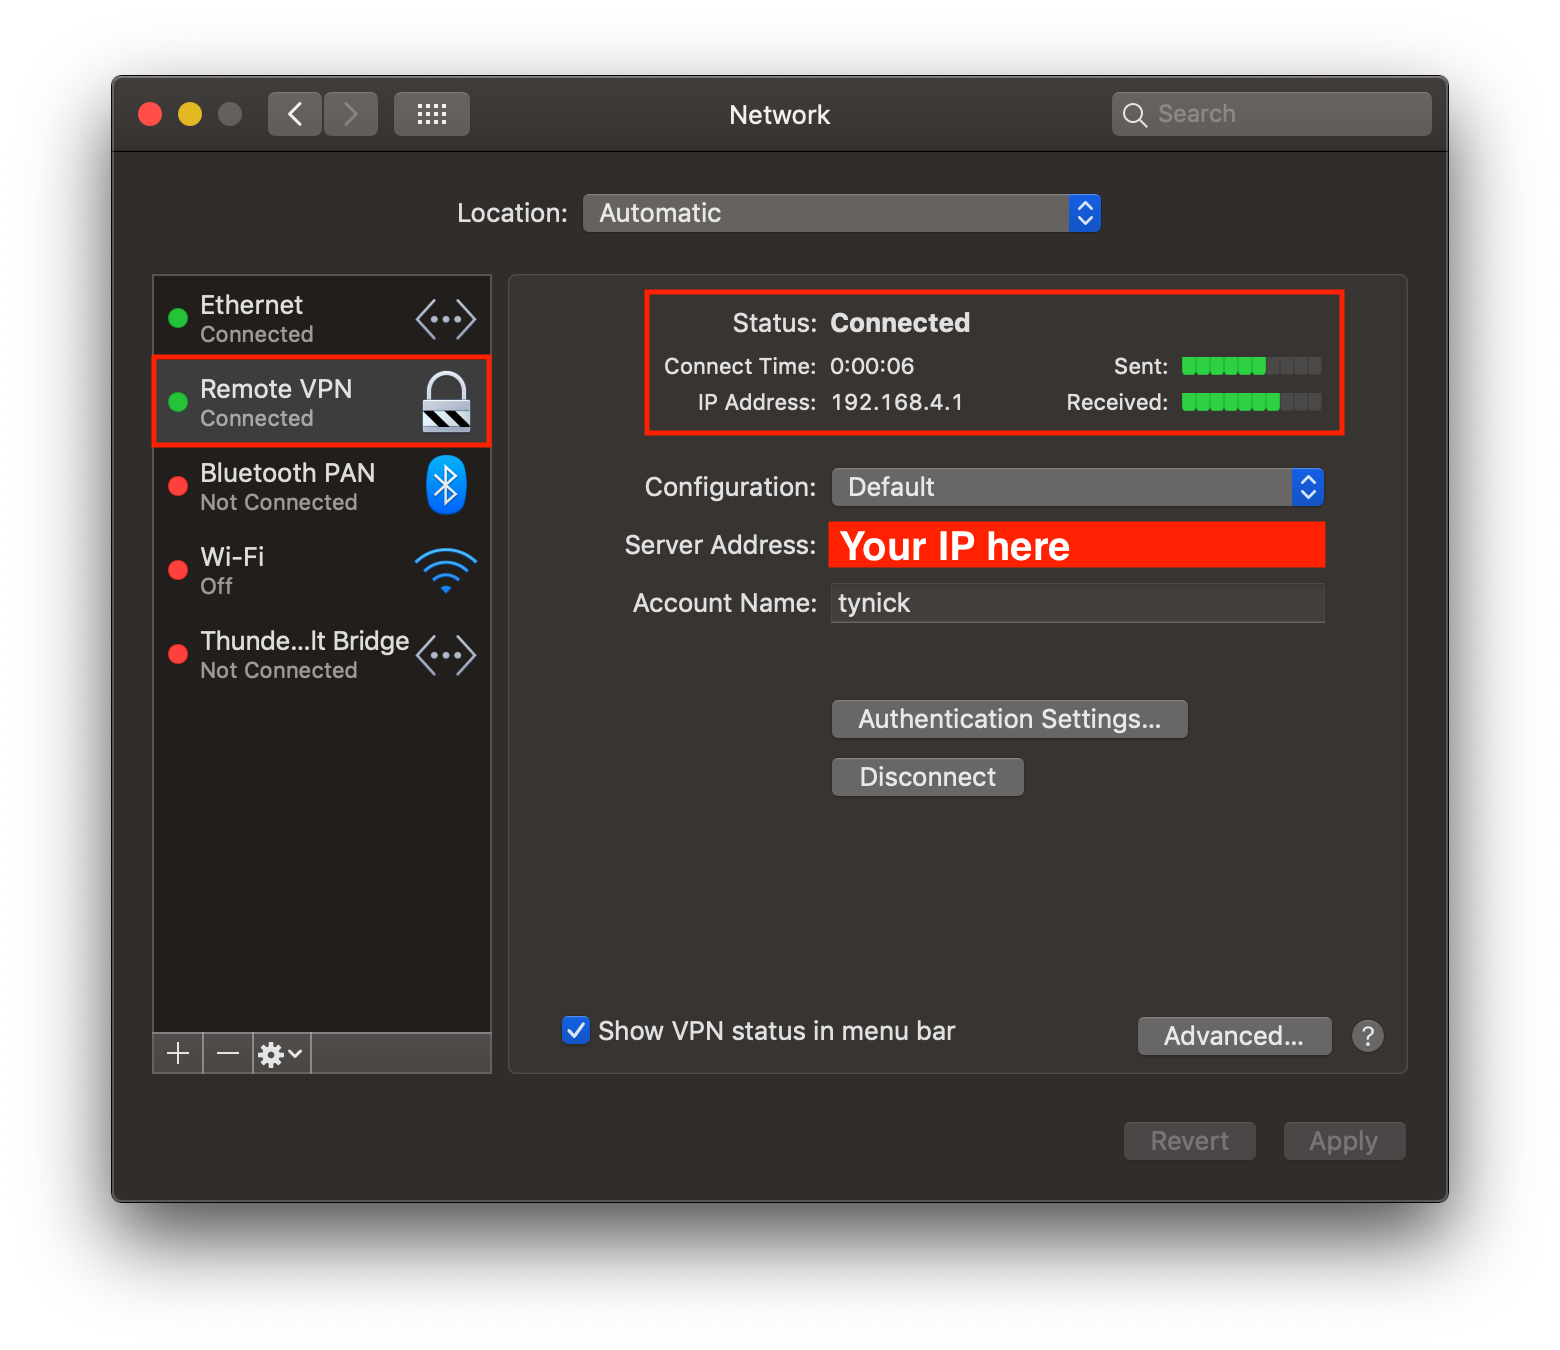
You should now be able to connect to the L2TP VPN.
Send me a message on Twitter if you have any questions.
Subscribe below and I’ll let you know when I post a new article.